-
Notifications
You must be signed in to change notification settings - Fork 0
Map Editor
For Windows users, there are three ways to get the map editor:
- Run the MapEdit.exe program included in the latest CorsixTH version.
- Download the latest pre-built win32 OpenGL game and MapEdit package, and run the included MapEdit.exe application.
- Download a source code version of CorsixTH, and compile MapEdit from source.
For users of other platforms, only the last option is available. To compile MapEdit, follow the HowToCompile page, noting that:
- WITH_OPENGL and BUILD_MAPEDITOR should be specified to CMake
- The very latest version of wxWidgets is required. This means at least wxWidgets 2.8 or 2.9.2.
- Left Mouse Button: Click or drag to paint tiles on to the map using the current brush.
- Right Mouse Button
- When left mouse button isn't pressed: Click to set the brush to the tile under the cursor.
- When left mouse button is pressed: Click to set the repeat interval for tile painting.
- Arrow keys: Move around the map while you are working on it at the Map Editor.
- 3rd Mouse Button: Drag to scroll map.
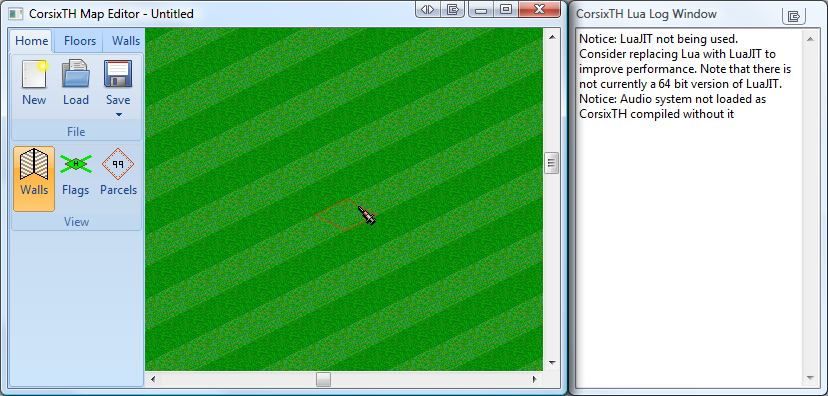
When you launch the map editor, you should initially see something like the following:
As long as things work, the log window on the right can be ignored, and will hence not be included in any more screenshots. The main pane of the map editor shows the map which you're working on. This map can be scrolled by holding down the middle/3rd mouse button and dragging, or by using the scrollbars adjacent to the map pane. To the left of the map pane is the ribbon, which has three tabs - "Home", "Floors", and "Walls".
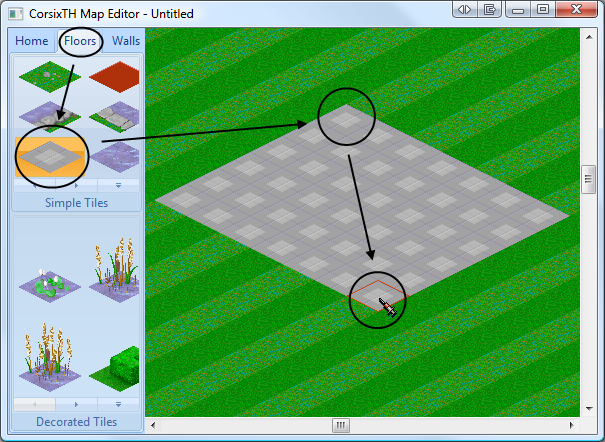
To begin making a map, switch to the "Floors" tab, click on one of the tiles in the simple floors gallery, and then drag out a rectangle in the map pane (using the left mouse button). The result should be something along the lines of:
All floors are edited in this way; be on the floors tab of the ribbon, select a tile from a floor gallery, and then drag a rectangle in the map pane.
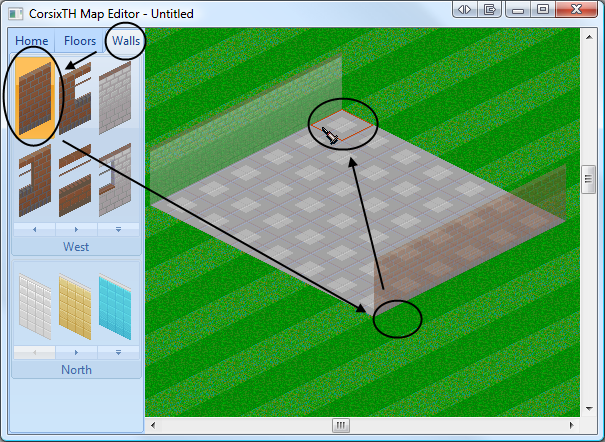
Walls are painted in a similar way to floors: switch to the "Walls" tab, pick a wall tile from one of the galleries, and then paint a rectangle. Slightly differently to floors, only two edges of the rectangle will be painted for walls, rather than everything in the rectangle. Also, for rectangles with width / height larger than 1 tile, one edge will get an inside wall, while the other edge will get the matching outside wall.
To delete walls, floor must be painted over the walls. Whenever a rectangle of floor is painted, all walls inside the rectangle (and not on the edge of the rectangle) are deleted.
If you don't want to delete a wall, but do want to be able to see the tiles behind it, then toggle the "Walls" button on the "View" panel of the "Home" tab. This will toggle walls between opaque and transparent, thus (when transparent) letting you see through walls. This transparent walls feature is currently available in the main game through the debug menu, and may in future be moved to a more accessible menu, so you should toggle this mode occasionally in the map editor to ensure that your map still looks good with transparent walls.
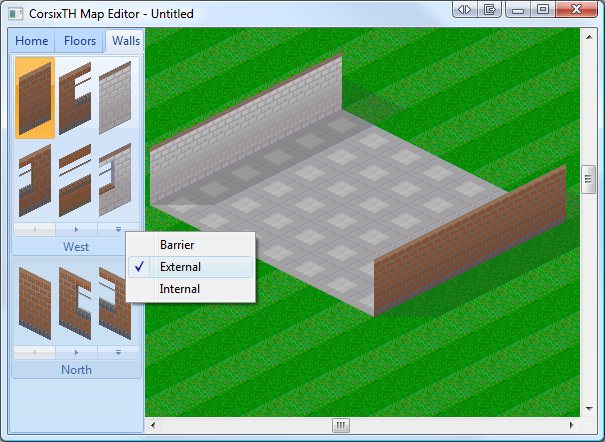
In typical maps, most of the available wall tiles won't be used. Hence it makes sense to only put in the tile gallery the walls which are typically used. To do this, left click on the extension button of the gallery (which is just to the right of the left and right arrow buttons) and un-tick the "Internal" and "Barrier" groups. This leaves just the "External" group, which contains the typically used wall tiles ("Internal" walls are used within a game, but rarely placed on a map before a game, while "Barrier" walls are created and destroyed automatically during a game). The following screenshot shows this:
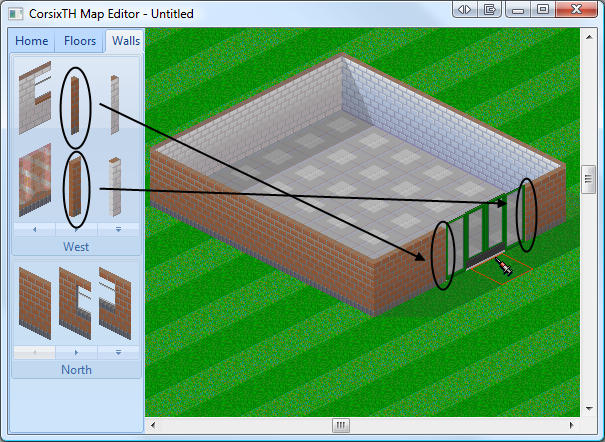
No hospital looks complete without a set of entrance doors. Slightly counter-intuitively, entrance doors cannot be placed directly. Instead, they are automatically created in all appropriate locations. An "appropriate location" is a wall segment, three tiles long, with a correctly-orientated piece of doorframe wall at the ends of the segment, and no wall in the middle of the segment. In the following picture, the two north-facing external-wall doorframe pieces were placed, and the piece of wall between them deleted, resulting in an entrance door being created automatically:
There are eight doorframe pieces: north-facing / west-facing, external-wall / internal-wall, left / right. A left / right pair facing the same direction are needed to make a location appropriate for a door, though they do not need to both have the same external-ness. If a location becomes inappropriate, then the entrance doors will be automatically deleted.
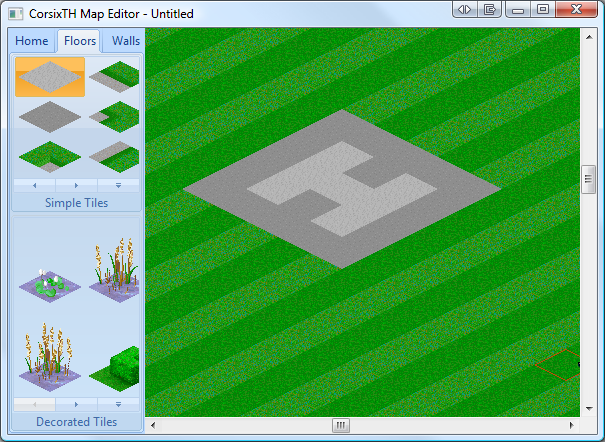
To allow for in-game emergencies to happen on your own maps, there must be helipad on the map for the emergency helicopter to land at. A helipad is a 5x5 region of the map made up of two distinct floor tiles in a "H" pattern, as in the following image:
Any such 5x5 region will automatically be detected by the map editor and marked as the helipad for the map. If there are multiple such regions, one will be chosen in an unspecified manner. The orientation of the H must be as in the above picture and the planned helipad must be accessible to plot 1 from the start of the game. If the first of these conditions is not met, then the game will not see it as the helipad. If the second condition is not met, the game may crash when you accept an emergency challenge.
To set the brush without explicitly choosing a tile from the gallery, right click on a tile in the map pane. This will set the brush to the tile under the cursor. If there are multiple options for what the brush could be (e.g. a grass floor versus a tree, or a north-facing wall versus a west-facing wall), then right clicking multiple times will cycle through the options.
If you have started painting, but decide that you want to cancel the paint, then you can. To do this, expand the paint rectangle to larger than just a single tile, then reduce it back down to a single tile, and then return the mouse cursor to the middle of the tile. This will reduce the paint rectangle to an empty rectangle, at which point the left mouse button can be released and no painting will be done.
To paint patterns, a feature called repeat-interval can be used. To use this, start painting a rectangle, and then with the left mouse button still held down, click the right mouse button. The distance (in whole tiles) between the origin of the paint rectangle and the position of the right click determines the repeat interval.
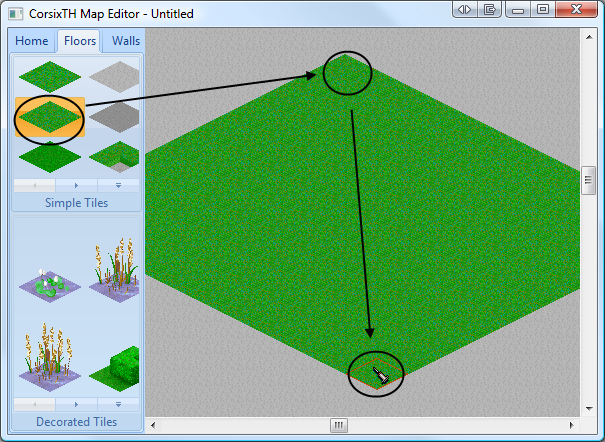
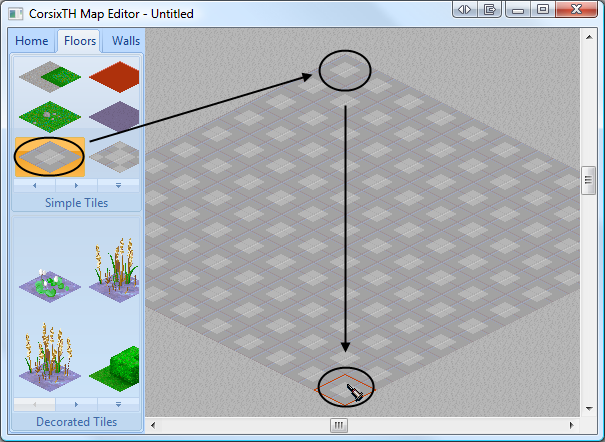
To paint a region of grass in the same style as the original game, start by painting a rectangle of one grass tile:
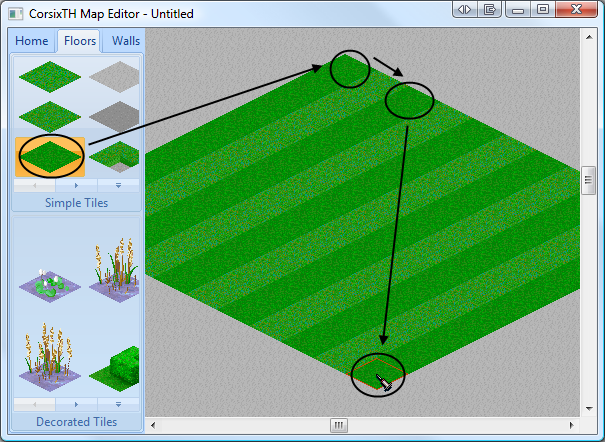
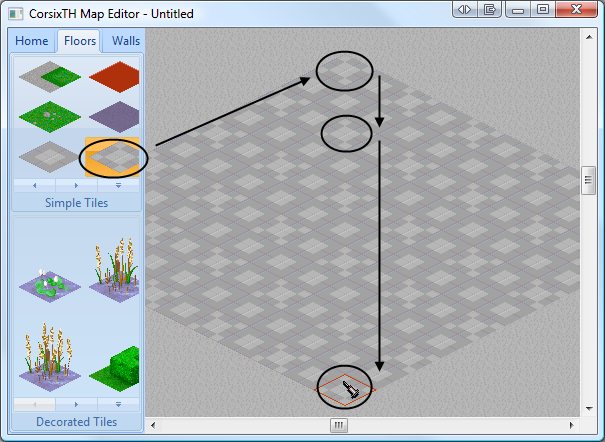
Then paint over the same rectangle with a different grass tile, but using the repeat interval feature. To do this, start the rectangle in the same place, then with the left mouse button still held, right click two tiles away from the start tile, then proceed to drag to the opposite corner of the rectangle, then release the left mouse button:
Another possible use of the repeat-interval feature is to create a pattern of alternating floor tiles. Whereas the grass pattern is a two-stage process, this is a three-stage process. Start by placing down a rectangle of one type of floor tile:
Then place down a rectangle of the other floor tile, setting a repeat interval two tiles away diagonally:
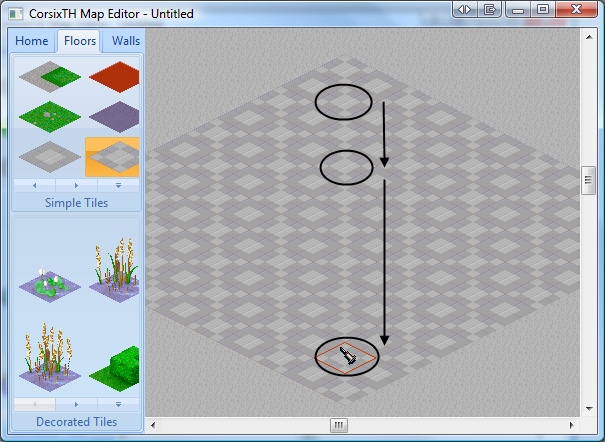
Finally complete the pattern by drawing a third rectangle, like the second, but offset by one tile diagonally:
When a map is loaded, either in-game or in the editor, the camera will be set to the map's default camera position. When a map is saved, the default camera position is set to the position of the camera at the time of the saving. Hence you should always save your map at the same place you want players to start looking at.
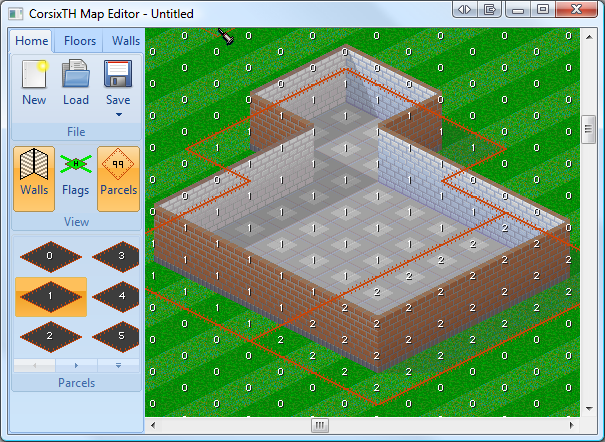
One important, but invisible, part of a map are the purchasable parcels of land. Each tile in the map has a parcel number associated with it. Parcel number 0 is considered the outside, parcel number 1 is player 1's initial piece of hospital, and other parcels are purchasable pieces of land. For a map to be playable, part of it must be painted as parcel number 1, and for a map to be interesting, other parts should be painted as supplementary parcels. Parcels are made visible by using the "Parcels" toggle button on the "View" panel of the "Home" tab. Once visible, parcels are painted in a similar way to floor tiles.
Back to the Home page
