-
Notifications
You must be signed in to change notification settings - Fork 5
USB interface and configuration
USB auto keyer is intended to work in two different input modes. In standalone mode, auto keyer gets inputs from attached Morse key. In "host terminal" mode it captures inputs from a USB port. This section of the documentation describes how to configure the host terminal to work with USB auto keyer.
Before configuring the PC or host terminal, make sure auto keyer is configured for "host terminal" based inputs and properly attached to the terminal.
-
Issue
lsusbcommand and check "HL-340 USB-Serial adapter" is available. If this entry is not available and auto keyer is properly attached, then make sure that the Linux kernel is configured withCONFIG_USB_SERIAL_CH341option.
-
Issue
dmesg | grep ttyand check for TTY entry associated with CH340 driver.
-
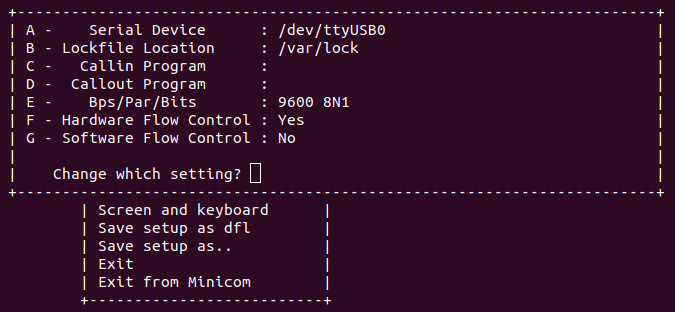
Open minicom and "Serial port setup" option.
-
Now configure minicom with following parameters:
-
Serial device: Enter name of the TTY entry associated with CH340 driver. For example:
/dev/ttyUSB0 - Bps/Par/Bits: 9600 8N1
- Hardware Flow Control: Yes
- Software Flow Control: No

-
Serial device: Enter name of the TTY entry associated with CH340 driver. For example:
-
After configuring above settings close "Serial port setup" options by pressing the Enter key.
-
Select "Save setup as dfl" option and press Enter key.
-
Now close the setup window, and Minicom is now ready to transfer data to the auto keyer.
-
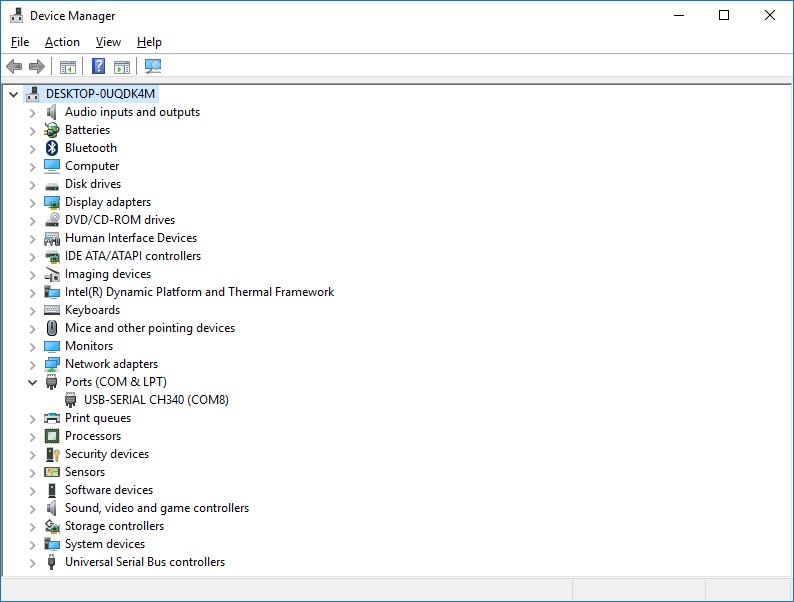
Open Windows device manager and check CH340 device is available under the "Ports (COM & LPT)". Update the CH340 device driver if the device is not properly installed.

-
Open PuTTY and select serial session.

-
Specify the "Serial line" and set "Speed" to 9600 and connect with the device.