-
Notifications
You must be signed in to change notification settings - Fork 0
Screen Capturing
2000eBe edited this page Apr 27, 2023
·
11 revisions
This use case is straightforward. The primary objective is to allow the user to choose a screen or window and define a rectangular area within this view.
The process for starting screen recording is as follows:
- Choose a screen or window from an application.
- Initiate the screen capture process, and the user interface will update and display a preview of the selected screen/window.
- Define the specific location where the information will be displayed.
- Define the regular expression by referring to the documentation provided here.
- The information will be captured, processed, and made available through various interfaces.

Feature: Use Case Screen Capturing
  As a user
  I want to capture the data from my capture areas as easy as possible.

  Scenario: I want to capture my screen
    Given there are no screens selected
    When I open the application
    Then I see a message that I have to define a capture area
    Then I select a screen to put my capture area on

  Scenario: I want to capture my screen
    Given there are no capture areas defined
    When I selected a screen
    Then I see a message that no capture areas are defined
    Then I define a capture area

  Scenario: I want to capture content from a game with regex
    Given there is no regex given
    When I defined a capture area
    Then I see a message that there is no regex given
    Then I see a button to add a regex

  Scenario: I want to remove a capture area
    Given there are Capture areas defined
    When I click on one area I can choose between delete and edit
    Then I click on delete
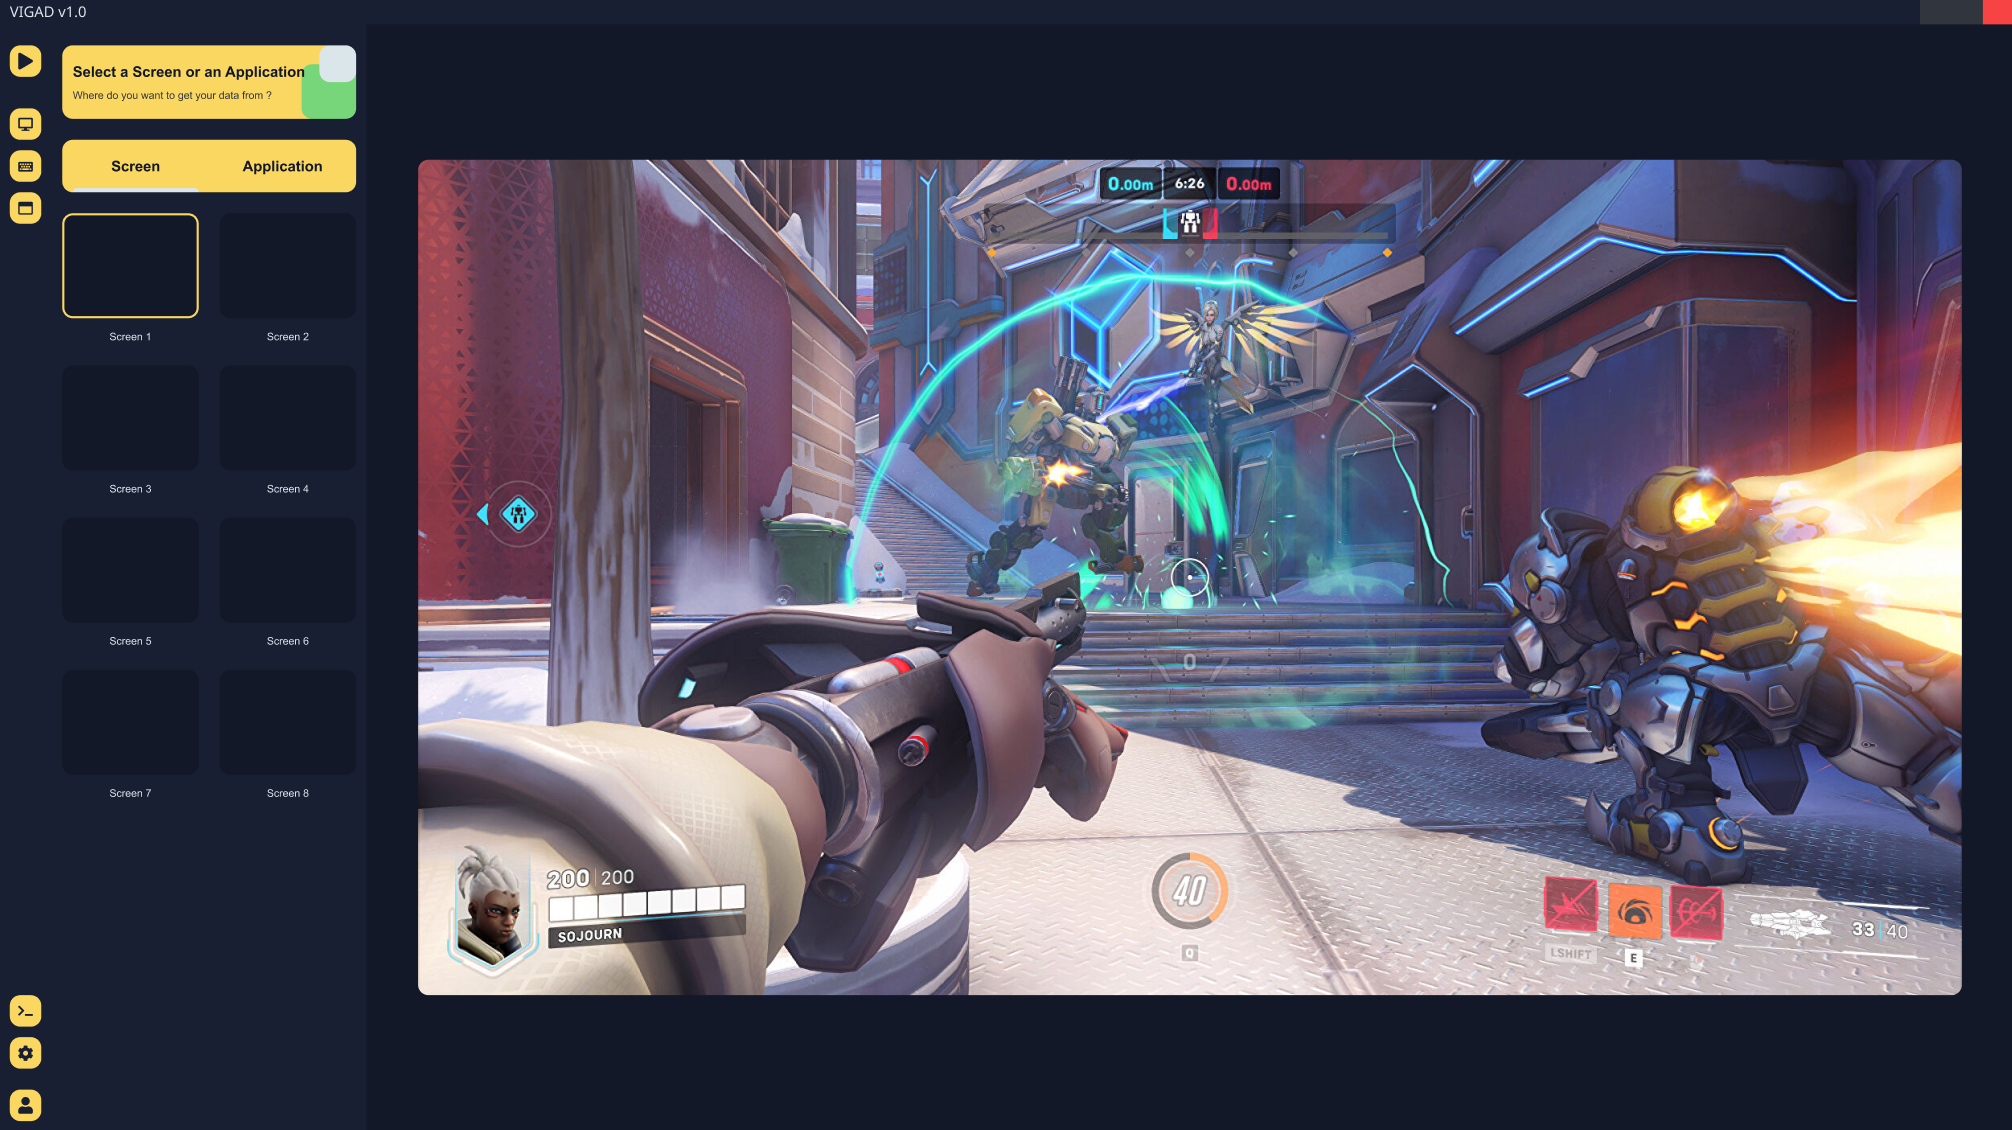
Then the selected area disappearsThis is the initial draft for creating the primary view of the application, including a panel for selecting a screen or window and defining their properties.

After further design iterations, we have settled on this design, which may only serve as a temporary solution, as there may be various aspects that we have yet to consider in future iterations.

We finally settled on a design which is perfect for the MVP.


(n/a)
(n/a)
(n/a)
(n/a)