Release Testing Instructions WooCommerce Admin 2.3.0
Please perform the tests outlined in the following areas:
The following two new features/bug fixes should also be tested. You can use a test site from the above test flows to perform these tests.
- Go to Analytics Report.
- Change Time period.
- Navigate to another report.
- Notice that the time period stays the same.
- Navigate to Homescreen.
- Navigate back to previous Analytics Report.
- Ensure that the time period is still what you set on step 2.
- Create a new store, and finish the Onboarding flow
- Go to WooCommerce > Home and select the Set up shipping costs task, it should show the standard stepper
- Type some number in the ‘Shipping cost’ input
- Click the ‘Rest of the world’ toggle to toggle it on.
- Type some number in the ‘Shipping cost’ input box under the ‘Rest of the world’ label
- Finish the set up, but don’t need to install the shipping label plugin
- Once on home screen the Set up shipping costs task should show as finished
- Click on the task again
- It should now redirect to the shipping settings page.
- On a new WooCommerce site/install
- Go through all the onboarding steps till we reach
Included business features - Ensure the plugin shows up correctly with the right naming and select it as the only extension to add
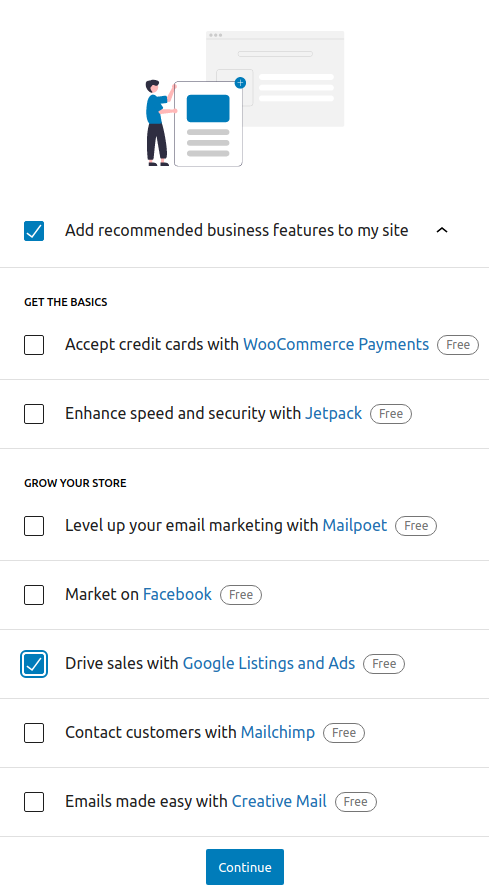
- Continue and confirm the
plugins were successfully activatednotice shows up - Finish onboarding and confirm that the extension was actually activated
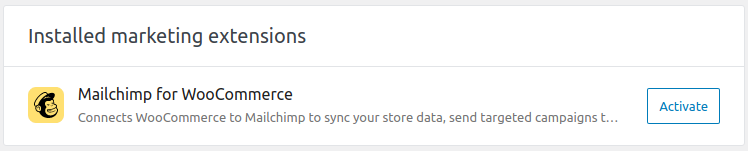
- View the installed marketing extensions section on the page Marketing > Overview
- The extension should appear in the following states:
-
Extension not installed (should not be included in the list, if the list is empty this section won't show at all)
-
Extension installed but not activated (click activate to confirm it works)

-
Extension installed and activated but not setup yet (click "Finish setup" to confirm we get redirected to the get started page)

-
Extension installed, activated and setup (click settings to confirm we get redirected to the settings page)
 Note: The documentation link is not active yet (still in draft)
- Visit any admin page with the params
plugin_action(install,activate, orinstall-activate) andplugins(list of comma separated plugins).wp-admin/admin.php?page=wc-admin&plugin_action=install&plugins=jetpack - If visiting this URL from a link, make sure you are sent back to the referer.
- Check that the plugins provided are installed, activated, or both depending on your query.
- Enable debug messages inside browser devtools, you can do it by running
localStorage.setItem( 'debug', 'wc-admin:*' );in your browser console. And don't forget to enable all log levels. - Create a new store with event tracking enabled.
- Select
United StatesorUKas the store country. - Visit the Payments task and click to setup
StripeandPayPal. - Verify the event
wcadmin_payments_task_stepper_viewwith the right `payment_method was recorded correctly. - Press
Proceedand verify the eventwcadmin_tasklist_payment_connect_startwith the rightpayment_methodwas recorded. - Verify that the event
wcadmin_tasklist_payment_connect_startalso is recorded for the payment gateways: Square, eWAY (for AU and NZ) and generic gateways like PayFast (for ZA) and PayStack (for ZA, GH, and NG).
- Create a new store and finish the onboarding flow, making sure your store location is filled out and within US | PR | AU | CA | GB | IE | NZ
- Visit Woocommerce > Settings > Payments you might have to wait a couple seconds, but it should show a card with Recommended ways to get paid listing 3 different payment providers (WC Payments, Stripe, and Paypal).
- Click
Get startedon one of the providers, it will show a loading icon (installing the plugin), once done it should redirect you to the plugin set up page. - Check if the plugin is installed and activated.
- Go back to the payment settings page
- Notice how the plugin you had previously installed and activated does not display anymore.
- Go to WooCommerce > Settings > Advanced > WooCommerce.com and un-select Show Suggestions and save
- Go to the payments setting screen again, the card should not be displayed.
- Enable the Show Suggestions again in WooCommerce > Settings > Advanced > WooCommerce.com
- Go to the payments setting screen again, the card should be displayed.
- Click on the 3 dots of the card, click
Hide this, it should make the card disappear, it should also not show on refresh. This can't be shown again unless thewoocommerce_show_marketplace_suggestionsoption is deleted (through PHPMyAdmin or usingwp option delete woocommerce_show_marketplace_suggestions).
- Go to Settings -> General.
- Set your store timezone significantly ahead of or behind the timezone you currently reside in.
- Create a test order and mark complete.
- Navigate to various analytics reports and note the time filter is based on the current store time. E.g., If your store timezone is 12 hours ahead of your current time, you may see
1st - 23rdinstead of1st - 22ndfor "Month to date" depending on your time of day. - Note that the recently added order shows up in analytics reports.
- Change your timezone and repeat, testing with both locations (e.g.,
Amsterdam) and also UTC offsets (e.g.,UTC-6).
- Go to Home.
- Click on 'Add my products'.
- Select 'Start with a template'.
- Click on the input radio button and see that render as expected.
- Add two variable products. You want to have at least one variable for each product.
Product A - color:black Product A - color:white
Product B - size:small Product B - size:medium
- Make an order for each product.
- Navigate to Analytics -> Products
- Choose 'Single product' from the 'Show' dropdown and search for the product.
- Confirm that the "Variations" table shows the correct variations. If you searched for the 'Product A', then you should see color:black and color:white.
In case the report shows "no data", please reimport historical data by following the guide on here
- Go to the WooCommerce home page
- Open your browser console
- Choose payment methods
- See no error message
- Setup a new store and set your country to
India. - Go to 'Choose Payment method' Checklist on the home page.
- Verify that PayPal is not presented as a payment method.
- Do not select "CBD industry" as a store industry during onboarding.
- Make various payment methods visible by switching to different countries.
- Attempt to set up various payment methods.
- Make sure that after setup, a
Managelink is shown that links to the payment method settings page. - Check that simple methods like, cash delivery or bank transfer initially have an
Enableoption.
- Install WooCommerce with WooCommerce Payments
- Clone this branch and run npm start (only needed if you are using dev version)
- Navigate to WooCommerce -> Home and observe the copy change.