Create Hello World Workflow Tutorial
This tutorial provides instructions on how to create this "Hello World" Kepler workflow
WARNING: When annotating parameters in Kepler use all lowercase for parameter keywords ie: allowedworkspacefiletypes=foo..
Download, install and launch Kepler.
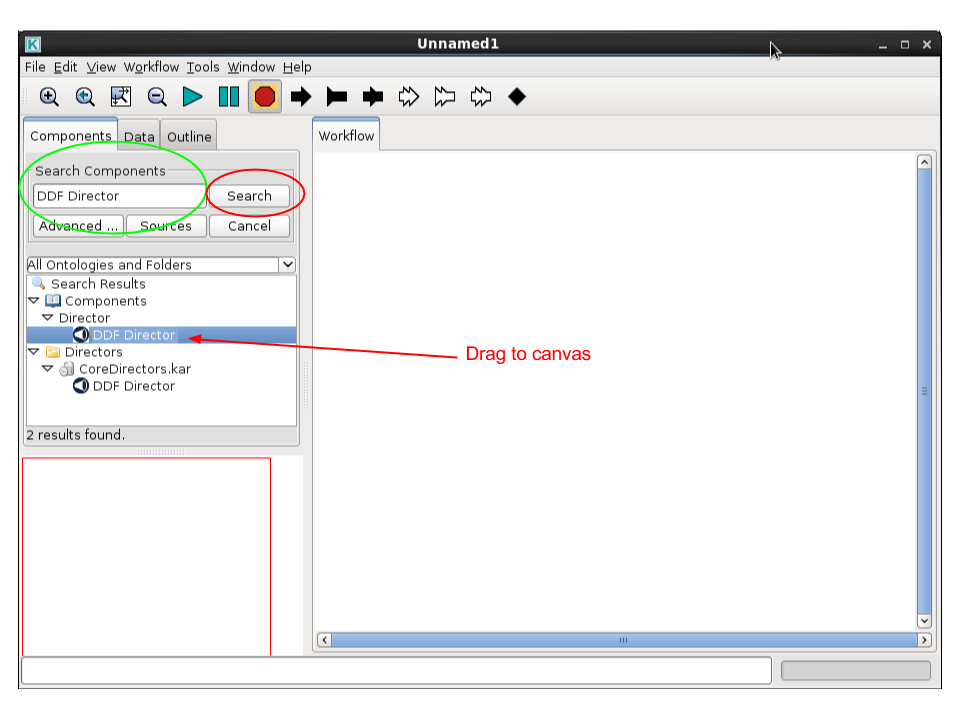
In the Search Components text field enter DDF Director (circled in green) and click the Search button (circled in red). This should update the left pane and show the DDF Director as seen below.
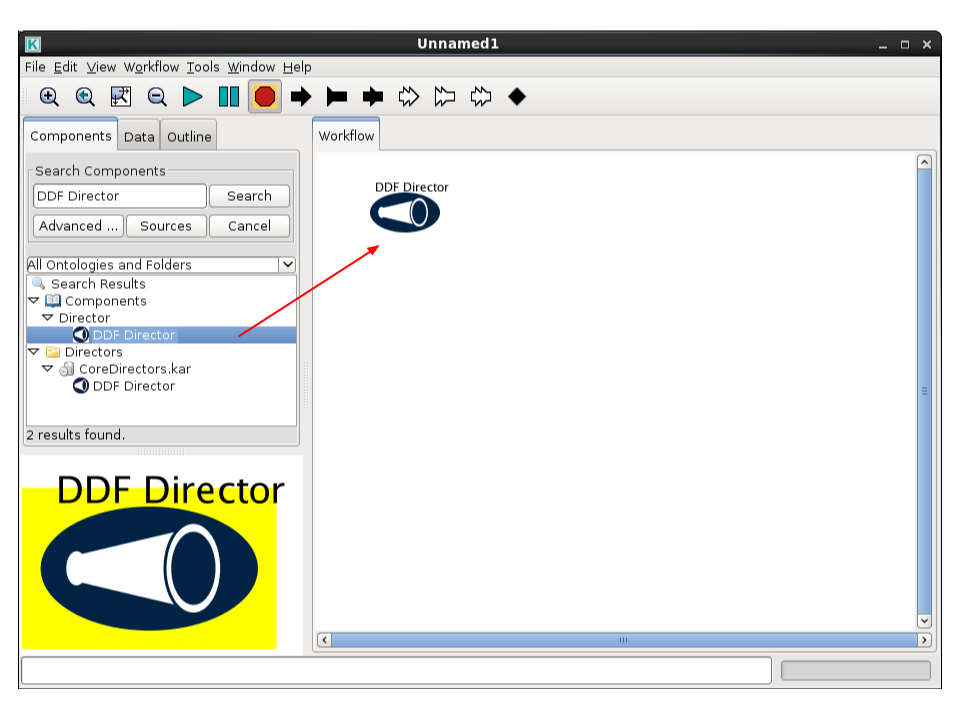
The DDF Director should be listed in the left pane (pointed to by red arrow). Drag the DDF Director to the canvas as seen below
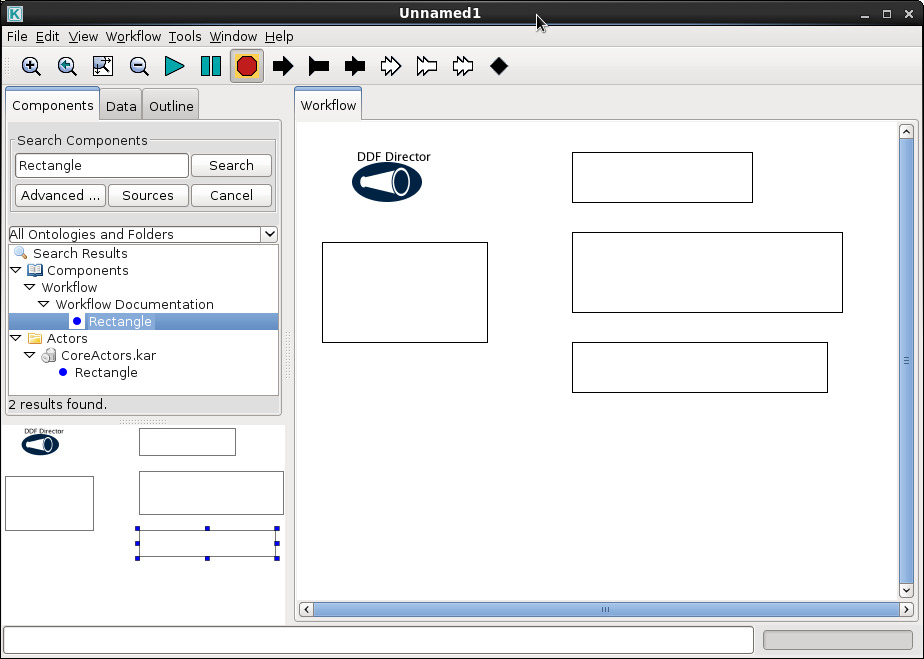
In the Search Components text field enter Rectangle and click the Search button. Drag 4 of these Rectangles onto the canvas as seen below. Be sure to resize and position roughly in a similar fashion.
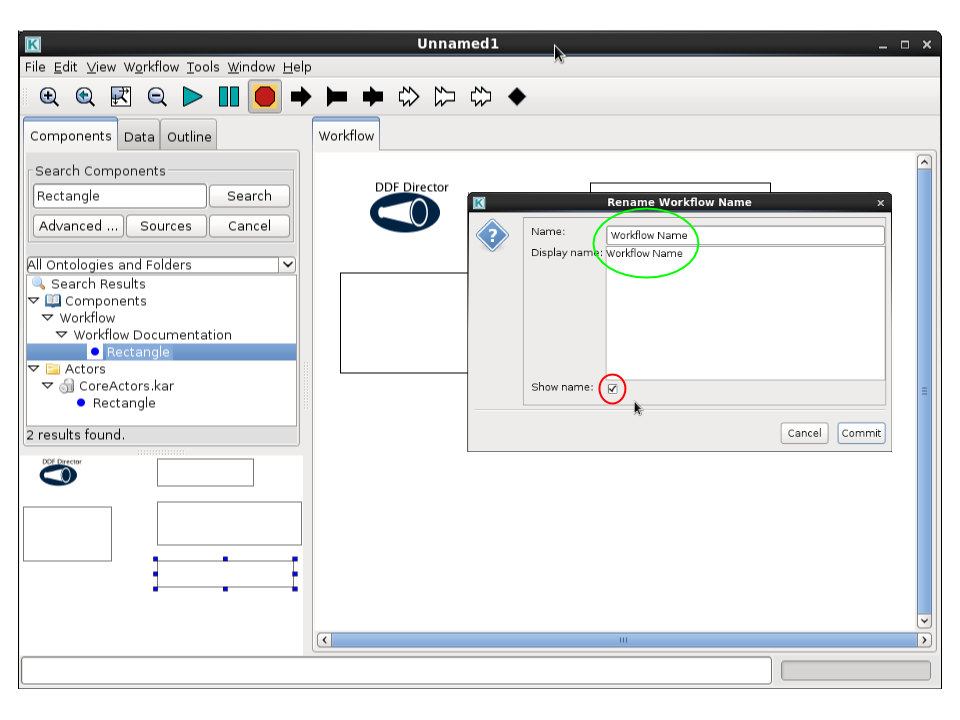
Move mouse over the upper right rectangle and right click to bring up a sub menu. Select Customize Name out of the menu and rename the Name and Display name to Workflow Name (circled in green). Also check the Show name check box (circled in red). When finished click Commit button
After clicking Commit the Rectangle should now have the label Workflow Name as seen below
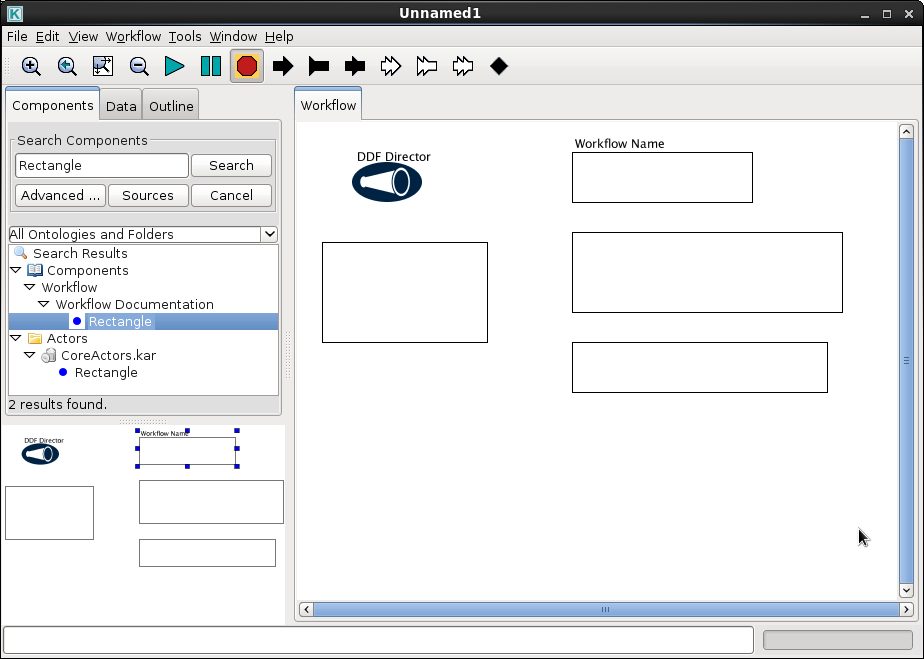
Using the same technique change the names for all the other Rectangles to the following:
- For the right center Rectangle change its name to Description
- For the bottom right Rectangle change its name to Release Notes
- For the left Rectangle change its name to User Settable Parameter

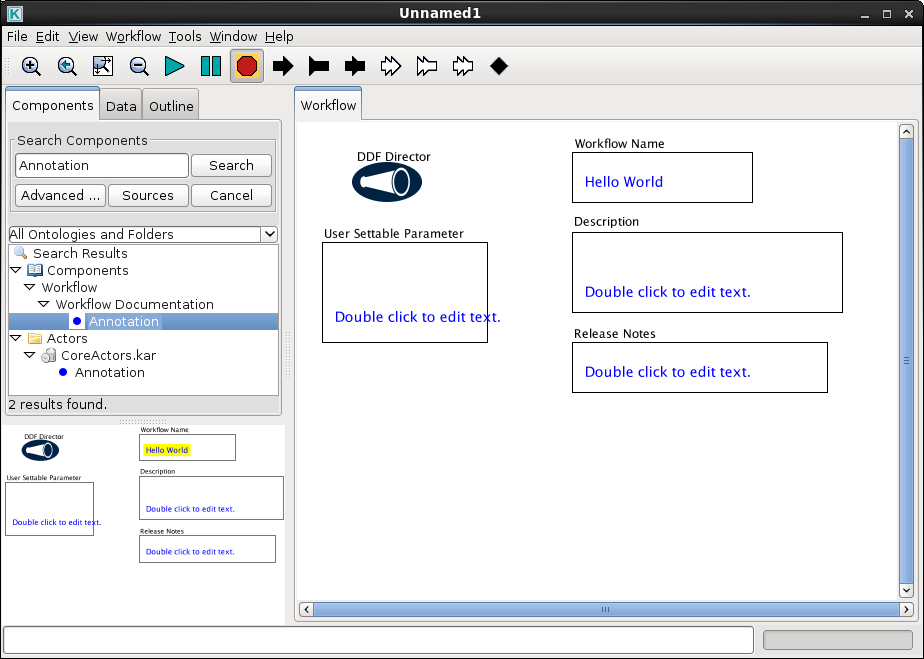
In the Search Components text field enter Annotation and click the Search button. Drag an Annotation into each of the four boxes as seen below. When dragging the Annotation first drop it outside the the Rectangle, deselect it, then reselect and drag into the Rectangle
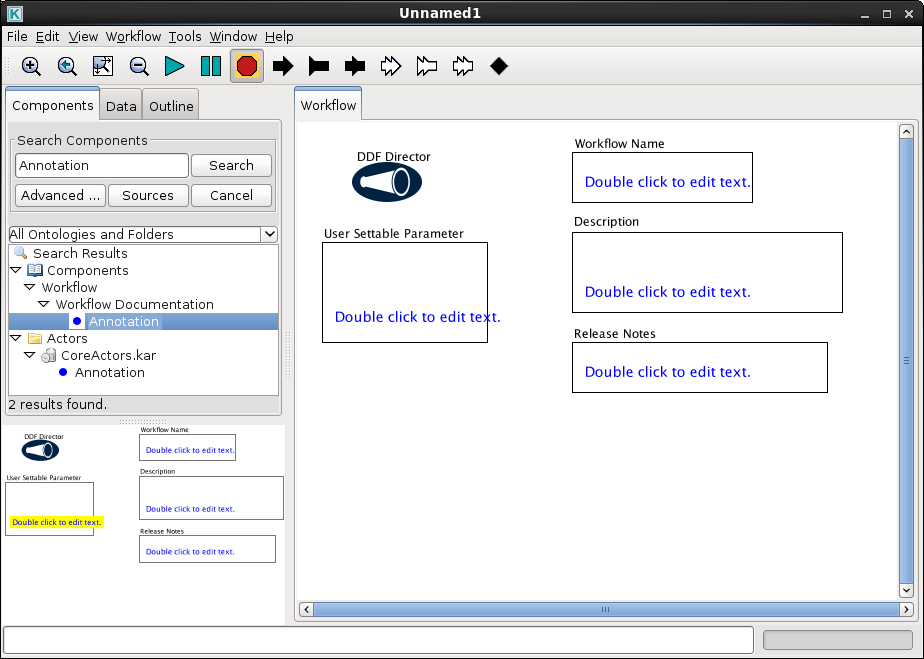
Double click on the Annotation in the Workflow Name Rectangle A dialog like the one should appear:
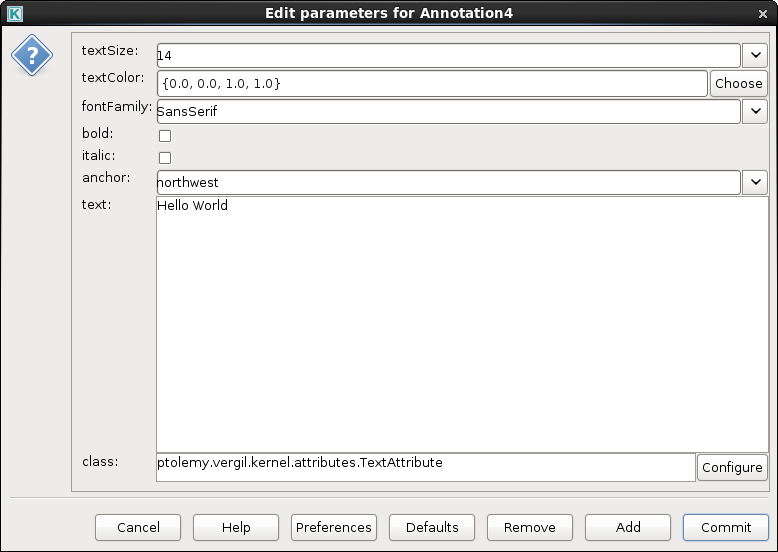
Replace the Double click to edit text. with Hello World and click Commit to save which should look like this:
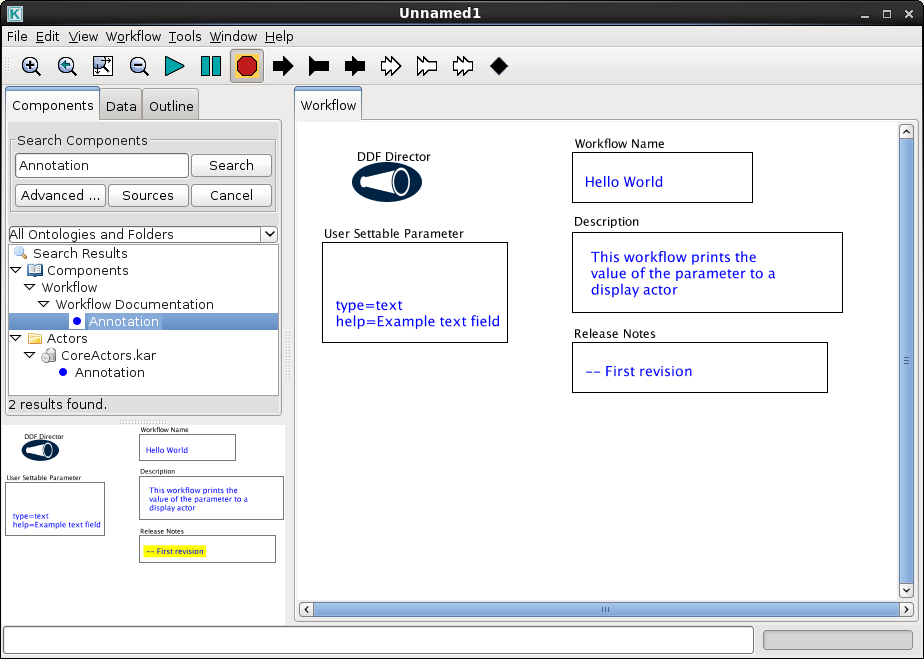
Now do the same for the other Annotations as follows:
-
For the Annotation in Description setting it to the following
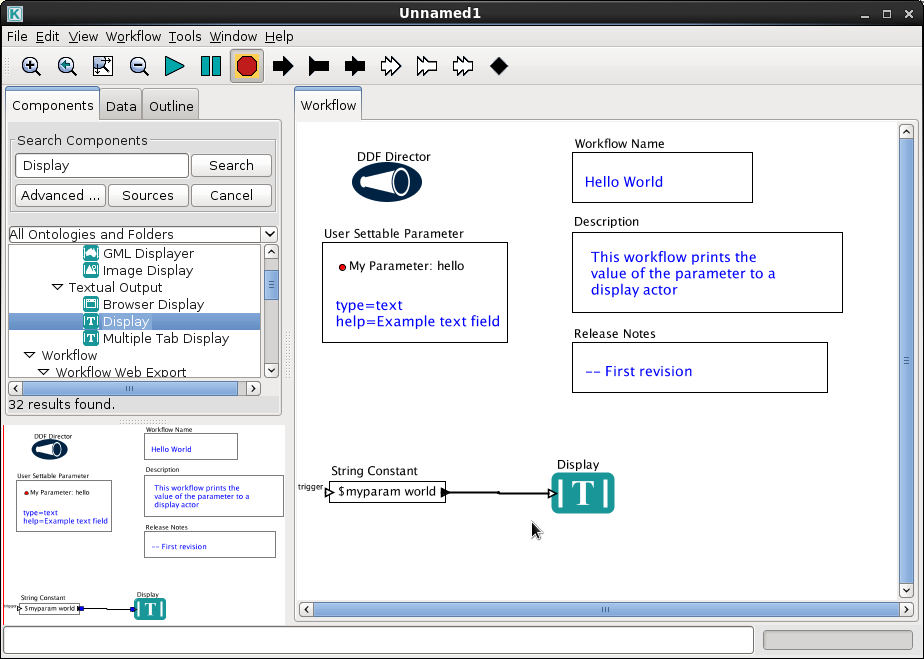
This workflow prints the value of the parameter to a display actor
-
For the Annotation in the Release Notes enter the following
-- First revistion
-
For the Annotation in the User Settable Parameter enter the following on 2 lines
   type=text
   help=Example text field
WARNING: When annotating parameters in [Kepler][kepler] use all lowercase for parameter keywords ie: allowedworkspacefiletypes=foo..
Here is a screenshot of the workflow with all of the above changes:
Make sure the Annotation is within the Rectangles and if needed resize the Rectangles
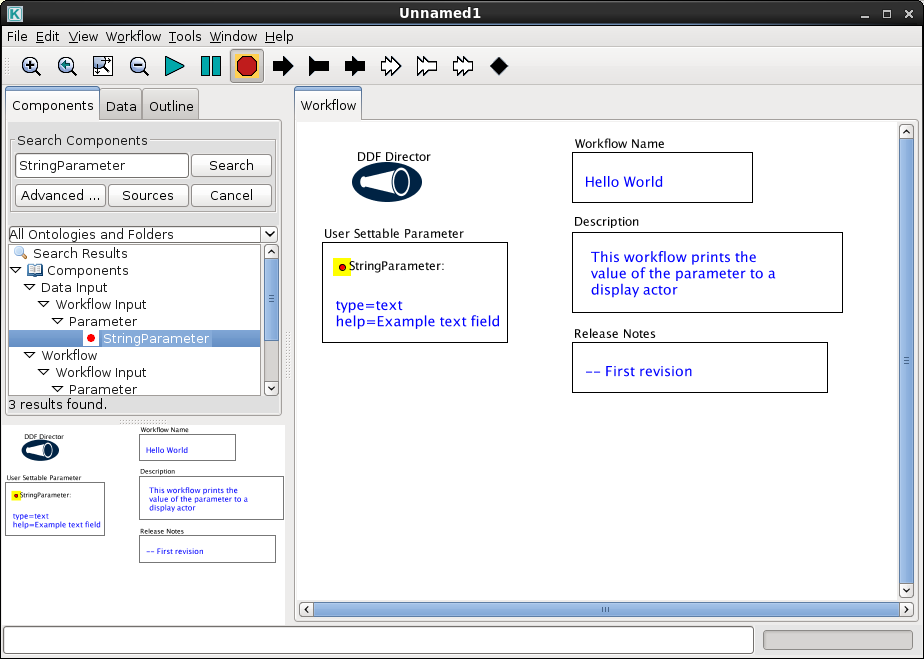
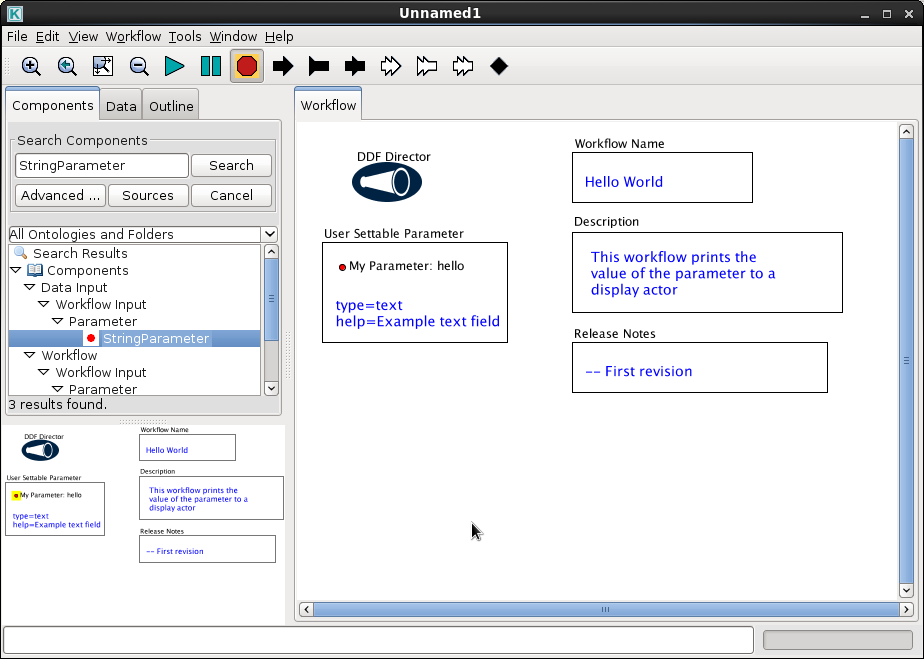
In the Search Components text field enter StringParameter and click the Search button. Drag a StringParameter into the User Settable Parameter Rectangle. When dragging the StringParameter first drop it outside the the Rectangle, deselect it, then reselect and drag into the Rectangle
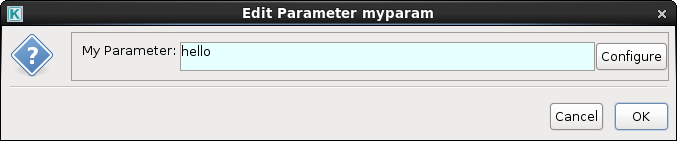
Right click on the StringParameter that was just added and select Customize Name in the submenu. Set the Name to myparam and the Display Name to My Parameter Click Commit when finished.

Double click on the My Parameter and set the value in the text field to hello and click OK
Here is what the workflow should look like:
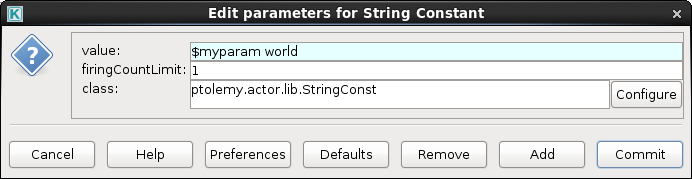
In the Search Components text field enter String Constant and click the Search button. Drag a String Constant onto the Canvas.

Double click on the String Constant on the canvas which will bring up the following dialog. Change NONE to 1 and set value to $myparam world as seen below and click OK
When done the workflow should look like this:

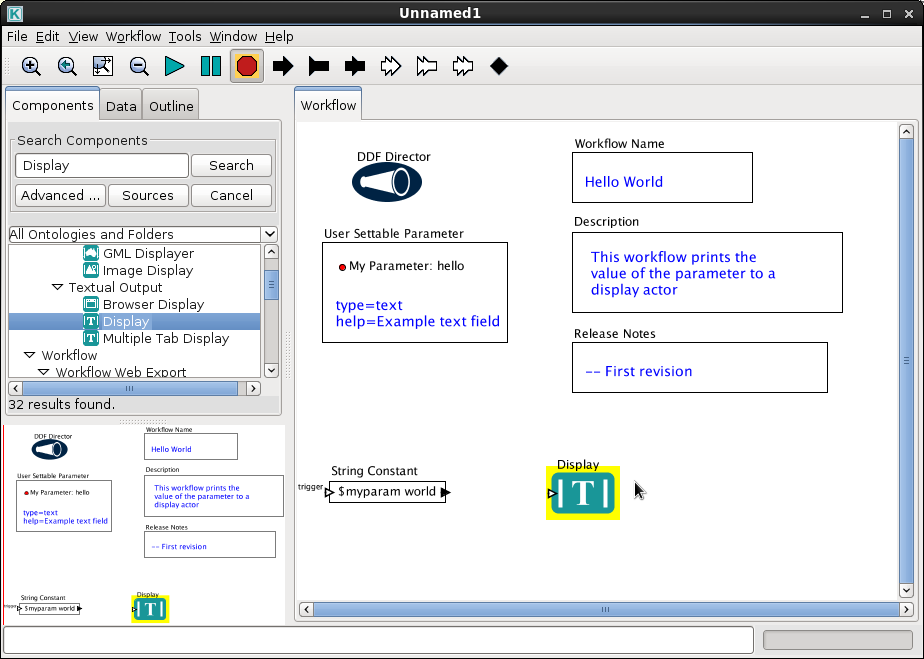
In the Search Components text field enter Display and click the Search button. Drag a Display onto the Canvas and put it to the right of the String Constant as seen in the figure below. Scrolling may be needed to find the Display actor.
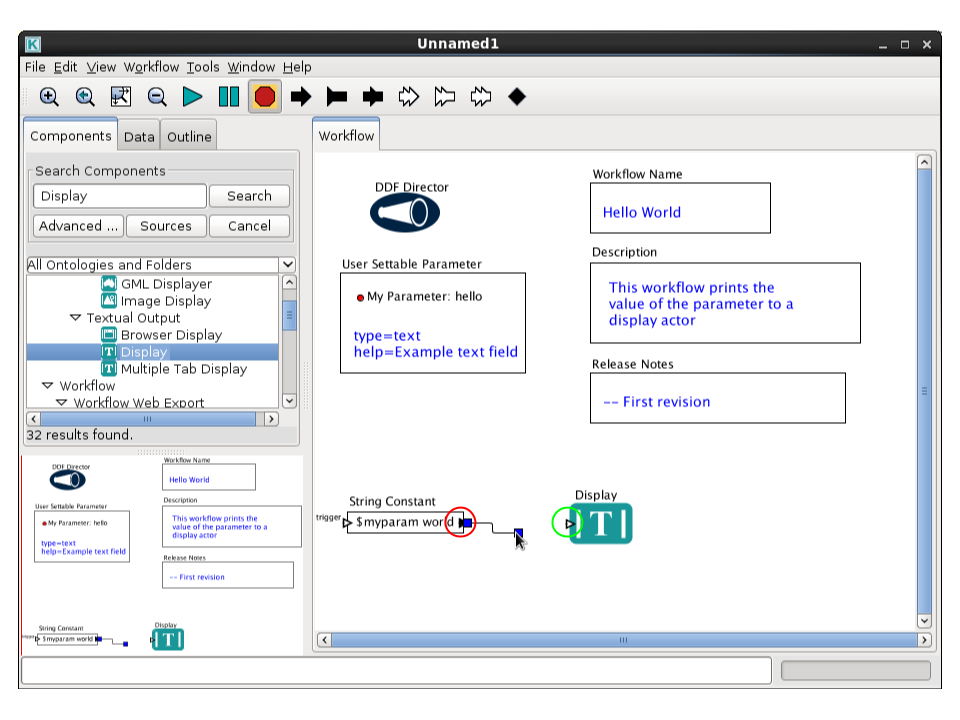
Connect the String Constant by holding a left click on the black arrow head (circled in red) and dragging the mouse to the other clear arrow head on the Display actor (circled in green). The figure below shows this action in mid drag
When completed the workflow should look like this:
Click the Run icon (circled in red) to try out the workflow.

If successful, this dialog should appear
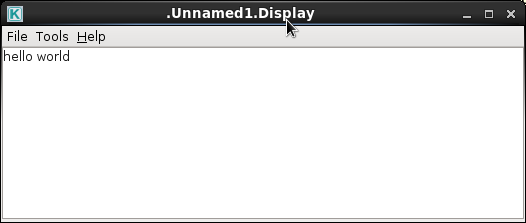
Congratulations on creating your first workflow. Be sure to save the workflow by going to File->Save in the menu. Here is a copy of "Hello World" Workflow