We interact with IVRs (interactive voice response) on a daily basis. IVR is the automated phone menu that you must have experienced many times. It very often reads out something like "press 1 if you're a developer, press 2 if you're an awesome developer". Today, we can build the entire system on the cloud using Plivo APIs and we are going to show you how.
We are going to build our app using Flask, Heroku and Plivo. The goal of this tutorial is to get you started with Plivo APIs and XML and quickly prototype and deploy apps on heroku. We will be leveraging three Plivo XML elements, GetDigits, Dial and Speak to create this application.
- Sign up for a Plivo account
- Head over to the Heroku documentation to get accquianted on how to setup an account and install the Heroku toolbelt.
- Create a HipChat account which will be used to send out notifications of calls coming in to your Plivo number
- Installed Python and Virtualenv. See this guide for guidance.
###Optional
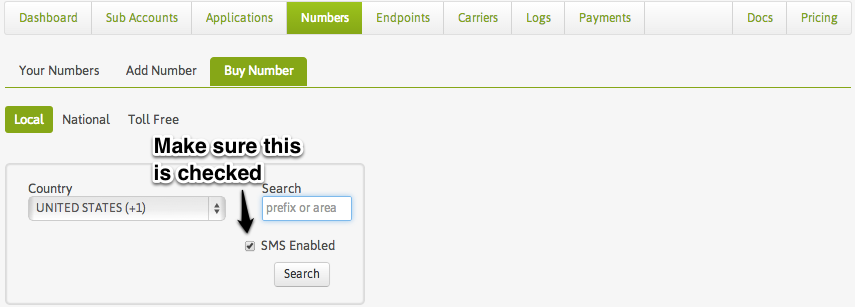
- Sign in to your Plivo account dashboard, and buy a number. Enter a prefix or an area code, make sure 'SMS enabled' is checked and click on Search.
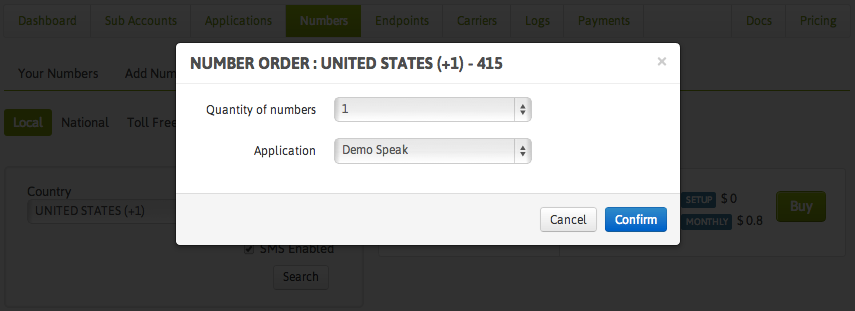
Click on Buy, choose the 'Demo Speak' app from the dropdown for now and click on 'Confirm'. To test it out, you can call your Plivo number which will appear after you click 'Confirm' and listen to the sample message.
- Get the latest source code by typing the following in the terminal and hit Enter.
$ git clone https://[email protected]/tsudot/wrench.git
$ cd wrench- Open the file creds.py in this folder in your favorite text editor and necessary credentials.
# Plivo Auth ID and Auth Token. https://manage.plivo.com/dashboard
PLIVO_AUTH_ID = ""
PLIVO_AUTH_TOKEN = ""

# HipChat API token. Create it here https://hipchat.com/admin/api
HIPCHAT_API_TOKEN = ""
Get the Plivo Auth ID and Auth Token from the dashboard.
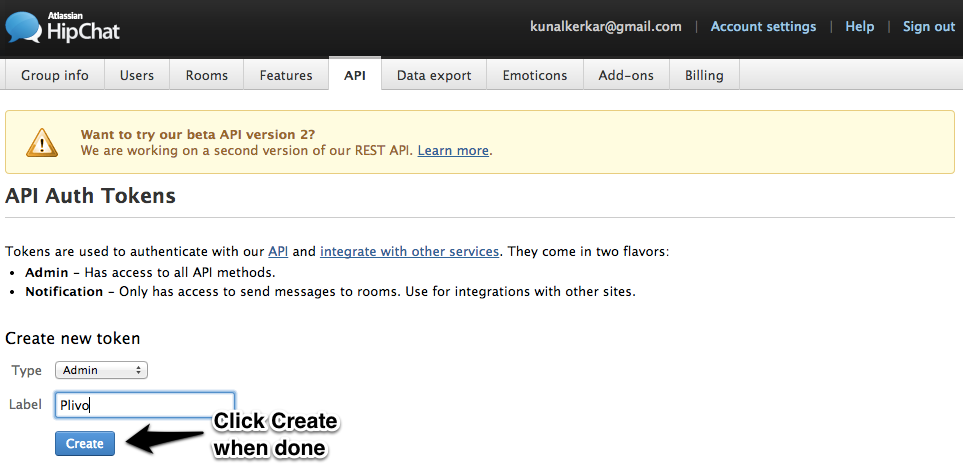
Enable HipChat API Access by creating a token here
- Open the file config.py in this folder in your favorite text editor. Create a HipChat room and add it to the VOICEMAIL_HIPCHAT_ROOMS list.
# The first phone number the call needs to be forwarded to
FIRST_CONTACT = '' # Eg. 15555555555. Make sure you add the country code.

# Needs to be a list of numbers the call will be broadcasted
# if it does not get answered by the FIRST_CONTACT
BROADCAST_CONTACTS = [''] # Eg. 15555555555. Make sure you add the country code.

# Add the Plivo Number you purchased in step 1.
SMS_SOURCE_NUMBER = ''

# Needs to be a list of numbers. The SMS with the voicemail recording
# will be sent to these numbers.
VOICEMAIL_SMS_RECEIVERS = [''] # Eg. 15555555555. Make sure you add the country code.

# All notifications will be sent the HipChat Rooms.
VOICEMAIL_HIPCHAT_ROOMS = [''] #Add HipChat Room Names`</pre>- Commit your changes.
$ git add creds.py config.py
$ git commit -m 'Adding credentials and config'`</pre>- Create a heroku app by typing the following command in your terminal. Take a note of your app url, in this case it is http://pacific-chamber-7397.herokuapp.com/
$ heroku create
Creating pacific-chamber-7397... done, stack is cedar
http://pacific-chamber-7397.herokuapp.com/ | [email protected]:pacific-chamber-7397.git
Git remote heroku added- Deploy your code to heroku and add the redistogo add on.
$ git push heroku master
$ heroku scale web=1
$ heroku scale worker=1
$ heroku addons:add redistogo
Note: For each application, Heroku provides 750 free dyno-hours. To run more than 1 dyno, you may have to verify your heroku account. Make sure you scale down the dynos when you are done testing.</div>
-
We will create a Plivo application and point it to the number you purchased in step 1. Open https://plivo.com/app/ in your browser.
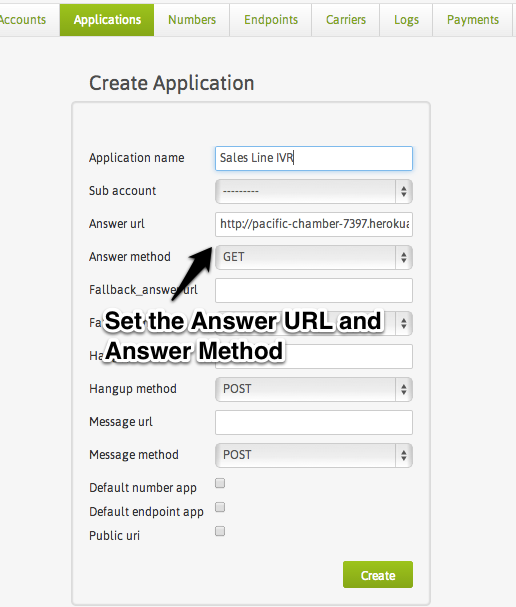
Click on the New Application button to create an application. Give a name to your application, lets call it 'Sales Line IVR'. Click on 'Create' upon done.
Use the answer URL as http://(heroku app url)/response/forward/. Choose the GET method. Leave the other fields as it is for now.
Note: Replace "heroku app url" with the the url returned when creating the heroku app in Step 6.
-
Go to the Plivo Number Page
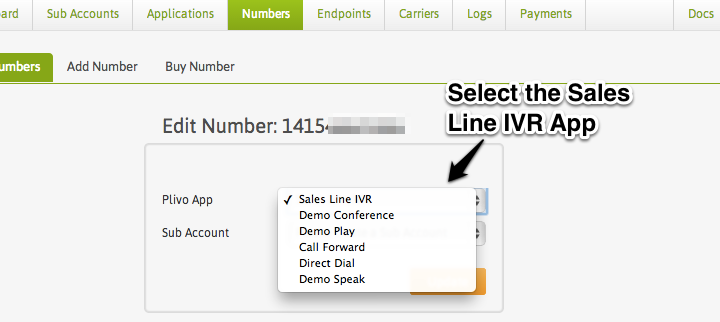
Click on the number you purchased in Step 1. Choose the application 'Sales Line IVR' in the dropdown and click 'Update'
-
You are all set. Make a call to your Plivo Number and test it out.
