Editing Content
Wherever possible, editing content should be as easy as editing a Word doc. The WordPress site also has very good guides about page and post editing.
For basic editing, you'll want to make sure you're in the Visual tab:

Then you should have access to a variety of options for manipulating the text. In addition to the usual basics – bold, underline, alignment, etc. – there are a variety of predefined content types that you should use to mark up headings and other content types. These will automatically be styled when the page is published.

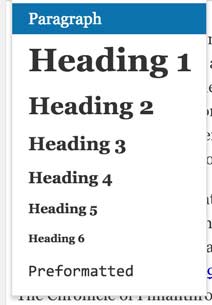
There are also several more advanced formatting options available, to manipulate pieces of content with custom styles. Under the Formats menu, there are a variety of prebuilt styles:


You can use these to create blocks that align nicely with each other. Here's an example, where we've put a header on top of a 3/4 width column and a 1/4 width column. Simply select each block of text you want to wrap in the format, and then click the format type in the menu. Note that in Visual Mode, it tells you the type of each block, and many styles show up automatically.

This results in a coherent whole page:

The home page uses many of these features above, and also has a few other pieces that are reusable.

First, it features shortcodes that allow you to include other content. In this case, we're using
[display-posts id="93938" include_excerpt="true" ignore_sticky_posts="true" excerpt_more_link="true" excerpt_more="Read The Full Story"]
to display the post with id 93938 to feature it. Below that, we're showing the three most recent posts in the blog with
[display-posts posts_per_page="3" ignore_sticky_posts="true" include_date="true" date_format="M j, Y h:i A"]
Also note that the feature blog post is wrapped in a Spotlight block, which adds the spotlight graphic and styling on the home page:

The staff page uses a similar shortcode to display lists of staff members:

This will list all staff members who belong to a particular group (staff, cofounders, etc.):

To create or edit a staff member, you create a Page like normal, but there are a few additional steps you'll need to go through. First, make sure the page has a parent of Our Team and is using the Staff Page template under attributes. You enter a number for the Menu Order here as well to choose where in the staff list they'll appear.

Once you choose the Staff Page template, you'll be able to fill out a few extra fields. The Group field is used by the staff list shortcode above to determine what members to show (staff, cofounders, etc.). You can give the person a Role (job title) here. If you fill in their WordPress Username (you can get this from the Users list in the WordPress admin area), their most recent 5 blog posts will appear on the right side of their staff page. You can also list their Twitter, LinkedIn, and GitHub profile names here to link those.
[[img/staff-fields.jpg]
Next, you'll want to give them a profile photo – these should have the normal photo above and the "fun" photo (the one that appears when you hover over the person on the staff page) below in the same image. Upload these and use the Featured Image box on the bottom right to select it.
Here's a mostly-filled out staff page:

The posts on the blog work much like they previously did. One big thing that has changed is that the image for each post in the list must be chosen as the Featured Image for the post – it will automatically be resized into a thumbnail of the correct size.
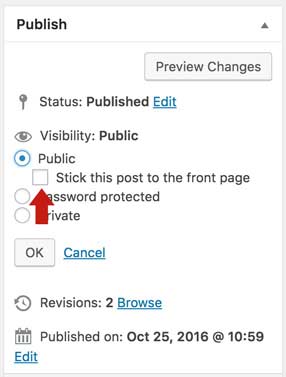
The Spotlight box on the main blog page is populated with "sticky" posts. To make a post sticky, choose the "stick to front page" option under the Visibility box: