-
Notifications
You must be signed in to change notification settings - Fork 1
play 2.0 in scala ide 2.0
Hi all, thanks for check-in out this guide. Its master version has been moved to the Scala IDE documentation project on GitHub and is availble in the new Scala IDE website http://scala-ide.org/docs/tutorials/play20scalaide20/index.html.
For comments or improvements, use GitHub ticket and pull request system.
Luc Bourlier - +Luc Bourlier @sky1uc
This guide will show you how to configure a Play web application to import it in Scala IDE, how to configure Scala IDE to work fine with the Play framework and finally a simple example of a change in the web application.
- Eclipse 3.6.2 (Helios) with Scala IDE for Scala 2.9 installed (update site: http://download.scala-ide.org/releases-29/stable/site).
[luc] links to installation instructions
-
A basic knowledge of the Eclipse user interface is required.
-
No knowledge of the Scala language is required (in this guide).
-
No knowledge of the Play framework is required (in this guide).
To be able to create a Play web application, the Play framework need to be installed. If you have not installed it already, follow this few steps, or use the Play documentation.
-
Download Play framework 2.0-beta from http://www.playframework.org/2.0.
-
Unzip it in your preferred location. Let's say
/path/to/play20for the purpose of this document. -
For convenience, add the Play folder to your system PATH:
export PATH=$PATH:/path/to/play20-
In your development folder, ask Play to create a new web application, as a
simple Scala application.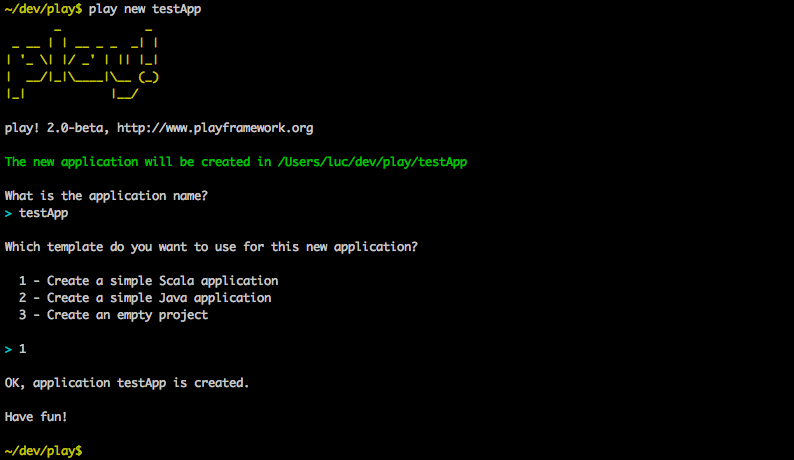
-
Go into the application folder.

-
And launch Play.
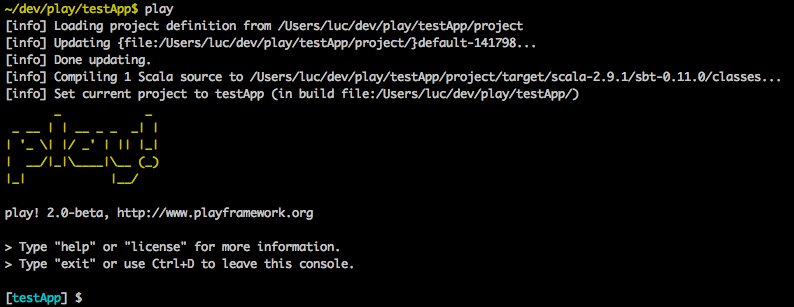
-
In Play, launch your newly created web application.

-
Check that the application works: http://localhost:9000/.

Now that the Play application is running, it needs to be configured so it can be imported into Scala IDE.
The eclipsify support is not yet integrated it Play 2.0, so we are using sbteclipse to make it an Eclipse project.
-
First, exit Play using
ctrl-d, and thenexit.
-
Add sbteclipse to sbt by creating the
project/build.sbtfile and adding the following lines.
resolvers += Classpaths.typesafeResolver

addSbtPlugin("com.typesafe.sbteclipse" % "sbteclipse" % "1.5.0")
-
Go back into Play.

-
Generate the Eclipse project configuration.

-
And relaunch the web application, so it is available later.

Setting a few preferences in Eclipse will make everything easier to use.
-
Open the internal web browser view in Eclipse, and check you can access your web application.
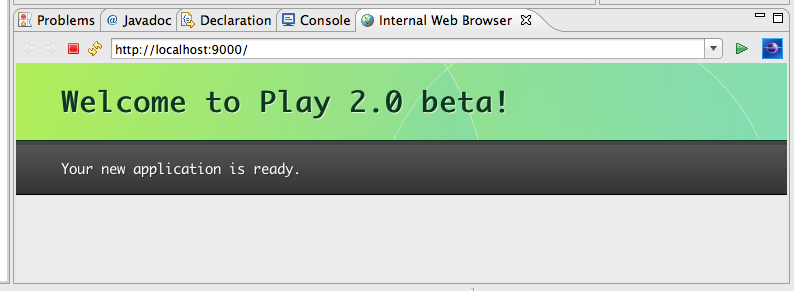
-
Configure Eclipse so changes on the filesystem are automatically picked up.
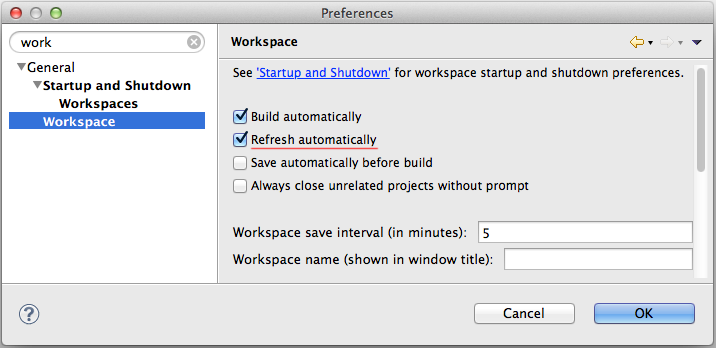
-
If you don't have the Web Development Tools for Eclipse installed, Eclipse opens
.htmlfiles in a web browser. Configure it to use theScala Editorinstead.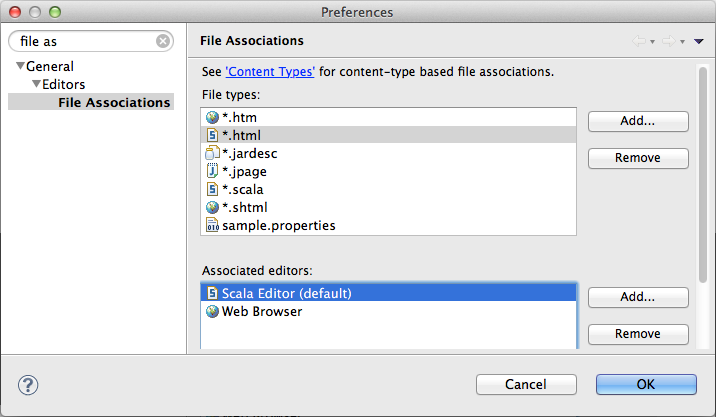
Everything is setup, it is time to import the project in the IDE.
-
Import the Play 2.0 application as an
Existing Projects into Workspace.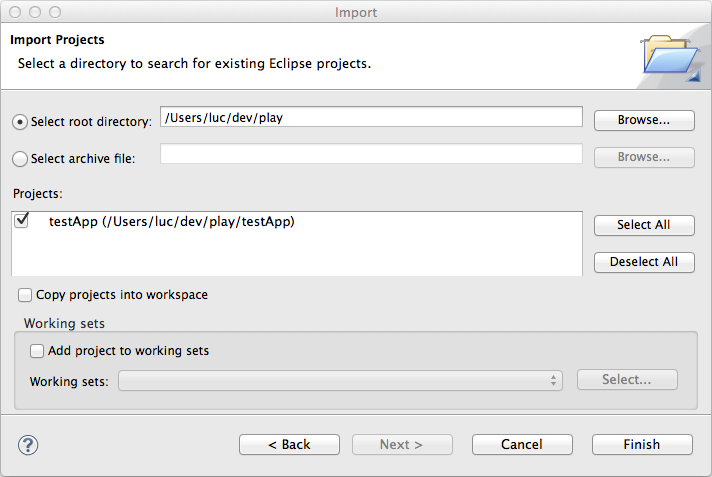
-
Everything is good, everything compiles.

Now that everything is setup, we can change the content. Let's add a way to have a quote on the main page.
-
First, create the
models.Quoteclass using the newScala Classwizard.
-
Add variables to
models.Quote.
package models

case class Quote(val text: String, val author: String) {

}- Add an extra parameter to the
index.scala.htmlview and update the layout.
@(message: String, quote: models.Quote)

@main("Welcome to Play 2.0 beta") {

    @play20.welcome(message)

    <p>@quote.text<em> - @quote.author</em></p>

}
-
The templates are transformed into Scala code by the Play framework, so use the
refreshbutton in the internal web browser to trigger it.Play returns a compilation error, the application is not using the template correctly. The error is also visible in the code of
Application.scala.
-
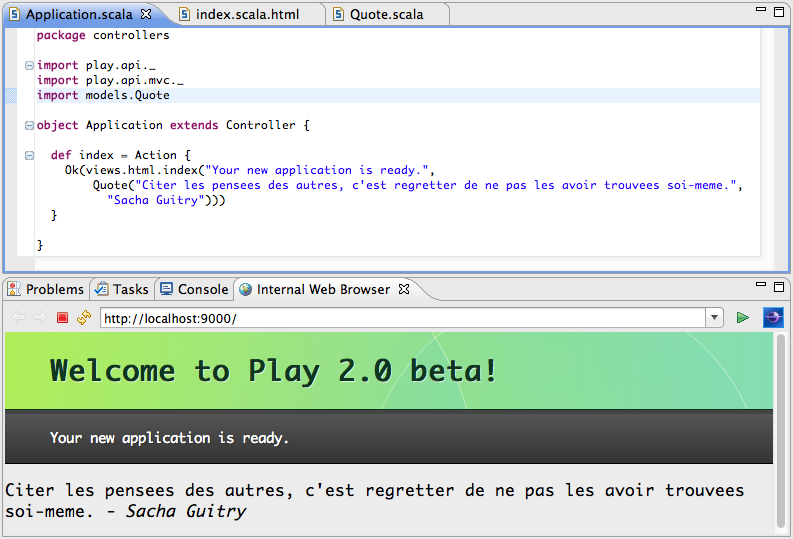
Fix the application code, using a smart quote.
  def index = Action {
    Ok(views.html.index("Your new application is ready.",
        Quote("Citer les pensees des autres, c'est regretter de ne pas les avoir trouvees soi-meme.",
            "Sacha Guitry")))
}-
The code compiles. Check the result in the internal web browser.
You now have all you need to create great web applications with Play 2.0 and scala.
For more information about Play 2.0, check out the Play 2.0 wiki.
For more information about Scala, go to the documentation website or get the downloadable eBook.
This guide now lives in the Scala IDE doc project on github. Please use github ticket and pull request system for feedback.
Luc Bourlier - +Luc Bourlier @sky1uc