Welcome! Tonight we'll be creating a random advice generator (fun animations included 😋) that uses the Advice Slip API. Feel free to ask lots of questions and build on this project! Follow the steps below to get going:
A code editor will make it easier for you to look at and edit the code for your app.
Here are some great open source code editor that is compatible with Windows, Mac, and Linux:
- Visual Studio Code: Microsoft's code editor with a super sleek user interface and terminal integration.
- [Sublime Text]: (https://www.sublimetext.com/)
- [Atom]: (https://atom.io/) There are lots of other code editors out there if you'd prefer something different, but Visual Studio Code is the code editor we'll be using during our demos.
Got it all downloaded? Great!
Navigate to this repository again: https://github.com/nuwit/rest-api-night
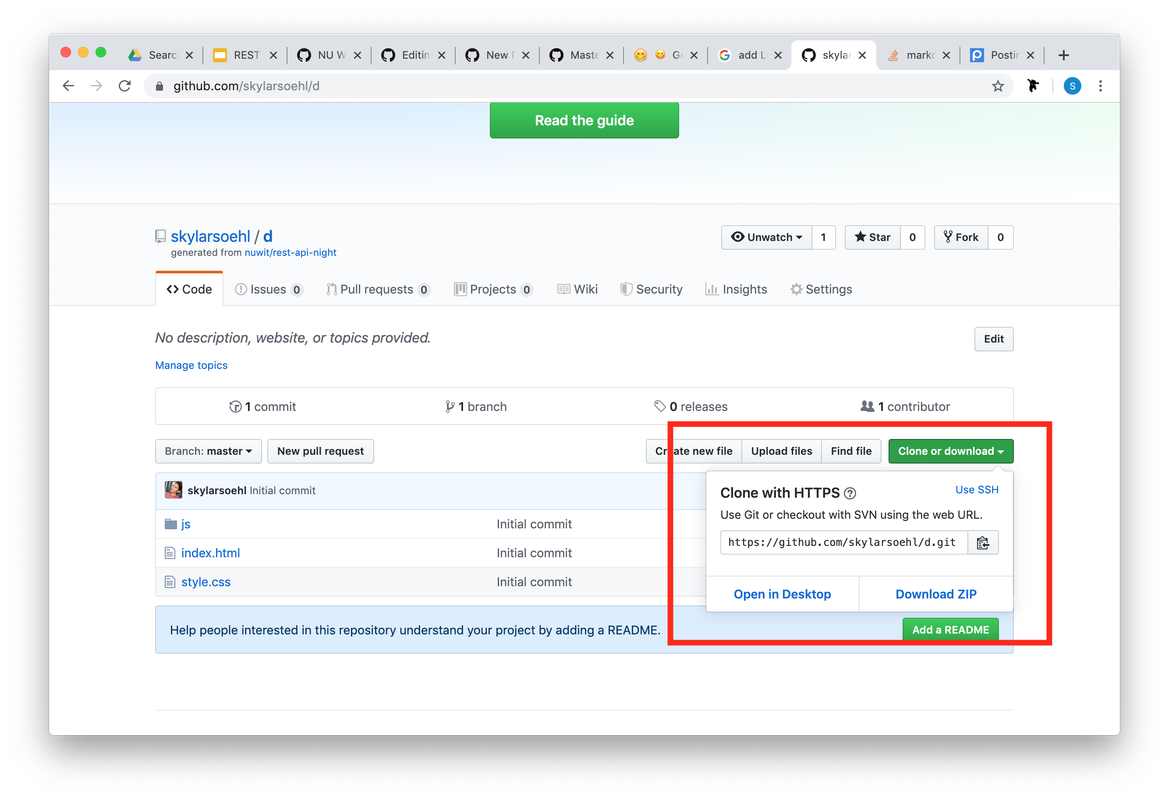
Press this button and select Download ZIP
Make sure you save the folder somewhere you can remember! Then, use your file explorer to navigate to the saved zip. Unzip the folder. Feel free to delete the zip and keep the unzipped files.
Login to your github account (if you're not already)
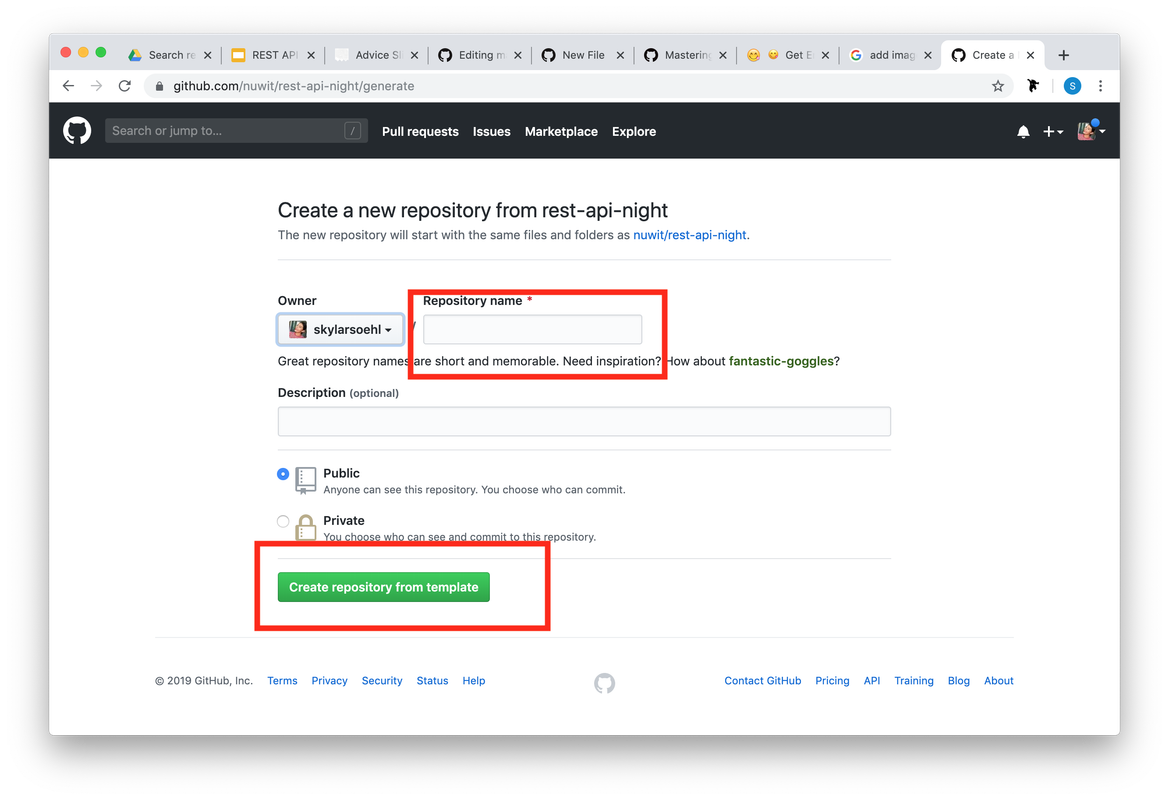
Navigate to this repository again: https://github.com/nuwit/rest-api-night
Click this button
Create a new repo
Clone your repo
If you'd like to test the starter code (and test your changes throughout) double click index.html. Refresh the page to view changes as you make them.
You'll see one file called index.html and folder called js. index.html is the file that constitutes the homepage of the website. The js folder is where all Javascript files will be kept. As of now, we only have one Javascript file, main.js, which is our main script for the website. There is also a style.css file that contains some minor styling for the webpage. Feel free to ignore it or play around with it!
Click on this link to go to the API we will be using tonight.
While there are hundreds of APIs to use on the internet, many are considered "consumption-only" and only allow you to make GET requests. In order to make POST, PUT, or DELETE requests, many APIs require some kind of authentication. That will not be covered in this tutorial but we highly encourage you to explore such APIs like Twitter or Spotify's API!
Check out the Random Advice section of the API. The request we will be making is GET and the url is what will be making the request to get the data.
Now look at the Slip Object section. This tells us what fields make up the object that will be returned in the reponse. We will use these fields to access the advice string so we can display it.
Now the fun part!! We will be making our request here.
IMPORTANT!!! Delete lines 1 and 9-14
If you refresh your broswer and click on the button, it should have a blank pop up. We want to populate this modal with our advice data from the API. The first thing we want to do is create a constant variable with the request url from the API.
At line 1 write: const url = 'https://api.adviceslip.com/advice'
This url will change depending on what information you're trying to get. For this project we want random advice but we could also get just one specific piece of advice. We would do this by calling https://api.adviceslip.com/advice/{slip_id} instead.
Next, we want to make our request. We do this by calling fetch(url). This method is part of another API, called Fetch API. Fetch provides a JavaScript interface for accessing and manipulating parts of the HTTP pipeline, such as requests and responses.
fetch() provides a logical way to get resources asynchronously across the network. It's API inception!!
Inside the getAdvice() function after confetti.start(); we want to write:
fetch(url)
        .then(response => response.json())
        .then(function(advice) {
            const adviceData = advice.slip.advice;
            document.getElementById('advice').innerHTML = adviceData;
        })
response => response.json() transforms the data into a JSON object and function(advice) handles displaying the data. We access the advice (string) of the JSON object by calling advice.slip.advice. This becomes text that we now can put inside our modal element, which we do by writing document.getElementById('advice').innerHTML = adviceData;
Finally refresh the page and watch the magic happen!
Congrats! You just made your first request to a RESTful API. There is soooo many more things to learn about REST, APIs, etc so if you want to do some self-learning checkout the following resources below!
- List of fun and fresh APIs
- Even more public APIs
- Rick & Morty API
- Tutorial on using JQuery & AJAX to make API requests <-- the tutorial shows you how to make the other requests we didn't cover today!
- Tutorial using a Studio Ghibli API and plain Javascript
- Quick JSON Tutorial


