With Auto-Photoshop-StableDiffusion-Plugin, you can directly use the capabilities of Automatic1111 Stable Diffusion in Photoshop without switching between programs. This allows you to easily use Stable Diffusion AI in a familiar environment. You can edit your Stable Diffusion image with all your favorite tools and save it right in Photoshop.
By supporting us on Patreon, you’ll help us continue to develop and improve the Auto-Photoshop-StableDiffusion-Plugin, making it even easier for you to use Stable Diffusion AI in a familiar environment. As a supporter, you’ll have the opportunity to provide feedback and suggestions for future development. Plus, you’ll get early access to new features and tutorials, as well as exclusive art tutorials and tips from a professional artist. We’re passionate about making AI approachable to artists and with your help, we can continue to do just that.
💎 Diamond:
 |
|
|---|---|
| Ronny Khalil | zachary |
🥇 Gold:
| Alex |
🥈 Silver:
| Amith Thomas | Olivier Lefebvre | xiao yuan | Ezra Blake |
🥉 Copper:
| Sebastian Karbowniczek | Arthur Liu |
Use method 1 or 2 if you are an Artist use method 3 if you are a Developer/Programmer
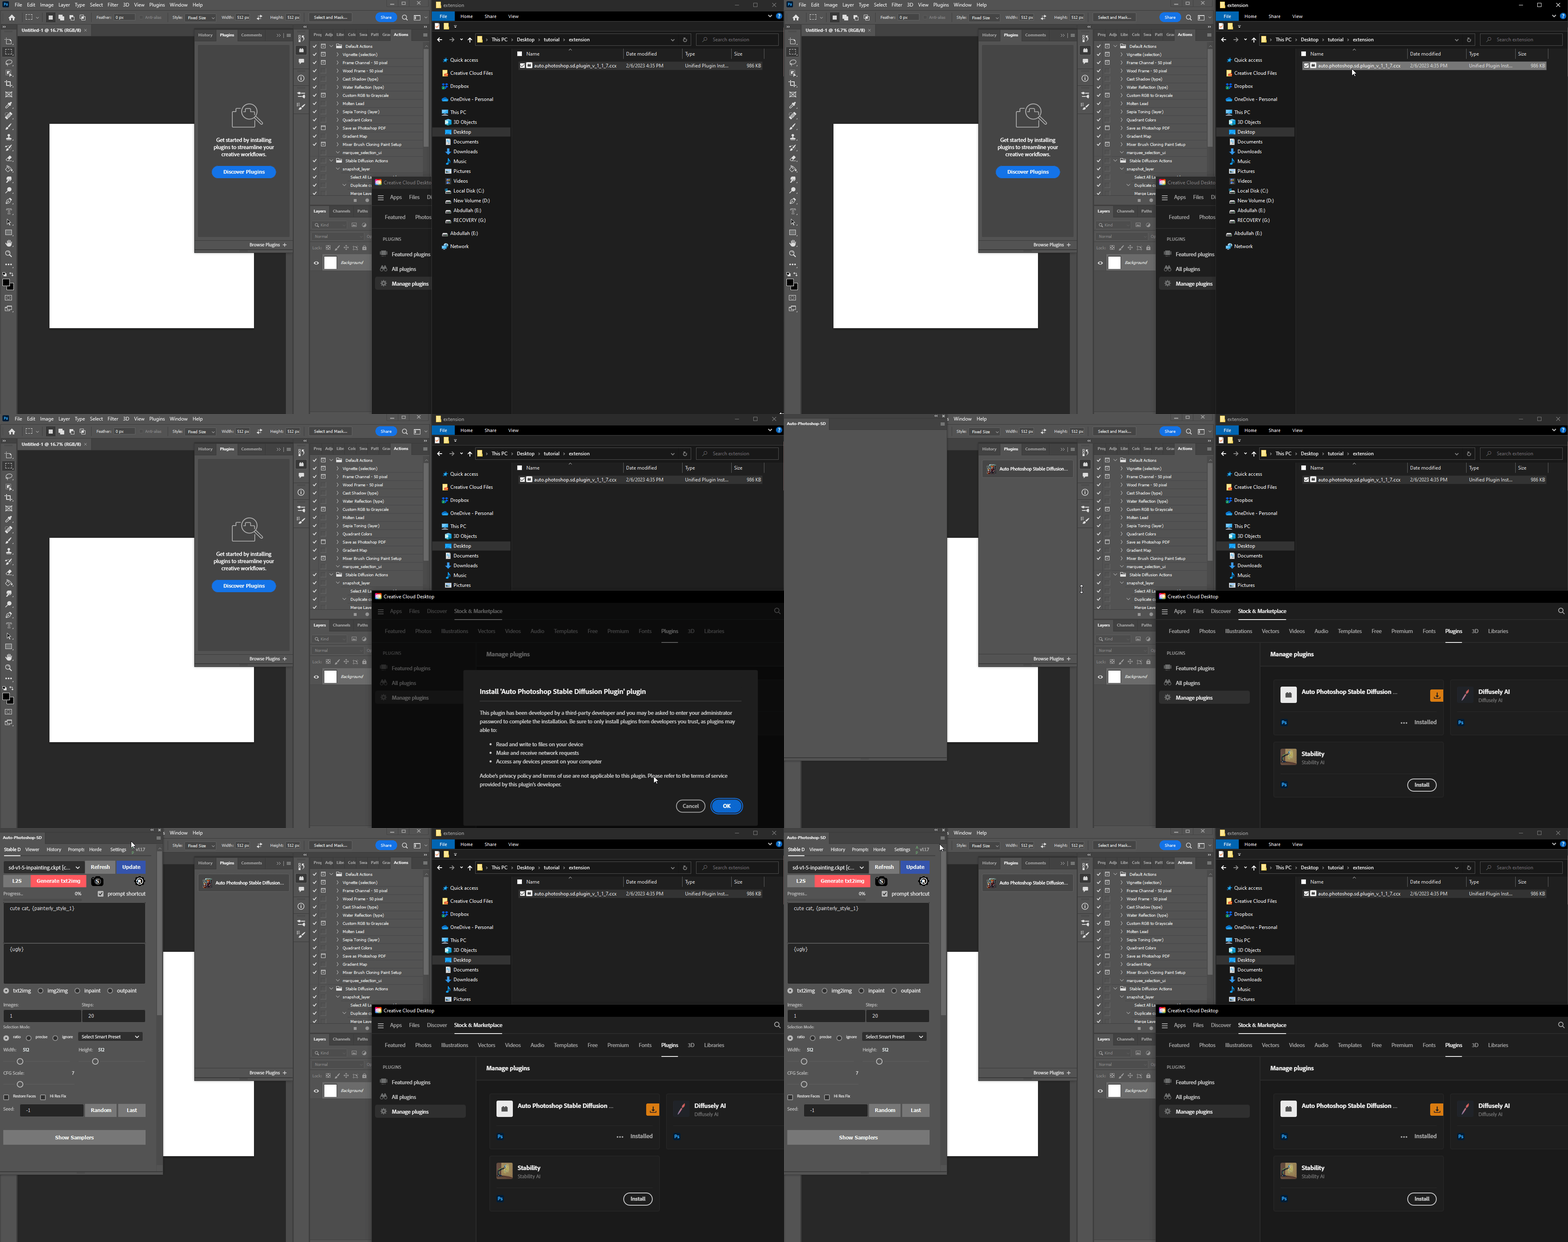
- Download the .ccx file
- run the ccx file . that's all. you will be able to use all of stable diffusion modes (txt2img, img2img, inpainting and outpainting), check the tutorials section to master the tool.
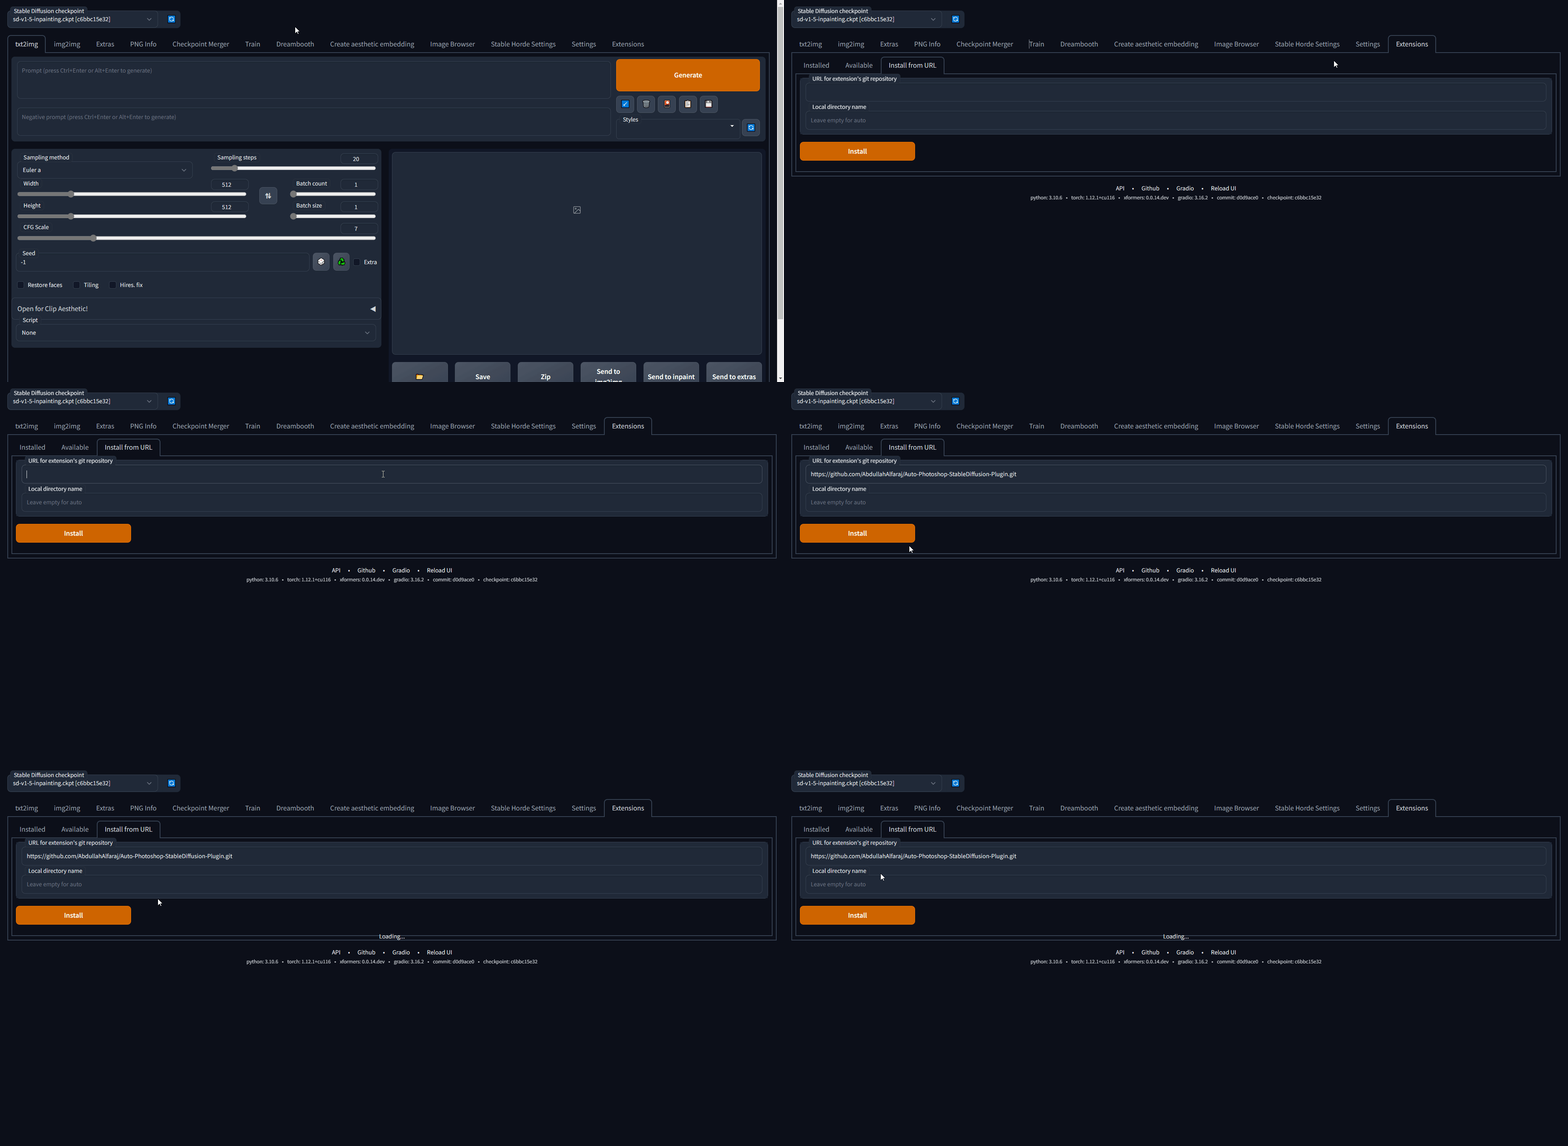
- (optional step) Install the Auto-Photoshop-SD Extension from Automatic1111. the extension will allow you to use the smart masking and image search features
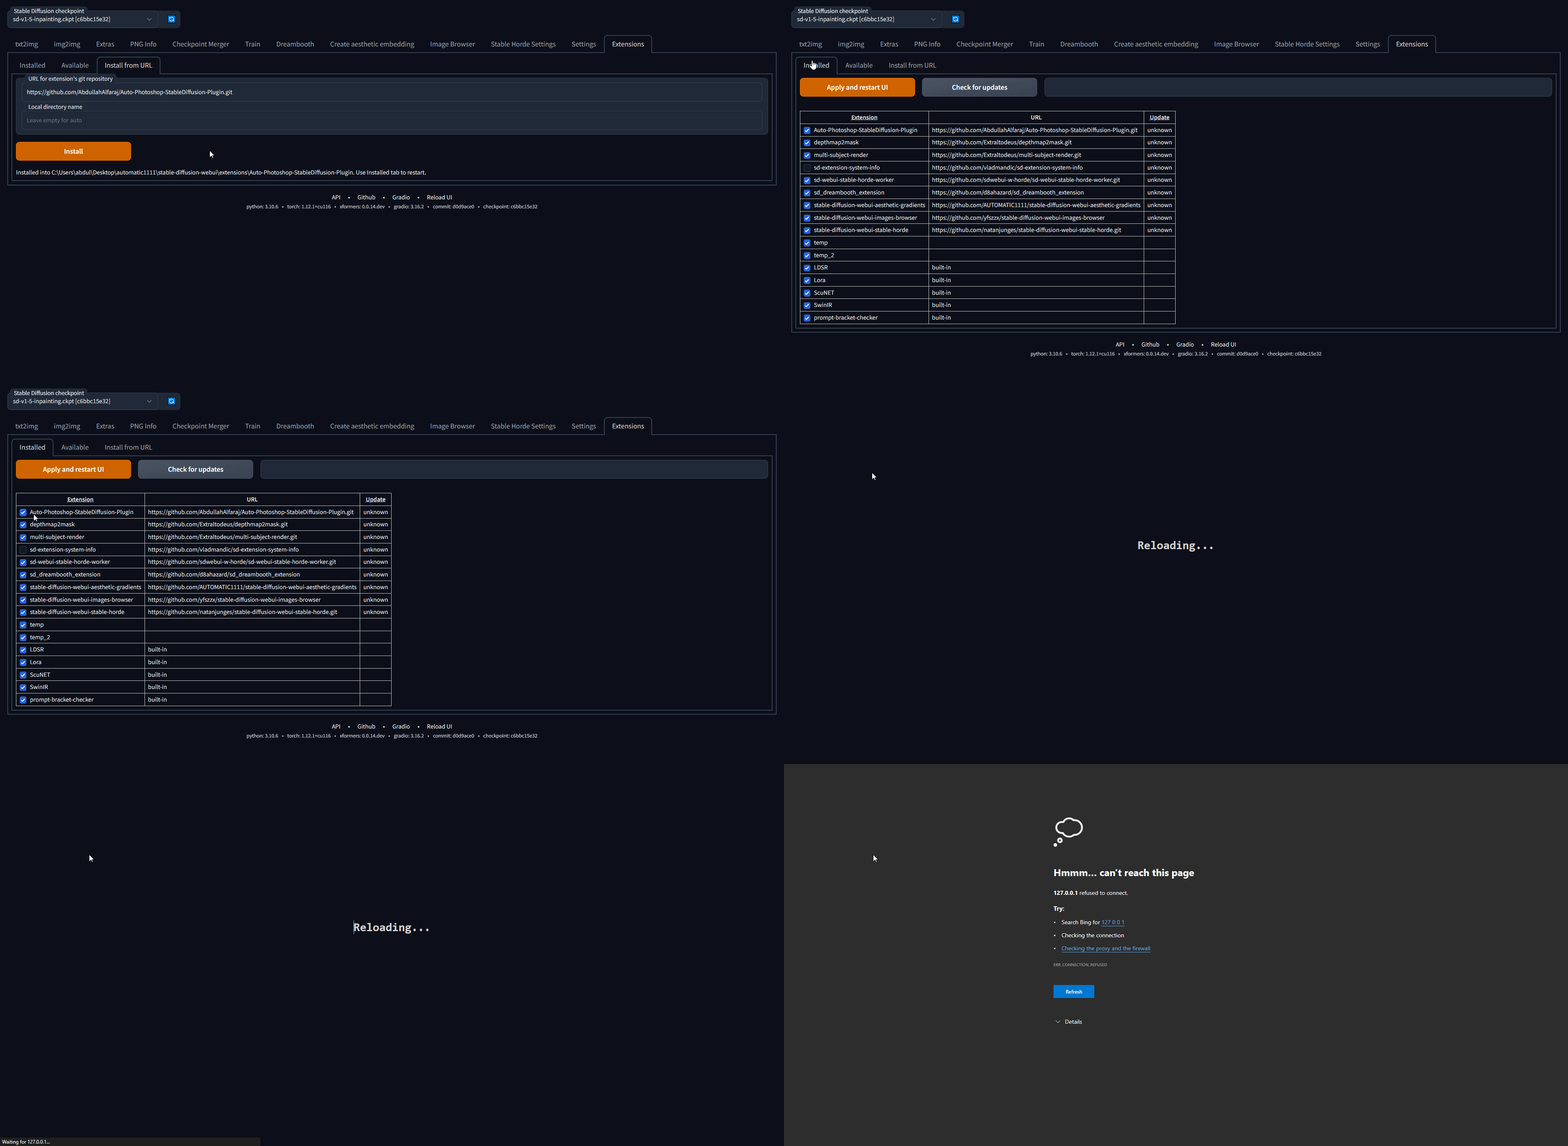
- c) Make sure the Auto-Photoshop plugin is listed, then click "Apply and Restart UI"
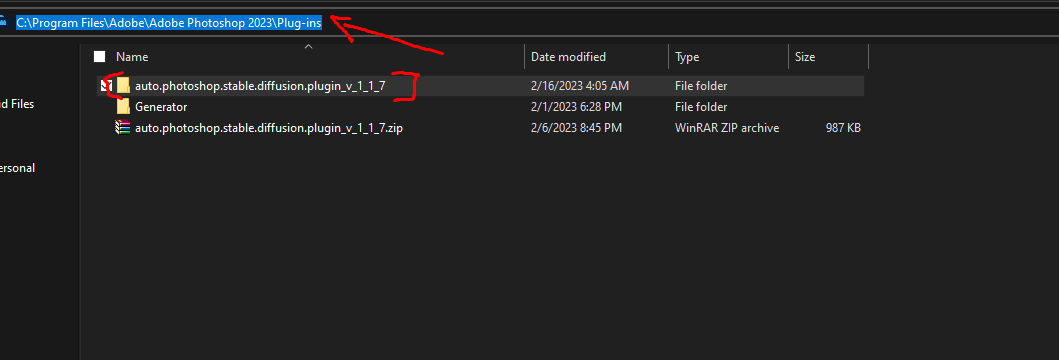
- Download the .zip file
- Unzip it in a folder with the same name
- move the unzipped folder to the Photoshop Plugin folder
- (optional step) Install the Auto-Photoshop-SD Extension from Automatic1111. the extension will allow you to use the smart masking and image search features
For artists we recommend you use the one click installer. If you are a developer Watch the any of these videos or follow the instruction bellow.
For artists we recommend you use the one click installer
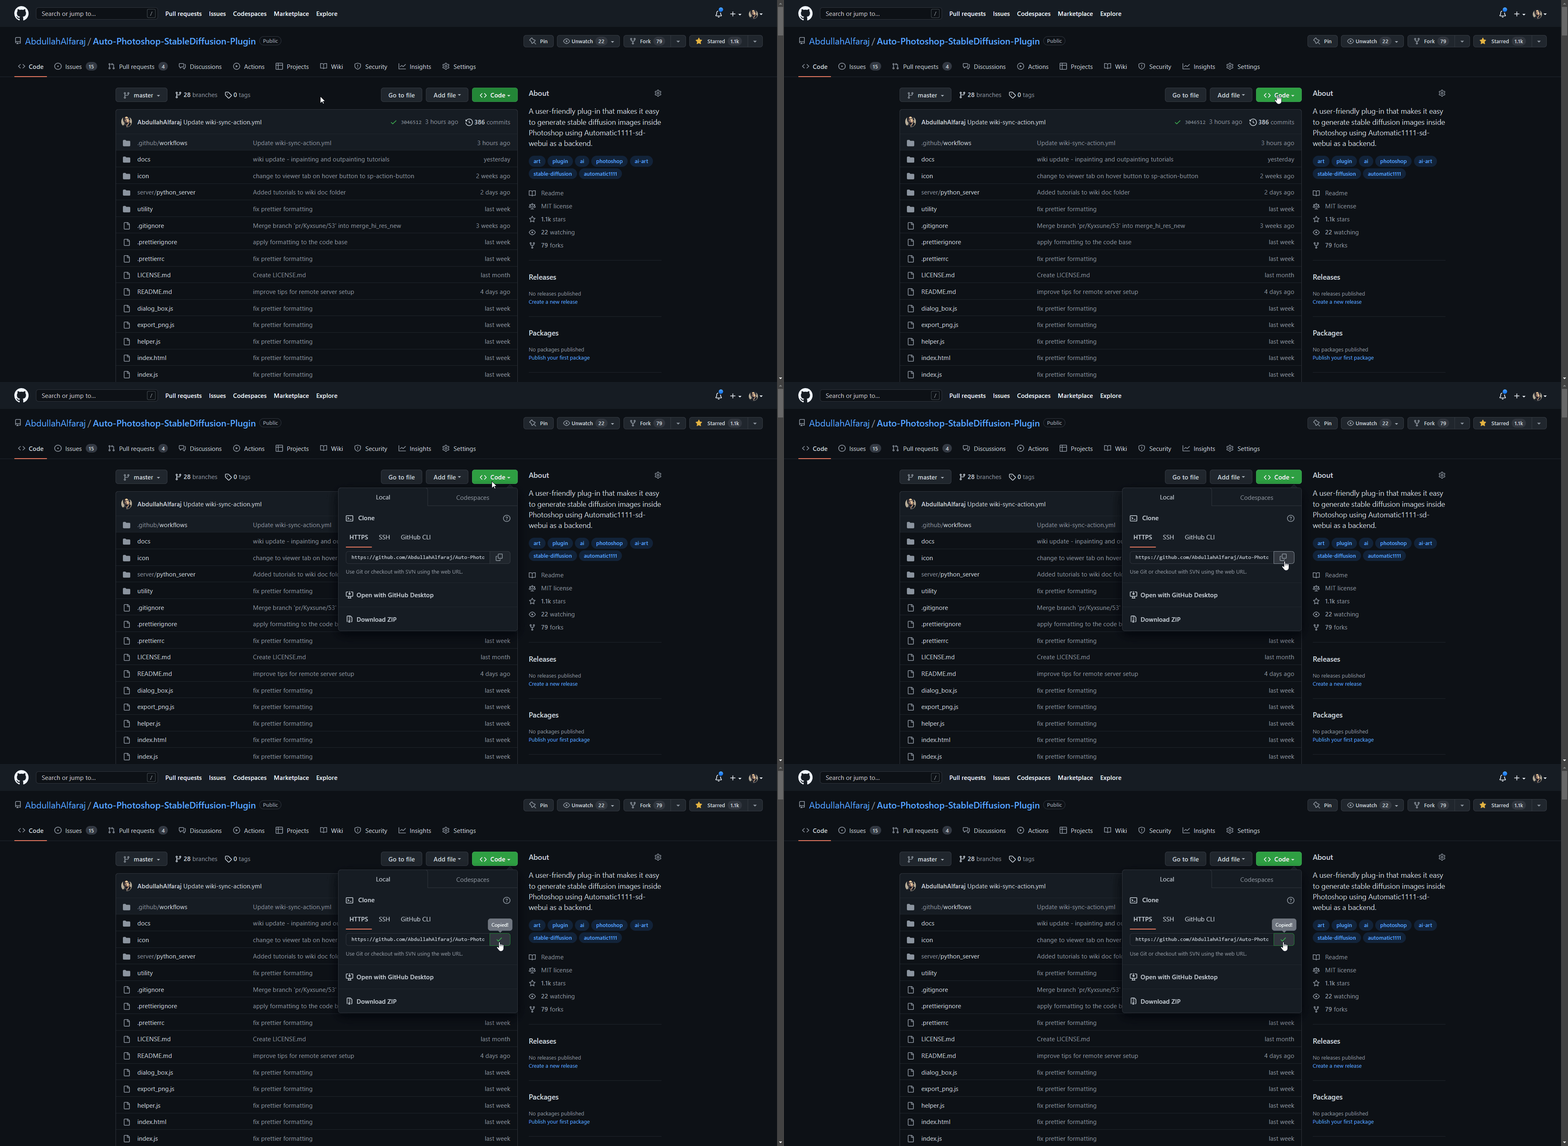
- download the plugin:
git clone https://github.com/AbdullahAlfaraj/Auto-Photoshop-StableDiffusion-Plugin.git
- run "start_server.bat" inside "Auto-Photoshop-StableDiffusion-Plugin" directory
- go to where you have automatic1111 installed. Edit the "webui-user.bat" in automatic1111 change this line
set COMMANDLINE_ARGS=
to
set COMMANDLINE_ARGS= --api
that will allow the plugin to communicate with the automatic1111 project. After saving close the "webui-user.bat" file and run it normally.
- run photoshop. go to edit -> prefrences -> plugins
- make sure you check "Enable Developer Mode" checkbox
- install "Adobe UXP Developer Tool" from here Installation (adobe.com) this tool will add the plugin into photoshop
- run Adobe UXP Developer Tool and click on "Add Plugin" button in the top right. Navigate to where you have "Auto-Photoshop-StableDiffusion-Plugin" folder and open "manifest.json"
- select the plugin and click on Actions -> Load Selected that's it.
The remote webui must also have --api set in COMMANDLINE_ARGS. You can check if api access is enabled by appending "/docs#" to the end of the url. If the documentation includes /sdapi/v1/samplers then api access is enabled.
- download the plugin:
git clone https://github.com/AbdullahAlfaraj/Auto-Photoshop-StableDiffusion-Plugin.git
- edit start_server.bat (or start_server.sh if on linux) to point to the remote installation of Automatic1111
- run "start_server.bat" inside "Auto-Photoshop-StableDiffusion-Plugin" directory
- run photoshop. go to edit -> prefrences -> plugins
- make sure you check "Enable Developer Mode" checkbox
- install "Adobe UXP Developer Tool" from here Installation (adobe.com) this tool will add the plugin into photoshop
- run Adobe UXP Developer Tool and click on "Add Plugin" button in the top right. Navigate to where you have "Auto-Photoshop-StableDiffusion-Plugin" folder and open "manifest.json"
- select the plugin and click on Actions -> Load Selected that's it.
The minimum Photoshop version that the plugin supports is Photoshop v24
There are a few issues that can result in this error, please follow the instructions for the corresponding error message in the UDT logs
This error occurs when Photoshop is not started before the plugin is attempted to be loaded. Simply start photoshop then restart UXP and load the plugin
This error occurs due to mismatched expectations between the plugin and the Automatic1111 backend. It can be solved by both updating the version of the Automatic111 backend to the latest verion, and making sure "Save text information about generation parameters as chunks to png files" setting is enabled within the UI.
This error occurs when the remote server does not have the api enabled. You can verify this by attempting to go to the URL you access the webui at and appending "/docs#" to the end of the url. If you have permissions, make relaunch the remote instance with the "--api" flag.
we provide two options to use the auto-photoshp plugin without GPU.
This is an awesome free crowdsourced distributed cluster of Stable Diffusion workers. If you like this service, consider joining the horde yourself! the horde is enabled completely by the generosity of volunteers so make sure you don't overwhelm the service and help join the cause if you can. read more on their github page
we link to this Colab directly inside plugin find it in the settings tab. you only need to run it. no need to change any of the settings. copy the gradio.live url the colab will generate and paste it into sd url field in the settings tab.

