Insanelymac GUIDE: https://www.insanelymac.com/forum/topic/345573-guide-acer-aspire-v-15-v5-591g-from-macos-sierra-10126-to-big-sur-11-windows-10
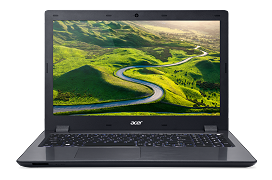
Acer Aspire V5-591G-XXXX
macOS Install Instructions
For specs, notes, other informations see the linked Insanelymac guide
You have two folders inside this git:
- bootpack: That is needed for the Installer USB and for the system EFI after a finished installation.
- postinstall: Things you need to setup after a finished installation for a working combo jack
- Create a macOS USB Installer with any method you now.
- For creating Big Sur Installer USB on Windows, use my guide: [GUIDE] Creating Clover macOS Big Sur Installer USB on Windows
- On macOS you can download the macOS Installer from App Store, or with gibMacOS, and create the USB Installer with the official "createinstallmedia" method
- For Sierra and older you need to use the official .dmg from Apple’s website.
- Mount your USB’s EFI and paste my CLOVER and BOOT folder from my bootpack
folder to it
- On Windows you can mount your USB’s EFI with MiniTool Partition Wizard
- Open MiniTool, select your USB drive’s EFI partition, right click, select “Change Letter”, Click OK, Apply, OK
- After that you can manage the EFI using Explorer++ in administrator mode
- On macOS you can use Terminal to mount, or use EFI Mountain Snow.app to mount your USB EFI
- If there is no EFI folder inside the EFI partition you need to create that first
- On Windows you can mount your USB’s EFI with MiniTool Partition Wizard
Example Structure:
- After finished, next step is to boot the Installer USB
- I suggest to boot with config_debug.plist because if anything will go wrong you’ll see the logs of what causing that.
- In Clover press NUM 0 or select “Options” below the partitions, select “Configs”, then select “config_debug.plist”
- Install macOS
- Don’t forget to boot from your USB after restarts
- If you install Big Sur boot from Preboot only!
- Don’t forget to boot from your USB after restarts
- After installing you need to mount your USB’s EFI and your System Drive’s EFI then copy the CLOVER and BOOT folder to your System Drive’s EFI
- (again, if there is no EFI folder, you need to create it first)
- Unmount and remove your USB Installer and restart your system
- Open up your config.plist with Clover Configurator.app, on SMBIOS tab, generate new SMBIOS, then you can log-in to iServices now
- For working audio and wifi (if you have BCM94352Z), you need to install some kexts after the Installation
- For working Combo Jack audio, you need to install CodecCommander and
ALCPlugFix
- Go to “postinstall/ALCPlugFix” folder, install CodecCommander.kext to
“/Library/Extensions/”, then install ALCPlugFix with install.sh
- (navigate to the “postinstall/ALCPlugFix” folder with Terminal, then open install.sh with sudo ./install.sh)
- After installing, the system will ask you if it’s okay to run ALCPlugFix, Allow it
- If there is no Allow or Open (Unidentified developer) option navigate to the installed “ALCPlugFix” file in Finder, Right Click and Open it that way first, you can allow it then. Same for “hda-verb” (you may need to open it twice)
- Go to “postinstall/ALCPlugFix” folder, install CodecCommander.kext to
“/Library/Extensions/”, then install ALCPlugFix with install.sh
- For WiFi if you have BCM94352Z you need to install AirportBrcmFixup, BrcmBluetoothInjector, BrcmFirmwareData, BrcmPatchRAM3 kexts to “CLOVER/kexts/Other”, they’re disabled in „CLOVER/kexts/Off”
- If everything is installed, you need to rebuild permissions & kextcache, and restart your system. Hackintool is a good application for this.
That’s it!
Happy Hackintoshing!
2021
Insanelymac - @kushwavez
GitHub - kushwavez
Reddit - u/kushwavez
Hungary 🇭🇺

