-
Notifications
You must be signed in to change notification settings - Fork 0
Platforms ‐ EN
The documentation, drawings, and circuit diagrams are available under the CC BY-SA-4.0 license.
The fan speed control project can be implemented on several platforms, and I will implement it over time. The idea for this was given by RealWorld, where the challenge is to implement the same web application using multiple technologies based on single specification.
We will not delve into the individual platforms deeply, I would outline things from the point of view of the project. However, I will try to fill up the text with links so that those who are still thirsty for knowledge can drink it.
Arduino is an open source microcontroller platform. The hardware products and descriptions are licensed under CC BY-SA 2.5, while the software and source codes are LGPL or GPL. Very well documented. It is a true open source hardware that we can be built even by ourselves at home and it will be compatible with all the code written for it. Open source code is important. Since 2005, despite minor internal legal disputes, its popularity has remained unbroken. My personal opinion is that anyone who wants to start a microcontroller project or just learn about electronics should start their adventures with an Arduino UNO or [NANO](https:// docs.arduino.cc/hardware/nano).
The programs must be written in the C-like language, either in the old Arduino IDE 1 or in the new Arduino IDE 2 environment. Long gone are the days when you have to set up the microcontroller in assembly language and then write the most efficient program. Fortunately for us, the Arduino environment and thr bootloader removes some of these chores for us. Nowadays, it is more important that the development happens quickly than that we use the very last clock cycle efficiently. This is still an option, we are not limited.
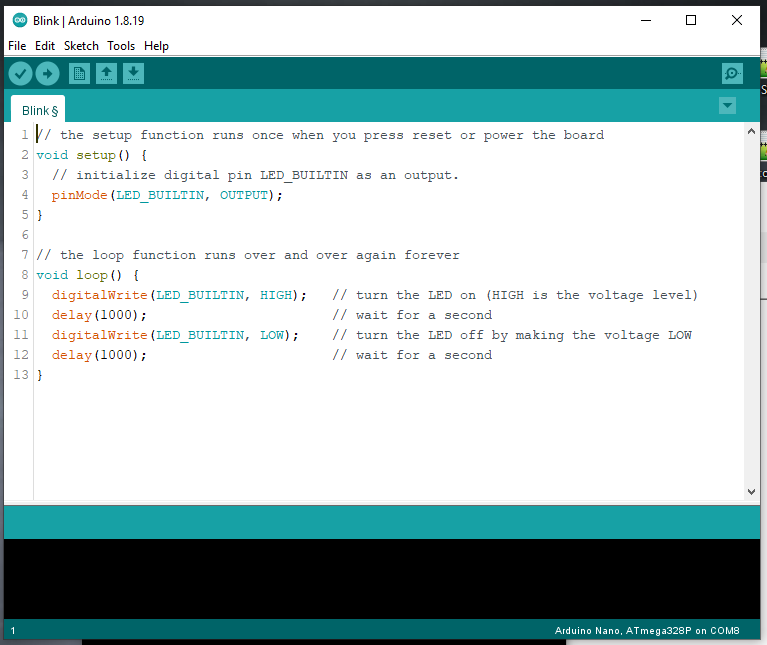
The first step to try is microcontrollers' Hello World! program, the Blinky!. In Arduino lingo a program is referred to as sketch. You can find the Blink sketch already prepared in File > Examples. If it was successfully translated and uploaded, one of the LEDs on our selected Arduino board will flash with a 50% duty cycle in a 2-second time window.

Or choose another one from the many built-in examples. The page I visit the most is the language reference page, where all functions, variable types, and other language structures are documented. If I write a program, I would define 5 parts:
- Header - the location of the used license and short documentation, even concerning the hardware. Of course
/* */between block comments. - Calling libraries and location of global variables - if you want to use external libraries by others, you can
#includethem. We can also name our global variables and Nano's pins here. A variable can typically be:- bool for true-false data types
- byte for integers stored in 8 bits in the range 0 - 255.
- float or double for floating-point numbers stored on 32 bits, there is no difference between the two types on an ATmega microcontroller.
- short, int, long - the first two are 16 bits, while the last stores integers on 32 bits. Please note that our 8-bit microcontroller can only perform operations with these numbers during several clock cycles.
- char for ASCII characters, which can also be used as integers.
- Serial - a class for storing character strings, with many functions that make our life easier. In return, it eats resources.
- setup() - this function is required and is executed once on every startup. Here we adjust the settings of the inputs and outputs, for example, or start the communication over Serial port.
- Our own functions - I put my functions here, or separate them from the loop() section. I can even reuse these in other projects, so I try to comment them well.
-
loop() - this is a
while(1) {}function that always runs while the microcontroller is under voltage. Here we write the main part of our program, and sometimes things go messy.
It is not necessary to follow this advice, there can be many good but different solutions. This worked for me.
My other projects with Arduino:
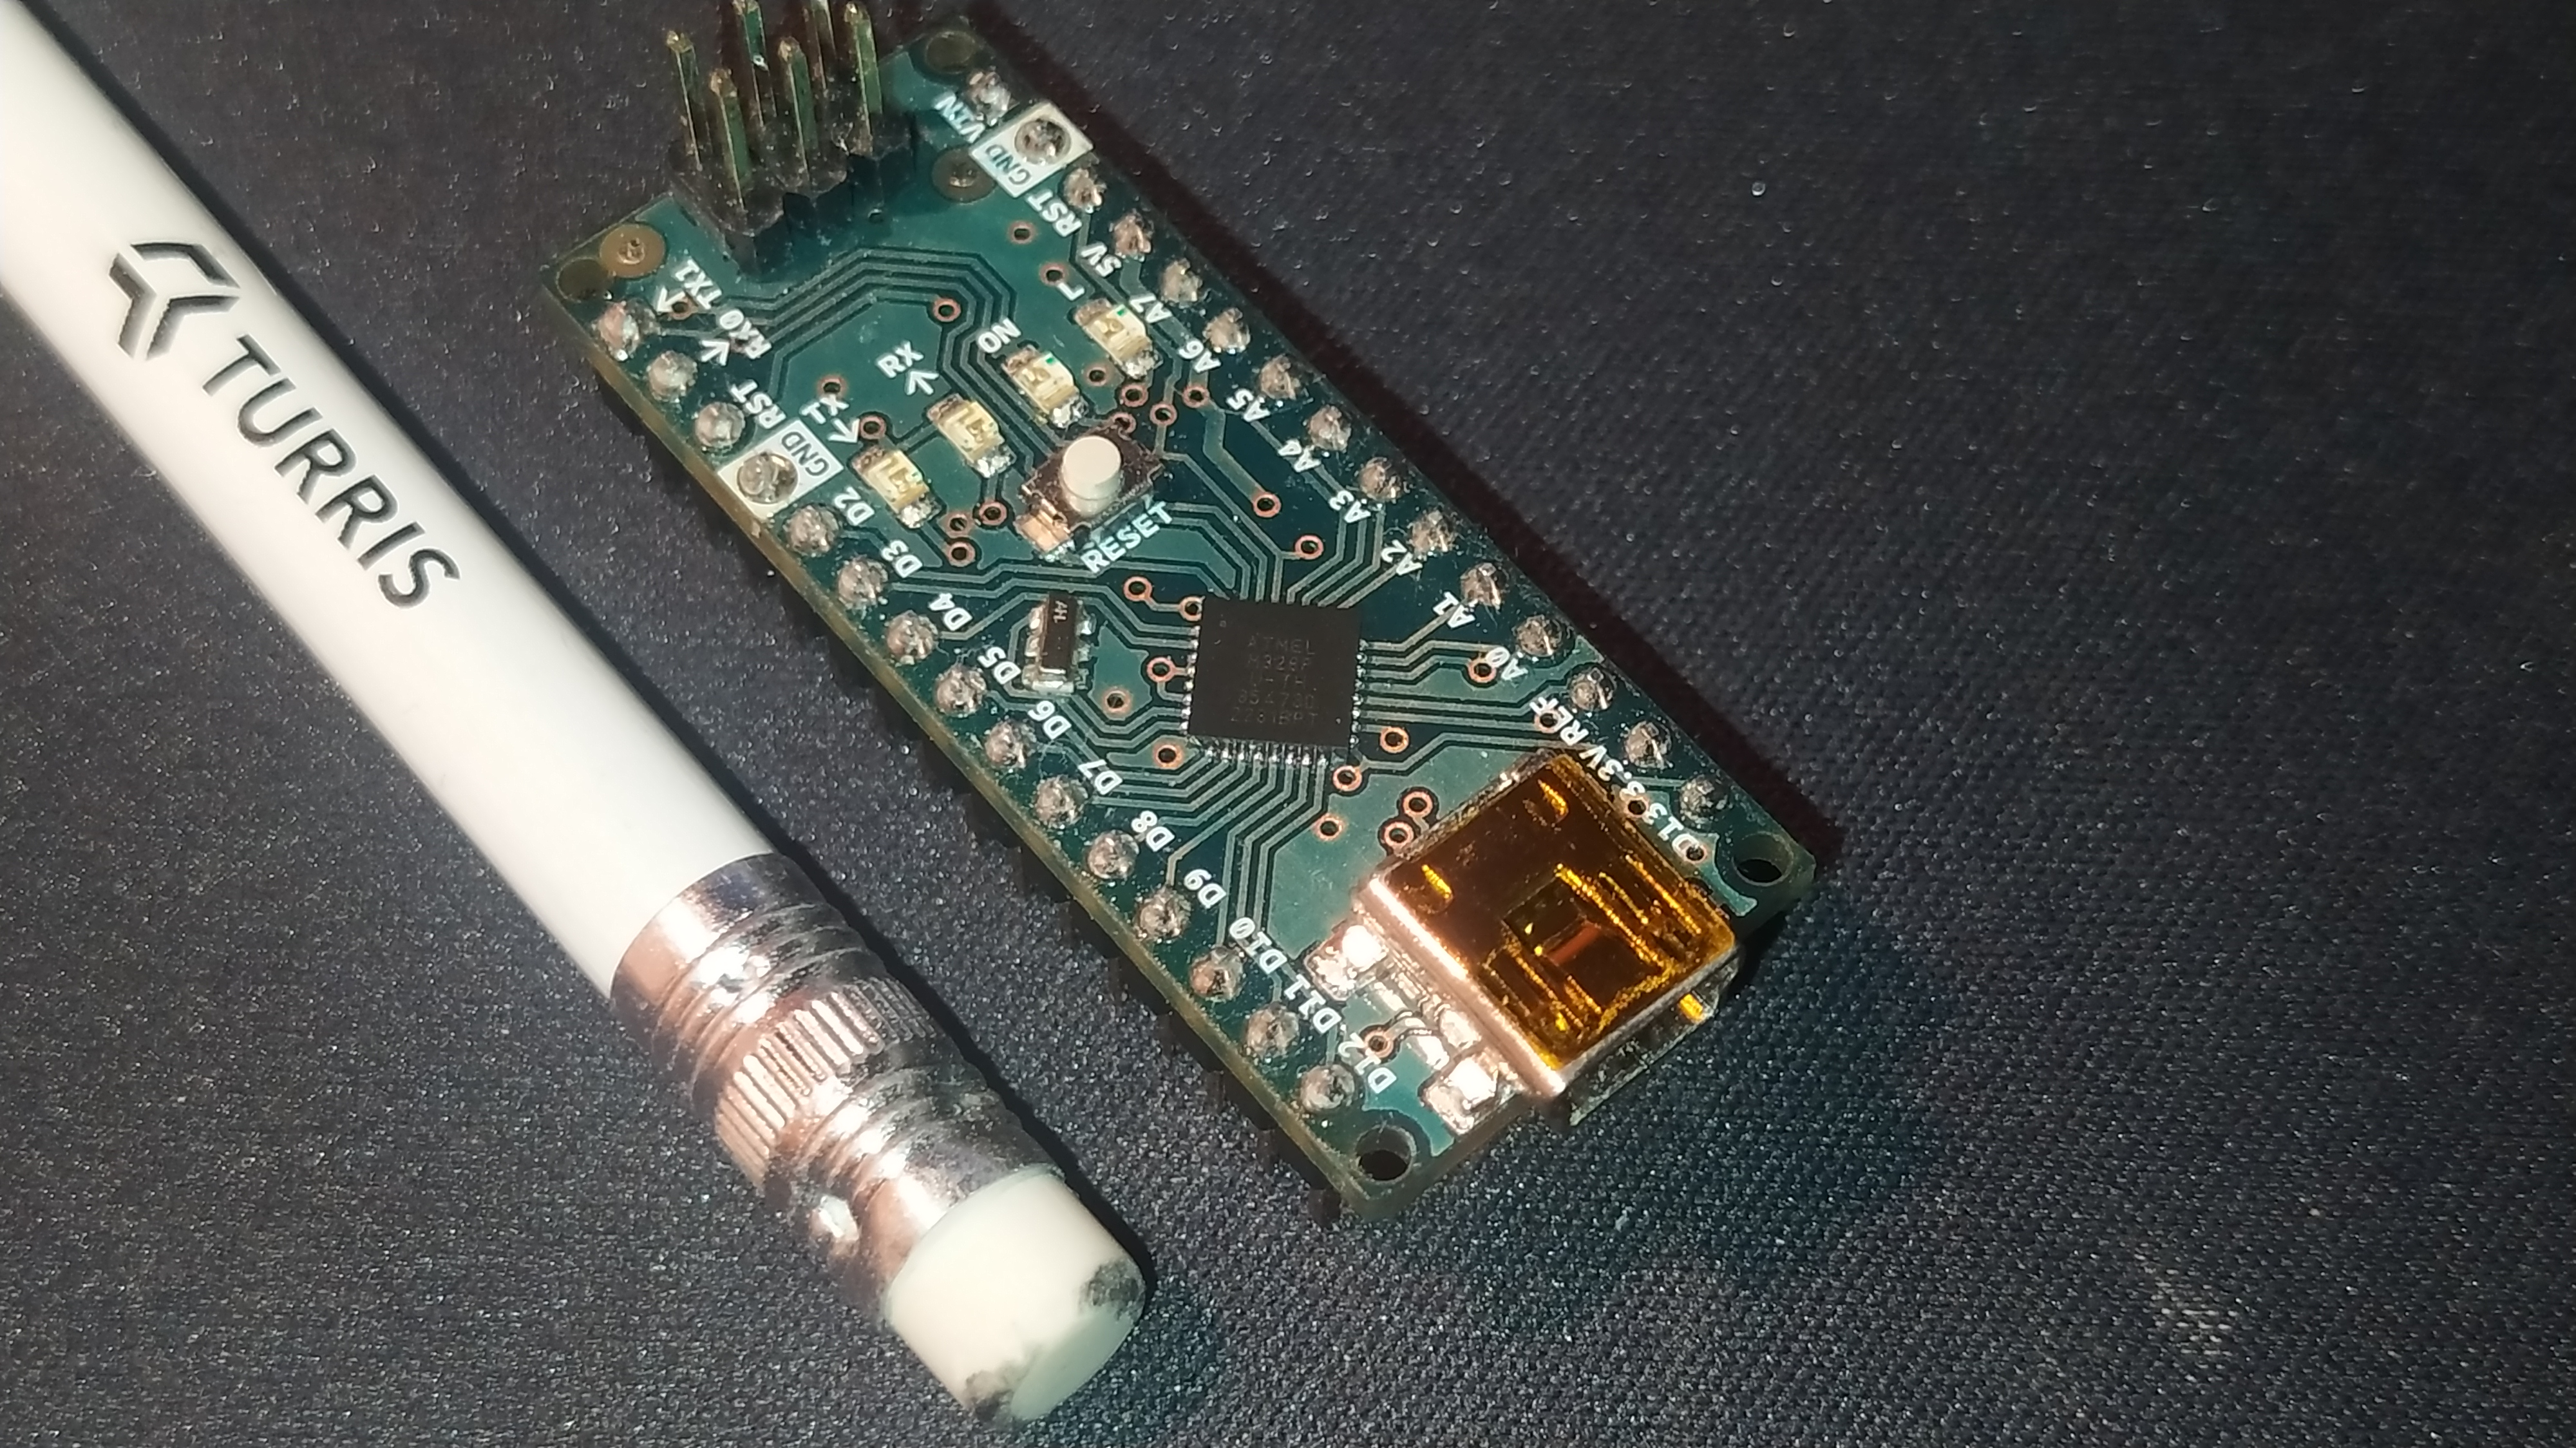
I choose the Arduino Nano board for this project because of its small size and convenient pin layout. All of these make it easier to integrate into products. The dimensions are compared to a regular pencil. Love the Turris team, they make schematics and source code available.

The soul of the classic Arduino boards is an ATmega328P 8-bit microcontroller that runs with a 16 MHz clock signal. I2C, SPI and hardware Serial port ( I mean it has an unbranched port).
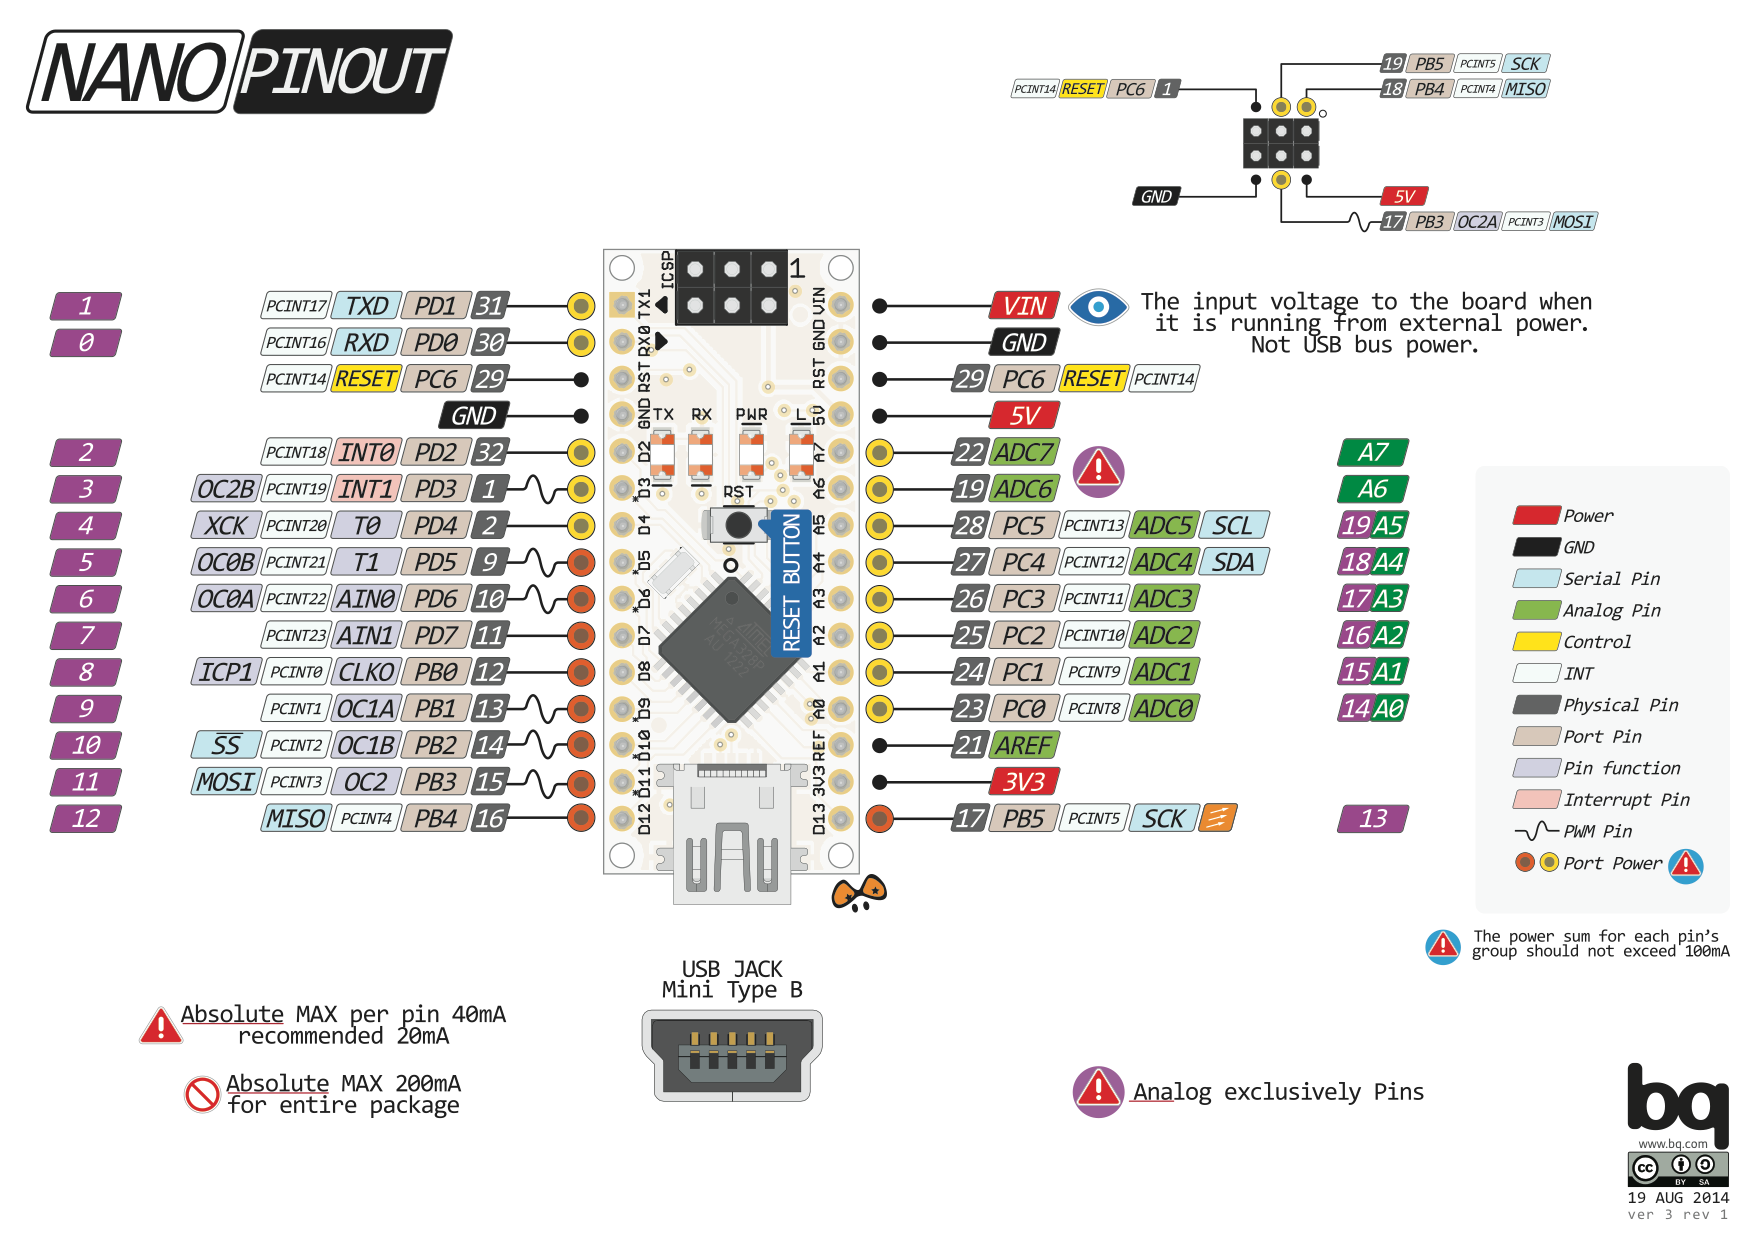
We can establish a connection with the outside world using 14 digital pins, of which 6 are PWM capable (they are connected in pairs to one of the three Timers) and 2 are sensitive to external interruptions datasheet. With an additional 8 pins we can perform analog voltage measurements, with the built-in 10-bit resolution A/D converter. Both the digital and analog pins operate in the 0 - +5 V range and can be loaded to a maximum of 40 mA, but it is better to keep the current sourcing or sinking at or below 20 mA.

The Arduino Nano can be supplied from a micro USB, but we can also connect an external +12 V power supply to the VIN and GND pins, with the correct polarity, of course. The Arduino Nano can even be powered from both sources at the same time. To operate at +12 V, the constant voltage regulator LM1117MPX-5.0 provides the +5 V voltage.
I plan to try Nano Every in the future. It is built on a newer microcontroller, the ATmega4809. In terms of hardware, it is largely the same as the Nano, while software support at the external library support level may not be on top in all cases. I would like to mention one important difference, that instead of 6, only 5 PWM capable outputs are available.
UNO was not chosen because it is much more difficult to build it into a product. Learning and playing is fine, maybe even easier than using a Nano. I would like to point out a few differences which are caused by the different packaging of the ATmega328P microcontroller:
- It can be easily replaced, so it can even be repaired with little effort.
- There are only 6 analog inputs, not the 8 that we have on the Nano
Previously, Leonardo was my favourite because of the more powerful ATmega32u4 microcontroller. 7 PWM channels, 12 ADC inputs, 5 external interrupts but on the wrong pins. I would like to point out two more things:
- There is Timer4, it is also externally accessible and can be driven up to 96 MHz. ref
- There is no hardware serial port, so we have to take care of calling the
SerialEvent()function ourselves.
For those who want to learn in video form:
- GreatScott! - Arduino Basics 101: Hardware Overview, Fundamental Code Commands
- GreatScott! - Arduino Basics 102: Control Structures, Variables, Interrupts
- GreatScott! - Arduino Basics 103: Library, Port Manipulation, Bit Math, Faster PWM/ADC
- EEVblog #45 - Arduino, PICAXE, and idiot assembler programmers