-
Notifications
You must be signed in to change notification settings - Fork 15
Home
So, you want to develop a module for Companion? Welcome! This wiki describes what you need to know and do to make a beautiful module being able to control your favorite gear with Companion.
As of Companion 3.0, you no longer need a full development environment to make modules. You only need a full environment if you wish to edit the code at the core of Companion. You do however still need some developer tools
Companion is written in Javascript and uses the node.js runtime. That means you should be at least a little bit familiar with Javascript. Companion, Javascript and Node.js are platform independent, so you can develop on Windows, macOS or Linux and the code you write will be able to run on Windows, macOS and Linux.
There are many ways of doing this. We recommend using a version manager, to allow for easily updating and switching between versions.
In the past, we recommended using n, but that requires a version node.js to be installed first.
Our recommendation is to use fnm It is fast and cross-platform. You are free to install any other way you wish, but you will need to figure out the correct commands or ensure you have the right version at each point.
Once you have installed fnm execute the following in a terminal, to install node.js v18 and make it be the default.
fnm install 18
fnm use 18
fnm default 18
corepack enable
To edit the source code or write new code you can use any text editor you like, but there are many editors which are made especially for developing computer code or even better especially for JavaScript. If you have no idea you should try the Visual Studio Code editor.
You will also need to install git, which is what we use with to manage, upload and download the sourcecode with GitHub. On macos this available from homebrew.
If you have never used git or github before, have a read of our Git crashcourse.
TODO - we should recommend a free git gui tool
It is now possible to develop modules against any standard release or beta build of Companion!
You can download and install a recent version from the website
- Create a
companion-module-devfolder somewhere on your computer. You can call it whatever you like. - If you are working on an existing module, clone it inside this folder using your prefered git tool.
- If you are making a new module, then clone the template module, available in Javascript or TypeScript, to an appropriately named folder inside of
companion-module-dev
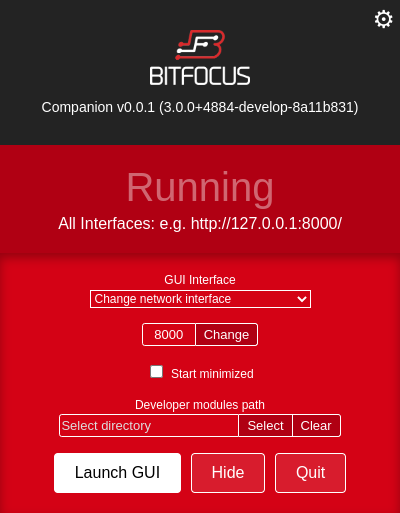
Once you have the companion launcher open, click the cog in the top right. This will reveal a 'Developer modules path' field. Use this to select the companion-module-dev folder you created earlier.

Companion will load in any modules it finds from that folder when starting, and will restart itself whenever a file inside that folder is changed.
You are now ready to start developing your module.
You should notice that whenever you save a file inside your companion-module-dev folder, companion will restart itself.
If it does not, or you are having issues getting your module to load in then please reach out on slack and we will be happy to assist you in getting started.
You should start at Module development 101
Getting Started
- Home
- Module development 101
- Git crashcourse
- Upgrading a module built for Companion 2.x
- Companion module library versioning
- Releasing your module
Development
- File Structure
- manifest.json
- Logging
- Module packaging
- Actions
- Feedbacks
- Presets
- Input Field Types
- Module configuration
- Upgrade scripts
- Variables
Code quality
Advanced functionality