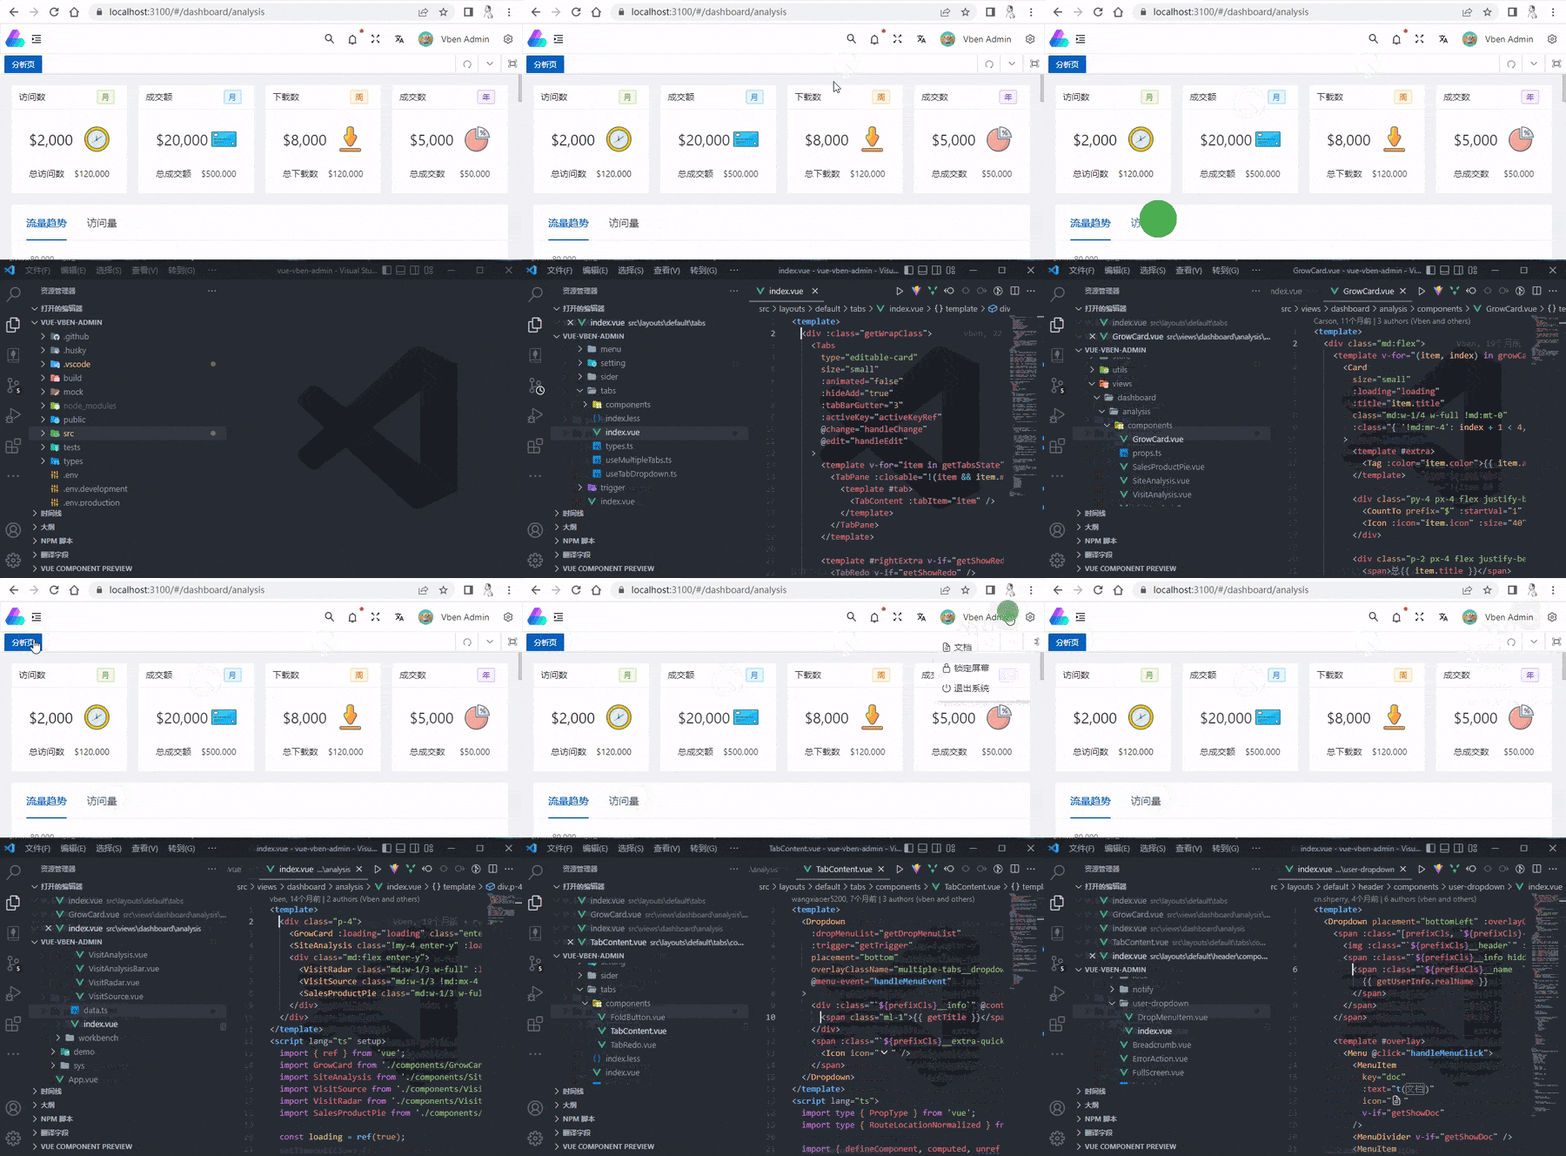
接手一个项目开发网页时要修改某部分,要么靠搜索,要么靠记忆找到对应代码,过程极为浪费时间。
在项目里用了 dom-to-code 插件后,对准想要修改的 dom 部分 ctrl + 按下鼠标滚轮,就会在编辑器打开对应的 dom 元素源码。
(使用 mac 触摸板的用户可以ctrl + 触摸板右键)
支持 vite/webpack + vue2/vue3/react
支持 vscode/webstorm
别人搜索你直接跳,别人加班你摸鱼。
npm i dom-to-codeinterface Options {
/**
* 插件模式,默认是 vue
*/
mode: 'vue' | 'react'
/**
* 引入的文件规则,vue 默认是 jsx、tsx、vue 文件,react 默认是 jsx、tsx 文件
*/
include?: string | RegExp | string[] | RegExp[] | null
/**
* 排除的文件规则,默认是 node_modules 文件
*/
exclude?: string | RegExp | string[] | RegExp[] | null
}首先在项目入口文件(比如 index 文件或 main 文件)中引入插件初始化
import { initDomToCode } from 'dom-to-code'

// 初始化 dom-to-code
// initDomToCode()

// 推荐:只在非生产环境初始化
process.env.NODE_ENV !== 'production' && initDomToCode()配置打包器,dom-to-code 支持 vite 和 webpack 打包器,以下是 vite 、vue-cli、webpack 里的示例(推荐只在非生产环境配置)
Vite
// vite.config.ts
import { defineConfig } from 'vite'
import vue3 from '@vitejs/plugin-vue'
import { domToCodePlugin } from 'dom-to-code/vite'

export default defineConfig({
  plugins: [
    vue3(),
    process.env.NODE_ENV !== 'production'
      ? domToCodePlugin({
          mode: 'vue',
        })
      : undefined,
  ].filter((f) => !!f)
})
Example: playgrounds/vite-vue3
Webpack
// webpack.config.js
const { domToCodePlugin } = require('dom-to-code/webpack')
module.exports = {
  /* ... */
  plugins: [
    domToCodePlugin({
      mode: 'vue'
    })
  ]
}
Vue CLI
// vue.config.js
const { domToCodePlugin, domToCodeDevServerV4, domToCodeDevServerV5 } = require('dom-to-code/webpack')

module.exports = {
  devServer: {
    // 如果你的 package.json 里的 @vue/cli-service 版本 <= 4.x.x,则使用 domToCodeDevServerV4
    // ...domToCodeDevServerV4,

    // 如果你的 package.json 里的 @vue/cli-service 版本 >= 5.x.x,则使用 domToCodeDevServerV5
    ...domToCodeDevServerV5
  },
  configureWebpack: {
    plugins: [
      domToCodePlugin({
        mode: 'vue'
      })
    ]
  }
  // 如果你使用的是chainWebpack
  // chainWebpack: (config) => {
  //   config
  //     .plugin('domToCodePlugin')
  //     .use(domToCodePlugin())
  // }
}
Example: playgrounds/webpack5-vue2
Create-react-app + react-app-rewired
// config-overrides.js
const { domToCodePlugin, domToCodeDevServerV4, domToCodeDevServerV5 } = require('dom-to-code/webpack')

module.exports = {
  webpack(config) {
    config.plugins.push(domToCodePlugin({
      mode: 'react',
    }))
    return config
  },
  devServer(configFunction) {
    return function (proxy, allowedHost) {
      const config = configFunction(proxy, allowedHost)

      // 如果你的 package.json 里的 react-scripts 版本 <= 4.x.x,则使用 domToCodeDevServerV4
      // Object.assign(config, domToCodeDevServerV4)

      // 如果你的 package.json 里的 react-scripts 版本 >= 5.x.x,则使用 domToCodeDevServerV5
      Object.assign(config, domToCodeDevServerV5)

      return config
    }
  },
}
Example: playgrounds/webpack5-react
查看 文档指南 📒(即将上线...)
如果无法跳转编辑器,请确保你的编辑器已经添加到环境变量,比如 vscode,添加成功后在命令终端输入
code -v可以看到 vscode 版本信息意味着成功。
Learn about contribution here.
This project exists thanks to all the people who contribute:


