-
Notifications
You must be signed in to change notification settings - Fork 3
Debug or Flash Zephyr applications using the CLI
These instructions apply to Arduino 101 boards. The debugging and flashing procedures will be identical on other hardware, however it is likely that you will need to connect your JTAG debugger and serial cable in a different way.
1 . Connect JTAG and your serial cable by following the instructions on the Zephyr website
- To see serial output from the device, you need the ftdi vcp drivers. These turn the usb connection into a windows com port that you can point putty at. These can be found on the FTDI website
- Please follow the install guide which will guide you through the process of opening the Windows device manager,finding the new device and updating the drivers
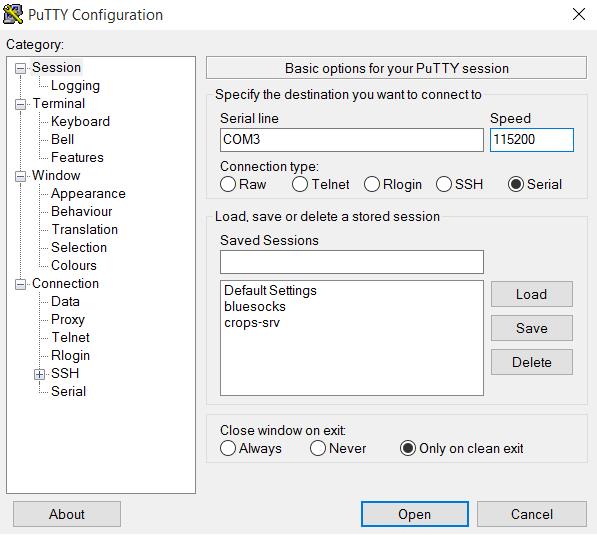
4 . Download putty, launch it and configure the COM port captured from the previous step as shown below. Click "Open"

5 . Download Zadig and launch it
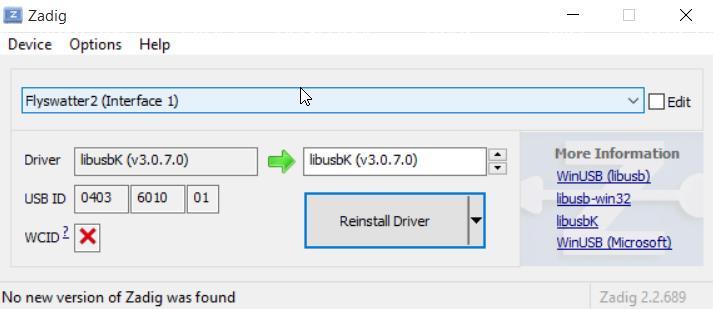
The box on the left shows the currently installed driver and the one on the right provides a drop-down menu with alternative drivers. Please select "libusbK" from the drop-down menu and click "Replace Driver".

This is how the Flyswatter interfaces will look after the driver is installed.

OR
Execute the following command from within the Docker Quickstart Terminal:
git clone https://github.com/todorez/zephtools.git
Typically both the x86 and ARC binaries are named zephyr.bin. Open the Windows CMD terminal and execute the following commands from within the zephtools directory
-
To flash the X86/Quark core:
zephflash.bat -b arduino_101 x86_image_file_to_flashExample:
zephflash.bat -b arduino_101 C:\Users\*your_username*\crops-workspace\zephyr-project\samples\nanokernel\apps\philosophers\outdir\zephyr.bin -
To flash the Arc core:
zephflash.bat -c -b arduino_101 image_file_to_flashExample:
zephflash.bat -b arduino_101 -c C:\Users\*your_username*\crops-workspace\zephyr-project\samples\nanokernel\apps\philosophers\outdir\zephyr.bin
-
Halt the target:
Execute the following command from within the Windows CMD terminal:
zephflash.bat -b arduino_101 -d -
Launch the debugger
Execute the following command from within the Docker Quickstart Terminal to launch the debugger:
/c/Users/username/.crops/gdb.zephyr path_to_img_with_dbg_symbolsExample:
/c/Users/username/.crops/gdb.zephyr /crops/zephyrproject/samples/nanokernel/apps/philosophers/outdir/zephyr.elf -
Connect the debugger to the target:
To connect to the x86 core:
target remote 192.168.99.1:3334To connect to the ARC core:
target remote 192.168.99.1:3333
** Note: Since the x86 core gates/controls the serial port from Message Q, it isn't possible/feasible to debug the arc core while the X86 core is halted since if the Arc core is pushing out serial info, then it will get stuck/full mbox since the X86 core is halted.**

