Welcome to Iphone 15 Clone Website.
Click here to Visit the Website »
Click here for Detailed Documentation and Proposal »
- 🤖 Introduction
- 🔋 Features
- ⚙️ Tech Stack
- 💎 Dependencies
- 📂 Folder Structure
- 🧰 Getting Started
- 🕸️ Code Snippets
- 🔗 Assets Links
- 📷 Screenshots
- 🖨️ Deploy on Vercel
- ⭐ Give A Star
- 🚀 Follow Me
- 📚 Learn More
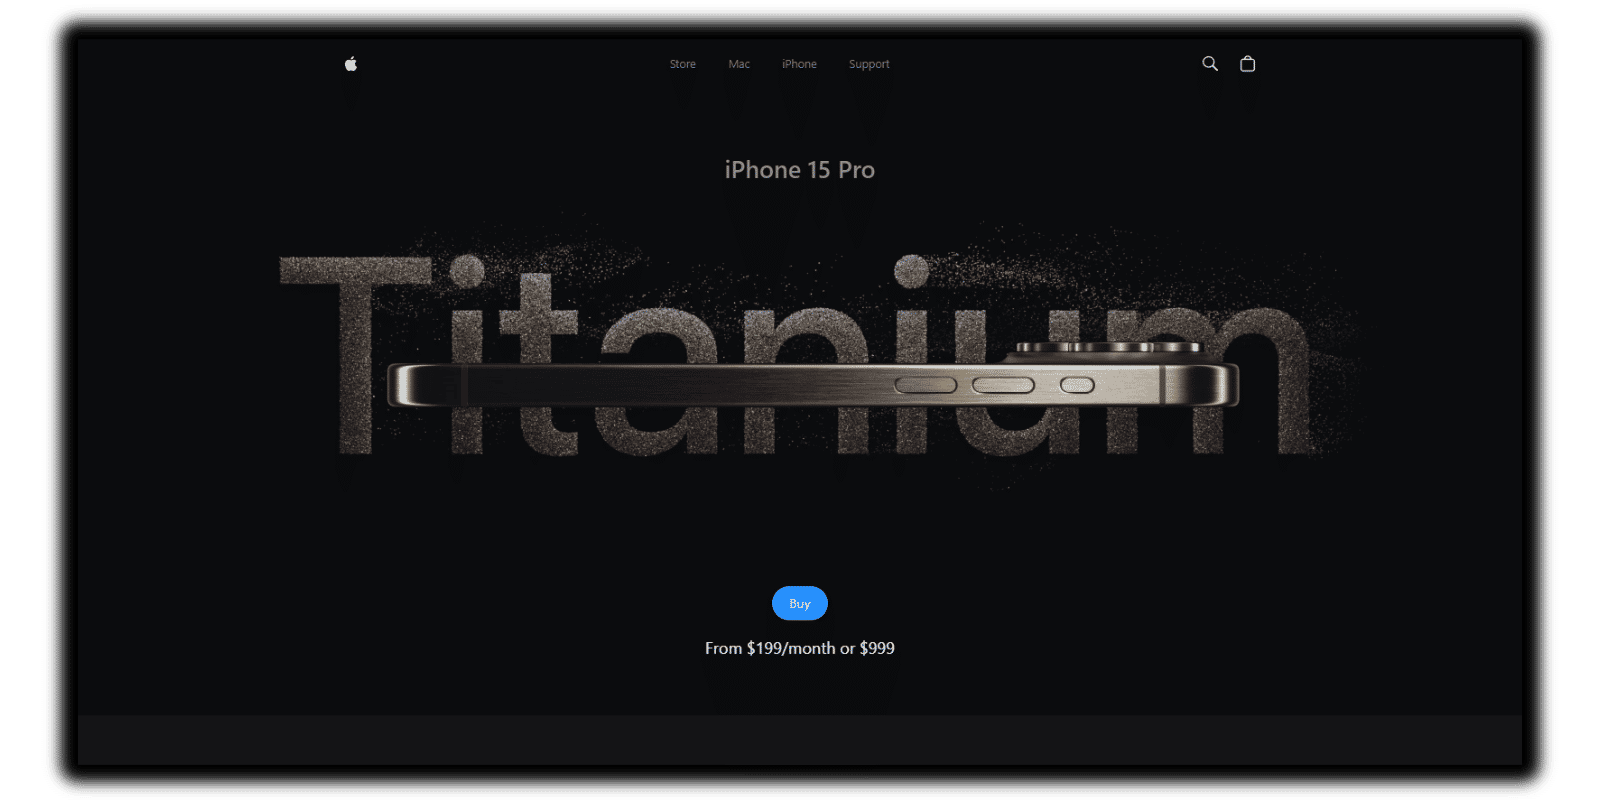
This website is a clone of Apple's iPhone 15 Pro website using React.js and TailwindCSS means making a website that looks just like Apple's but using certain tools. We'll use GSAP for cool animations and Three.js to show the iPhone models in different colors and shapes.
With GSAP, we can add fun animations that make the website more interesting. Think of it like adding special effects to a movie to make it exciting. These animations will make the website more enjoyable to use.
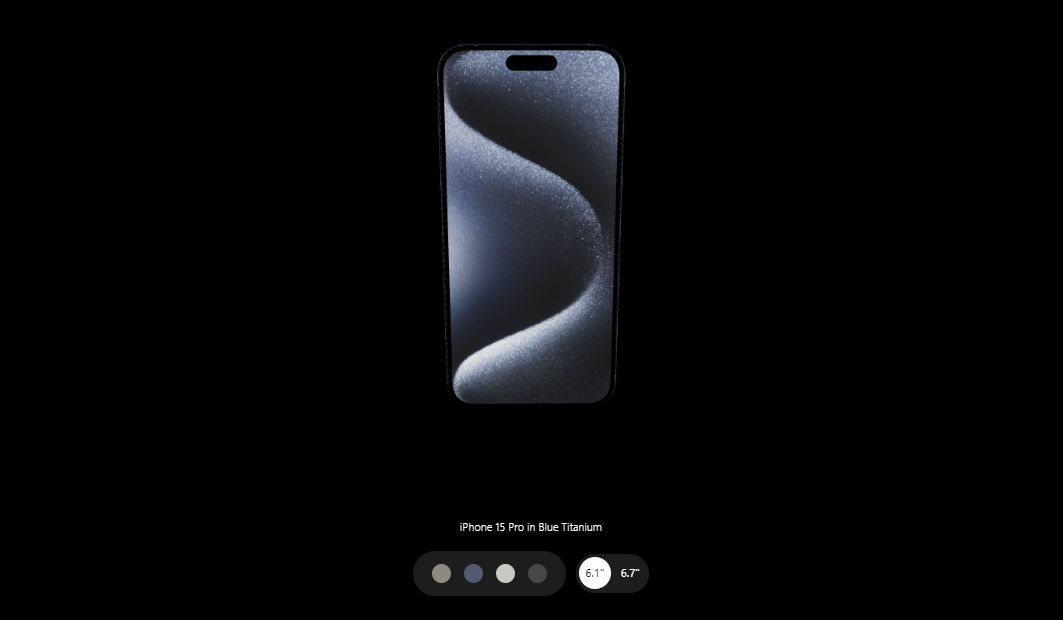
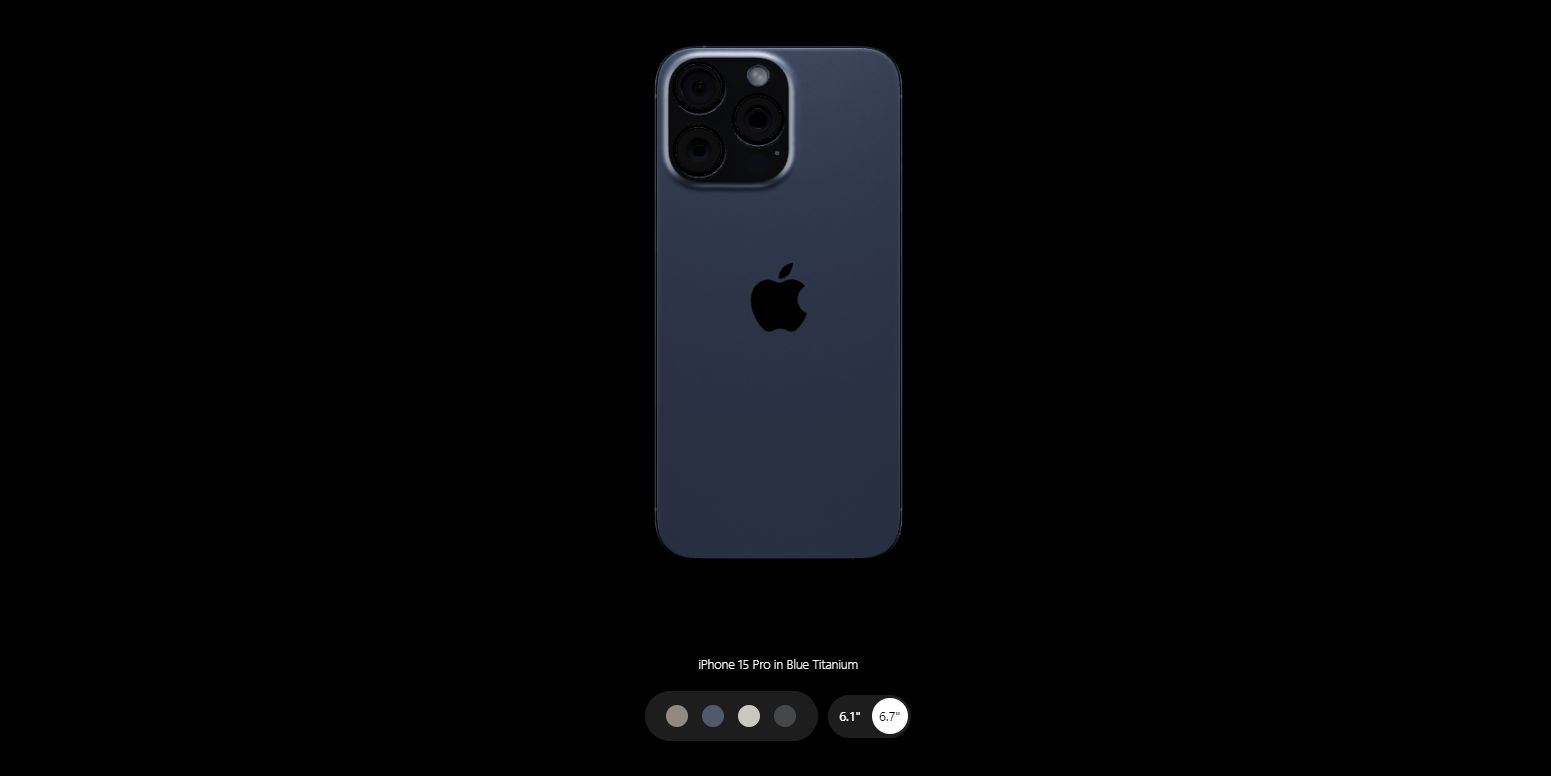
Three.js helps us show 3D versions of the iPhone 15 Pro. You'll be able to see the phone from different angles and in different colors. It's like being able to spin a toy around to see it from all sides. This makes the website more interactive and lets you explore the iPhone in a cool way.
By using React.js and TailwindCSS along with GSAP and Three.js, we can make a website that not only looks like Apple's but also feels engaging and fun to use.
👉 Beautiful Subtle Smooth Animations using GSAP: Enhanced user experience with seamless and captivating animations powered by GSAP.
👉 3D Model Rendering with Different Colors and Sizes: Explore the iPhone 15 Pro from every angle with dynamic 3D rendering, offering various color and size options.
👉 Custom Video Carousel (made with GSAP): Engage users with a unique and interactive video carousel developed using GSAP for a personalized browsing experience.
👉 Completely Responsive: Consistent access and optimal viewing on any device with a fully responsive design that adapts to different screen sizes.
and many more, including code architecture and reusability
- React.js
- Three.js
- React Three Fiber
- React Three Drei
- GSAP (Greensock)
- Vite
- Tailwind CSS
- Vercel
Useful resources and dependencies that are used in Apple Clone.
- @gsap/react: ^2.1.0
- @react-three/drei: ^9.102.6
- gsap: ^3.12.5
- react: ^18.2.0
- react-dom: ^18.2.0
- three: ^0.162.0
- @react-three/eslint-plugin: ^0.1.1
- @types/react: ^18.2.67
- @types/react-dom: ^18.2.21
- @vitejs/plugin-react: ^4.2.1
- autoprefixer: ^10.4.18
- eslint: ^8.57.0
- eslint-config-prettier: ^9.1.0
- eslint-config-standard: ^17.1.0
- eslint-plugin-import: ^2.29.1
- eslint-plugin-react: ^7.34.0
- eslint-plugin-react-hooks: ^4.6.0
- eslint-plugin-react-refresh: ^0.4.5
- eslint-plugin-tailwindcss: ^3.15.1
- postcss: ^8.4.36
- prettier: ^3.2.5
- tailwindcss: ^3.4.1
- vite: ^5.1.6
Here is the folder structure of this app.
apple-clone/
  |- public/
    |-- assets/
    |-- models/
    |-- apple-icon.png
    |-- favicon.ico
    |-- favicon1.png
    |-- favicon2.png
  |- src/
    |-- assets/
        |--- index.js
    |-- components/
        |--- Features.jsx
        |--- Footer.jsx
        |--- Hero.jsx
        |--- Highlights.jsx
        |--- HowItWorks.jsx
        |--- IPhone.jsx
        |--- Lights.jsx
        |--- Loader.jsx
        |--- Model.jsx
        |--- ModelView.jsx
        |--- Navbar.jsx
        |--- VideoCarousel.jsx
    |-- constants/
        |--- index.js
    |-- utils/
        |--- animations.js
    |-- App.css
    |-- App.jsx
    |-- index.css
    |-- main.jsx
  |- .eslintrc.json
  |- .gitignore
  |- index.html
  |- package-lock.json
  |- package.json
  |- postcss.config.js
  |- tailwind.config.js
|- vite.config.jsFollow these steps to set up the project locally on your machine.
Prerequisites
Make sure you have the following installed on your machine:
Cloning the Repository
https://github.com/baibhavsagar/iPhone-clone.git
cd iphone-clone
Installation
Install the project dependencies using npm:
npm installRunning the Project
npm run devOpen http://localhost:5173 in your browser to view the project.
If encountering dependency errors:(Optional)
Install project dependencies using
npm install --legacy-peer-depsor
yarn install --legacy-peer-depsNow app is fully configured 👍 and you can start using this app using either one of npm run dev or yarn dev
tailwind.config.js
/** @type {import('tailwindcss').Config} */
export default {
  content: ["./index.html", "./src/**/*.{js,ts,jsx,tsx}"],
  theme: {
    extend: {
      colors: {
        blue: "#2997FF",
        gray: {
          DEFAULT: "#86868b",
          100: "#94928d",
          200: "#afafaf",
          300: "#42424570",
        },
        zinc: "#101010",
      },
    },
  },
  plugins: [],
};
constants/index.js
import {
  blackImg,
  blueImg,
  highlightFirstVideo,
  highlightFourthVideo,
  highlightSecondVideo,
  highlightThirdVideo,
  whiteImg,
  yellowImg,
} from "../utils";

export const navLists = ["Store", "Mac", "iPhone", "Support"];

export const hightlightsSlides = [
  {
    id: 1,
    textLists: [
      "Enter A17 Pro.",
      "Game‑changing chip.",
      "Groundbreaking performance.",
    ],
    video: highlightFirstVideo,
    videoDuration: 4,
  },
  {
    id: 2,
    textLists: ["Titanium.", "So strong. So light. So Pro."],
    video: highlightSecondVideo,
    videoDuration: 5,
  },
  {
    id: 3,
    textLists: [
      "iPhone 15 Pro Max has the",
      "longest optical zoom in",
      "iPhone ever. Far out.",
    ],
    video: highlightThirdVideo,
    videoDuration: 2,
  },
  {
    id: 4,
    textLists: ["All-new Action button.", "What will yours do?."],
    video: highlightFourthVideo,
    videoDuration: 3.63,
  },
];

export const models = [
  {
    id: 1,
    title: "iPhone 15 Pro in Natural Titanium",
    color: ["#8F8A81", "#ffe7b9", "#6f6c64"],
    img: yellowImg,
  },
  {
    id: 2,
    title: "iPhone 15 Pro in Blue Titanium",
    color: ["#53596E", "#6395ff", "#21242e"],
    img: blueImg,
  },
  {
    id: 3,
    title: "iPhone 15 Pro in White Titanium",
    color: ["#C9C8C2", "#ffffff", "#C9C8C2"],
    img: whiteImg,
  },
  {
    id: 4,
    title: "iPhone 15 Pro in Black Titanium",
    color: ["#454749", "#3b3b3b", "#181819"],
    img: blackImg,
  },
];

export const sizes = [
  { label: '6.1"', value: "small" },
  { label: '6.7"', value: "large" },
];

export const footerLinks = [
  "Privacy Policy",
  "Terms of Use",
  "Sales Policy",
  "Legal",
  "Site Map",
];
Lights.jsx
import { Environment, Lightformer } from "@react-three/drei";

const Lights = () => {
  return (
    // group different lights and lightformers. We can use group to organize lights, cameras, meshes, and other objects in the scene.
    <group name="lights">
      {/**
       * @description Environment is used to create a background environment for the scene
       * https://github.com/pmndrs/drei?tab=readme-ov-file#environment
       */}
      <Environment resolution={256}>
        <group>
          {/**
           * @description Lightformer used to create custom lights with various shapes and properties in a 3D scene.
           * https://github.com/pmndrs/drei?tab=readme-ov-file#lightformer
           */}
          <Lightformer
            form="rect"
            intensity={10}
            position={[-1, 0, -10]}
            scale={10}
            color={"#495057"}
          />
          <Lightformer
            form="rect"
            intensity={10}
            position={[-10, 2, 1]}
            scale={10}
            rotation-y={Math.PI / 2}
          />
          <Lightformer
            form="rect"
            intensity={10}
            position={[10, 0, 1]}
            scale={10}
            rotation-y={Math.PI / 2}
          />
        </group>
      </Environment>

      {/**
       * @description spotLight is used to create a light source positioned at a specific point
       * in the scene that emits light in a specific direction.
       * https://threejs.org/docs/#api/en/lights/SpotLight
       */}
      <spotLight
        position={[-2, 10, 5]}
        angle={0.15}
        penumbra={1} // the penumbra is the soft edge of a shadow cast by a point light
        decay={0} // the amount the light dims as it moves away from the source
        intensity={Math.PI * 0.2} // the light intensity
        color={"#f8f9fa"}
      />
      <spotLight
        position={[0, -25, 10]}
        angle={0.15}
        penumbra={1}
        decay={0}
        intensity={Math.PI * 0.2}
        color={"#f8f9fa"}
      />
      <spotLight
        position={[0, 15, 5]}
        angle={0.15}
        penumbra={1}
        decay={0.1}
        intensity={Math.PI * 3}
      />
    </group>
  );
};

export default Lights;
materials
    useEffect(() => {
      Object.entries(materials).map((material) => {
        // these are the material names that can't be changed color
        if (
          material[0] !== "zFdeDaGNRwzccye" &&
          material[0] !== "ujsvqBWRMnqdwPx" &&
          material[0] !== "hUlRcbieVuIiOXG" &&
          material[0] !== "jlzuBkUzuJqgiAK" &&
          material[0] !== "xNrofRCqOXXHVZt"
        ) {
          material[1].color = new THREE.Color(props.item.color[0]);
        }
        material[1].needsUpdate = true;
      });
    }, [materials, props.item]);
VideoCarousel.jsx
import gsap from "gsap";
import { useGSAP } from "@gsap/react";
import { ScrollTrigger } from "gsap/all";
gsap.registerPlugin(ScrollTrigger);
import { useEffect, useRef, useState } from "react";

import { hightlightsSlides } from "../constants";
import { pauseImg, playImg, replayImg } from "../utils";

const VideoCarousel = () => {
  const videoRef = useRef([]);
  const videoSpanRef = useRef([]);
  const videoDivRef = useRef([]);

  // video and indicator
  const [video, setVideo] = useState({
    isEnd: false,
    startPlay: false,
    videoId: 0,
    isLastVideo: false,
    isPlaying: false,
  });

  const [loadedData, setLoadedData] = useState([]);
  const { isEnd, isLastVideo, startPlay, videoId, isPlaying } = video;

  useGSAP(() => {
    // slider animation to move the video out of the screen and bring the next video in
    gsap.to("#slider", {
      transform: `translateX(${-100 * videoId}%)`,
      duration: 2,
      ease: "power2.inOut", // show visualizer https://gsap.com/docs/v3/Eases
    });

    // video animation to play the video when it is in the view
    gsap.to("#video", {
      scrollTrigger: {
        trigger: "#video",
        toggleActions: "restart none none none",
      },
      onComplete: () => {
        setVideo((pre) => ({
          ...pre,
          startPlay: true,
          isPlaying: true,
        }));
      },
    });
  }, [isEnd, videoId]);

  useEffect(() => {
    let currentProgress = 0;
    let span = videoSpanRef.current;

    if (span[videoId]) {
      // animation to move the indicator
      let anim = gsap.to(span[videoId], {
        onUpdate: () => {
          // get the progress of the video
          const progress = Math.ceil(anim.progress() * 100);

          if (progress != currentProgress) {
            currentProgress = progress;

            // set the width of the progress bar
            gsap.to(videoDivRef.current[videoId], {
              width:
                window.innerWidth < 760
                  ? "10vw" // mobile
                  : window.innerWidth < 1200
                  ? "10vw" // tablet
                  : "4vw", // laptop
            });

            // set the background color of the progress bar
            gsap.to(span[videoId], {
              width: `${currentProgress}%`,
              backgroundColor: "white",
            });
          }
        },

        // when the video is ended, replace the progress bar with the indicator and change the background color
        onComplete: () => {
          if (isPlaying) {
            gsap.to(videoDivRef.current[videoId], {
              width: "12px",
            });
            gsap.to(span[videoId], {
              backgroundColor: "#afafaf",
            });
          }
        },
      });

      if (videoId == 0) {
        anim.restart();
      }

      // update the progress bar
      const animUpdate = () => {
        anim.progress(
          videoRef.current[videoId].currentTime /
            hightlightsSlides[videoId].videoDuration
        );
      };

      if (isPlaying) {
        // ticker to update the progress bar
        gsap.ticker.add(animUpdate);
      } else {
        // remove the ticker when the video is paused (progress bar is stopped)
        gsap.ticker.remove(animUpdate);
      }
    }
  }, [videoId, startPlay]);

  useEffect(() => {
    if (loadedData.length > 3) {
      if (!isPlaying) {
        videoRef.current[videoId].pause();
      } else {
        startPlay && videoRef.current[videoId].play();
      }
    }
  }, [startPlay, videoId, isPlaying, loadedData]);

  // vd id is the id for every video until id becomes number 3
  const handleProcess = (type, i) => {
    switch (type) {
      case "video-end":
        setVideo((pre) => ({ ...pre, isEnd: true, videoId: i + 1 }));
        break;

      case "video-last":
        setVideo((pre) => ({ ...pre, isLastVideo: true }));
        break;

      case "video-reset":
        setVideo((pre) => ({ ...pre, videoId: 0, isLastVideo: false }));
        break;

      case "pause":
        setVideo((pre) => ({ ...pre, isPlaying: !pre.isPlaying }));
        break;

      case "play":
        setVideo((pre) => ({ ...pre, isPlaying: !pre.isPlaying }));
        break;

      default:
        return video;
    }
  };

  const handleLoadedMetaData = (i, e) => setLoadedData((pre) => [...pre, e]);

  return (
    <>
      <div className="flex items-center">
        {hightlightsSlides.map((list, i) => (
          <div key={list.id} id="slider" className="sm:pr-20 pr-10">
            <div className="video-carousel_container">
              <div className="w-full h-full flex-center rounded-3xl overflow-hidden bg-black">
                <video
                  id="video"
                  playsInline={true}
                  className={`${
                    list.id === 2 && "translate-x-44"
                  } pointer-events-none`}
                  preload="auto"
                  muted
                  ref={(el) => (videoRef.current[i] = el)}
                  onEnded={() =>
                    i !== 3
                      ? handleProcess("video-end", i)
                      : handleProcess("video-last")
                  }
                  onPlay={() =>
                    setVideo((pre) => ({ ...pre, isPlaying: true }))
                  }
                  onLoadedMetadata={(e) => handleLoadedMetaData(i, e)}
                >
                  <source src={list.video} type="video/mp4" />
                </video>
              </div>

              <div className="absolute top-12 left-[5%] z-10">
                {list.textLists.map((text, i) => (
                  <p key={i} className="md:text-2xl text-xl font-medium">
                    {text}
                  </p>
                ))}
              </div>
            </div>
          </div>
        ))}
      </div>

      <div className="relative flex-center mt-10">
        <div className="flex-center py-5 px-7 bg-gray-300 backdrop-blur rounded-full">
          {videoRef.current.map((_, i) => (
            <span
              key={i}
              className="mx-2 w-3 h-3 bg-gray-200 rounded-full relative cursor-pointer"
              ref={(el) => (videoDivRef.current[i] = el)}
            >
              <span
                className="absolute h-full w-full rounded-full"
                ref={(el) => (videoSpanRef.current[i] = el)}
              />
            </span>
          ))}
        </div>

        <button className="control-btn">
          <img
            src={isLastVideo ? replayImg : !isPlaying ? playImg : pauseImg}
            alt={isLastVideo ? "replay" : !isPlaying ? "play" : "pause"}
            onClick={
              isLastVideo
                ? () => handleProcess("video-reset")
                : !isPlaying
                ? () => handleProcess("play")
                : () => handleProcess("pause")
            }
          />
        </button>
      </div>
    </>
  );
};

export default VideoCarousel;
utils/index.js
import hero from "/assets/images/hero.jpeg";

export const heroImg = hero;

import hmv from "/assets/videos/hero.mp4";
import smallmv from "/assets/videos/smallHero.mp4";
import highlightFirstmv from "/assets/videos/highlight-first.mp4";
import highlightSectmv from "/assets/videos/hightlight-third.mp4";
import highlightThirdmv from "/assets/videos/hightlight-sec.mp4";
import highlightFourthmv from "/assets/videos/hightlight-fourth.mp4";
import exploremv from "/assets/videos/explore.mp4";
import framemv from "/assets/videos/frame.mp4";

import apple from "/assets/images/apple.svg";
import search from "/assets/images/search.svg";
import bag from "/assets/images/bag.svg";
import watch from "/assets/images/watch.svg";
import right from "/assets/images/right.svg";
import replay from "/assets/images/replay.svg";
import play from "/assets/images/play.svg";
import pause from "/assets/images/pause.svg";

import yellow from "/assets/images/yellow.jpg";
import blue from "/assets/images/blue.jpg";
import white from "/assets/images/white.jpg";
import black from "/assets/images/black.jpg";
import explore1 from "/assets/images/explore1.jpg";
import explore2 from "/assets/images/explore2.jpg";
import chip from "/assets/images/chip.jpeg";
import frame from "/assets/images/frame.png";

export const heroVideo = hmv;
export const smallHeroVideo = smallmv;
export const highlightFirstVideo = highlightFirstmv;
export const highlightSecondVideo = highlightSectmv;
export const highlightThirdVideo = highlightThirdmv;
export const highlightFourthVideo = highlightFourthmv;
export const exploreVideo = exploremv;
export const frameVideo = framemv;

export const appleImg = apple;
export const searchImg = search;
export const bagImg = bag;
export const watchImg = watch;
export const rightImg = right;
export const replayImg = replay;
export const playImg = play;
export const pauseImg = pause;

export const yellowImg = yellow;
export const blueImg = blue;
export const whiteImg = white;
export const blackImg = black;
export const explore1Img = explore1;
export const explore2Img = explore2;
export const chipImg = chip;
export const frameImg = frame;
index.css
@tailwind base;
@tailwind components;
@tailwind utilities;

* {
  margin: 0;
  padding: 0;
  box-sizing: border-box;
}

body {
  color: white;
  width: 100dvw;
  overflow-x: hidden;
  height: 100%;
  background: #000;
  border-color: #3b3b3b;
  user-select: none;
}

canvas {
  touch-action: none;
}

.scrim-max-width {
  margin-inline-start: auto;
  margin-inline-end: auto;
  position: relative;
  max-width: 1120px;
}

@layer utilities {
  .flex-center {
    @apply flex items-center justify-center
  }

  .nav-height {
    @apply h-[calc(100vh-60px)]
  }

  .btn {
    @apply px-5 py-2 rounded-3xl bg-blue my-5 hover:bg-transparent border border-transparent hover:border hover:text-blue hover:border-blue
  }

  .color-container {
    @apply flex items-center justify-center px-4 py-4 rounded-full bg-gray-300 backdrop-blur
  }

  .size-btn-container {
    @apply flex items-center justify-center p-1 rounded-full bg-gray-300 backdrop-blur ml-3 gap-1
  }

  .size-btn {
    @apply w-10 h-10 text-sm flex justify-center items-center bg-white text-black rounded-full transition-all
  }

  .common-padding {
    @apply sm:py-32 py-20 sm:px-10 px-5
  }

  .section-heading {
    @apply text-gray lg:text-6xl md:text-5xl text-3xl lg:mb-0 mb-5 font-medium opacity-0 translate-y-20
  }

  .feature-text {
    @apply text-gray max-w-md text-lg md:text-xl font-semibold opacity-0 translate-y-[100px]
  }

  .feature-text-container {
    @apply w-full flex-center flex-col md:flex-row mt-10 md:mt-16 gap-5
  }

  .feature-video {
    @apply w-full h-full object-cover object-center scale-150 opacity-0
  }

  .feature-video-container {
    @apply w-full flex flex-col md:flex-row gap-5 items-center
  }

  .link {
    @apply text-blue hover:underline cursor-pointer flex items-center text-xl opacity-0 translate-y-20
  }

  .control-btn {
    @apply ml-4 p-4 rounded-full bg-gray-300 backdrop-blur flex-center
  }

  .hero-title {
    @apply text-center font-semibold text-3xl text-gray-100 opacity-0 max-md:mb-10
  }

  .hiw-title {
    @apply text-4xl md:text-7xl font-semibold text-center
  }

  .hiw-subtitle {
    @apply text-gray font-semibold text-xl md:text-2xl py-10 text-center
  }

  .hiw-video {
    @apply absolute w-[95%] h-[90%] rounded-[56px] overflow-hidden
  }

  .hiw-text-container {
    @apply flex md:flex-row flex-col justify-between items-start gap-24
  }

  .hiw-text {
    @apply text-gray text-xl font-normal md:font-semibold
  }

  .hiw-bigtext {
    @apply text-white text-3xl md:text-5xl font-normal md:font-semibold my-2
  }

  .video-carousel_container {
    @apply relative sm:w-[70vw] w-[88vw] md:h-[70vh] sm:h-[50vh] h-[35vh]
  }

  .g_fadeIn {
    @apply opacity-0 translate-y-[100px]
  }
}Public Assets used in the project can be found here
GLTFs into JSX: https://github.com/pmndrs/gltfjsx
-
Sign Up/Log In to Vercel:
- If you don't have an account on Vercel, you'll need to sign up for one. Visit the Vercel website (https://vercel.com/) and sign up with your email or GitHub account.
- If you already have an account, log in to your Vercel account.
-
Connect Git Repository:
- Once you're logged in, click on the "Import Project" button on the dashboard.
- Select your Git repository where your app's code resides. Vercel supports repositories hosted on GitHub, GitLab, Bitbucket, and more.
-
Configure Project Settings:
- After selecting the repository, Vercel will detect your project's framework. If it doesn't, you'll need to specify it.
- Configure other settings such as the branch to deploy, build settings, and environment variables if needed.
-
Review Deployment Settings:
- Review the deployment settings to ensure everything looks correct. You can set up custom domains, add environment variables, and configure other advanced settings here.
-
Deploy Your App:
- Once you're satisfied with the settings, click on the "Deploy" button.
- Vercel will start building and deploying your app. You can monitor the progress on the dashboard.
-
Wait for Deployment to Finish:
- Depending on the size of your app and its dependencies, the deployment process may take some time.
- Once the deployment is complete, Vercel will provide you with a URL where your app is live.
-
Test Your App:
- Visit the provided URL to test your deployed app. Make sure everything is working as expected.
-
Customize Domain (Optional):
- If you want to use a custom domain for your app, you can set it up in the project settings on Vercel. Follow the instructions to verify domain ownership and configure DNS settings.
-
Continuous Deployment (Optional):
- Vercel supports continuous deployment, which means your app will automatically redeploy whenever you push changes to your Git repository. You can configure this in the project settings.
-
Monitor and Manage Deployments:
- You can monitor your deployments, view logs, and manage your projects directly from the Vercel dashboard.
That's it! Your app is now successfully deployed on Vercel and accessible to users. Make sure to keep an eye on your deployments and update your app as needed.
You can also give this repository a star to show more people and they can use this repository.
This Repository is developed and maintained by Baibhav Sagar
React:
- Official React Documentation:
- React Documentation - The official documentation provides a comprehensive guide to learning React, starting from the basics to advanced topics.
- React Tutorial by React Team:
- React Tutorial - This interactive tutorial teaches you the fundamentals of React by building a tic-tac-toe game.
- React - The Complete Guide (incl Hooks, React Router, Redux):
- Udemy Course - A highly rated Udemy course covering React from beginner to advanced level.
Tailwind CSS:
- Official Tailwind CSS Documentation:
- Tailwind CSS Documentation - The official documentation provides in-depth explanations of Tailwind's utility classes and features.
- Tailwind CSS Course by Adam Wathan:
- Tailwind CSS Course - A comprehensive video course by Adam Wathan, the creator of Tailwind CSS, covering everything from basics to advanced techniques.
- Tailwind CSS Crash Course:
- YouTube Tutorial - A crash course on Tailwind CSS by Traversy Media, covering the essentials to get you started quickly.
Three.js:
- Official Three.js Documentation:
- Three.js Documentation - The official documentation provides detailed guides, examples, and API references for learning Three.js.
- Three.js Journey by Bruno Simon:
- Three.js Journey - A comprehensive video course covering Three.js from beginner to advanced level, created by Bruno Simon.
- Three.js Fundamentals:
- Website - A collection of tutorials, examples, and explanations covering the fundamentals of Three.js, suitable for beginners.
These resources should provide with a solid foundation for learning React, Tailwind CSS, and Three.js. Happy coding!


