Notice! Project files in the development branches are NOT intended for public use in production of PCB's, may or may not be tested and may change or be removed without notice!
If you order PCB's from these, YOU bear the sole responsibility for how these turn out!!! Please use the Gerber files for producing PCB's, found under the header 'Releases' instead (Look here >>). Also please note the difference between a 'Pre-release' (partially/fully untested, basically what I order a prototype PCB from to test) and a full actual 'Release' which is fully tested, built and ready to be used to produce PCB's.
Lotus 58 Classic is the wired designs of the Lotus keyboard. Wireless with BLE and 2.4Ghz dongled wireless reside in other repositories.
Starting with simple tweaks to the Lily58 Glow before ordering a set of PCB's it quickly spiraled out of control, and I ended up with what wasn't quite a Lily58 anymore, and although very similar in layout, it is no longer compatible with plate and case design.
Because of this, it was renamed Lotus58, referencing another flower much like the lily in the name Lily58.

- Layout very similar to the original Lily58 family
- Per key RGB and RGB underglow
- Kaihl Hot-swap sockets for MX compatible switches
- Can be used as a standalone Gamepad for either hand
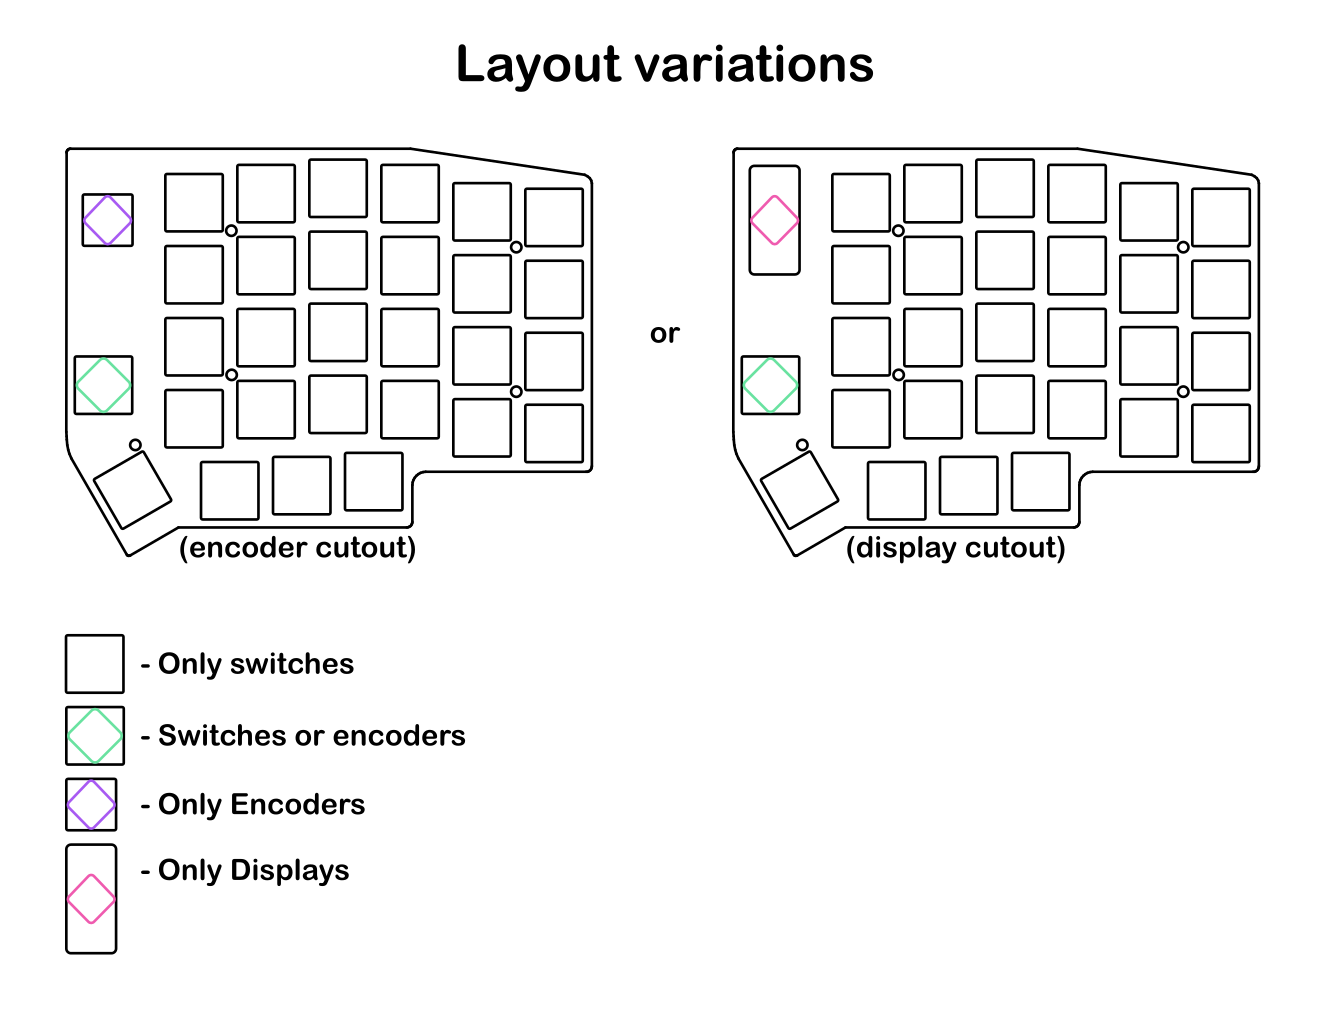
- Optional 0.91" OLED Screens and rotary encoders (one each per side)
- All components through-hole and easily soldered for beginners (SMD option for diodes)
- Designed with a sandwich-style plate/case as part of the design
- Optional plate layout with OLED screen (Encoder can be placed on upper thumb key position)
- Optional plate layout with rotary encoder (Removes OLED screen for that side)
- Optional plate layout with no hole for OLED or upper encoder (Encoder can be placed on upper thumb key position)
There are a couple of 'official' commissioned designs for 3D printed cases for the Lotus 58 Glow, available in a separate Git here.
And you can find several more made by users using Google, and/or by joining the Discord channel and chatting to the builders/designers and users.
If you are not aiming at modifying things, don't look for the gerber files in the folders, pretty please!
And please don't open yet another issue about it!
The gerber files are where they belong, zipped up in releases, look under that header for the version you want.
- Most PCB manufacturers have a MOQ of 5 PCB's, meaning you end up with 2½ keyboards when finished.
- The recommended PCB thickness is 1.6 mm, both for the main PCB and plates to allow the keyswitches to grip the plate and lock in place securely.
If ordering from JLCPCB the plate Gerber files include a reference putting the added serial etc on a breakaway part for a clean look with minimal cost, if using another manufacturer it's possible they have additional fee's for removing the extra text, or you should consider plotting the Gerber files yourself with the correct reference for your manufacturer. Otherwise use the standard settings from JLPCB.
Some basic build instructions are in the WIKI, and I really try to keep these updated. But please keep in mind that whenever these instructions conflict with information on the PCB silkscreen, the silkscreen is and always will be the correct source of information! It's always updated with the version, and the most current information for the PCB version in question.
The intent has always been that the keyboard should be able to be fully built with some very basic soldering skills and the instructions on the silkscreen.
I sell complete kits, making it easy to build your keyboard, and it also supports prototypes for new wacky ones.

.png)
