SuperTux C# Editor Guide
Let's face it: Nobody ever gave you a clear explanation on how to make a SuperTux level.
It's sad, but true. So, why are you crying over lost cake? Guess what: I made a better one. What I'm going to do, is show you how to make a nice, proper SuperTux level using the Microsoft .NET extension. But probably the best thing about this guide, is with your cheese burger, I'm holding the nerd-sauce. Now your probably waiting for me to stop making odd food metaphors, so let's begin.
Vocabulary? This isn't school! This is a level editor. Yes, I tried telling myself that I didn't want to bore my readers to death by reading about the words. Although recommend for your full comprehention of the tutorial, you don't need to read it, unless you want to be able to latch on quick. If you don't know what one of the underlined words means, just refer back to here. multiscript: Multiple scripts played at the same time as another. script: A program that preforms a function, such as moving a platform, or playing music. tilemap: The area where you place tiles, the “terrain” blocks. translucent: Something that you can vaguely see through. Not to be confused with transparent. transparent: Something that you can see very clearly through. Not to be confused with translucent.
Keep in mind, sadly, the editor does NOT work on Mac, and the Windows version of the editor is intended for Windows XP. but there are a few ways you could fix that. The best would be getting Parallels Desktop for Mac (Which is what I use), from the website. You can get a free trial, but after 30 days, sorry. Well, if you bought it (which would be fantastic), continue reading the windows section.
However, You should be able to run it using mono for OS X. If you managed to do so, please update this section.
Well, of course, before you begin, your gonna need the actual game. Just install it into Program files, to keep everything organized, and it can be downloaded Supertux 0.3.3 (Beta). If you prefer a recent SVN Snapshot, take a look at Rgcjonas
First of all, you'll need the “Microsoft .NET framework.” There is a good link right .NET Framework. Make sure you have every Version installed, at least 2.0, 3.5, 4.0 (Windows 7 ships all these by default.)
After that, get the GTK Framework which can be downloaded (WARNING! Will download on click!) GTK for .NET framework Just follow the instructions, and download the latest version. On the bottom there will be a link that will say something like “Download Mono and GTK,” so get that one.
Lastly, we can't be running around with no editor. So download the latest version (the one at the top) SuperTux Editor. make sure it says “Windows, 32bit, .NET, GTK# 2.10” or something towards the end of the link in the page. A more recent build (recommended if you downloaded a svn build of SuperTux above) can be obtained here: Rgcjonas You should update your game, and then you should download this new version for both Linux and Windows: It is highly recommended, because this is what aI will be using. Supertux Editor Revision 6694.
SKIP THIS IF YOU ARE NOT USING WINDOWS SEVEN OR HIGHER: There are a few extra steps for Windows 7 and up. Complete the following steps here, made by SK1LL: Link
Now launch “supertux-editor.exe” in the editor's folder you just downloaded, and we can begin.
You need a recent SuperTux version. Some distributions ship SuperTux 0.3.3, just check your package manager / software center. If you prefer a recent svn version, you have to build it yourself. This is really easy.
The editor needs mono and Gtk# to run. Most distributions packaged that, some even install it by default.
Editor builds for 0.3.3 can be downloaded from http://elektromaniak.wz.cz/download.html. Grab the latest version (the one at the top) where it says linux.
If you need a more recent version, you can build it yourself. this is easy, too.
You have to run it using
mono supertux-editor.exe
If you get a strange error saying: Unhandled Exception: System.MissingMethodException: Method not found: 'System.Type.op_Inequality'. Run it using
mono --runtime=v4.0 supertux-editor.exe
Now that it's launched, a little window should pop up telling you to
select the SuperTux directory. This is so it can get the images for
the tiles, the music, the sounds ect. You also need to select the
SuperTux Game's .exe file.  So select the
two directories. It should look something like this for the data
directory: “C:\Program Files\SuperTux 0.3.3\data” It should look
something like this for your Executable directory: C:\Program
Files\SuperTux 0.3.3\supertux2"
So select the
two directories. It should look something like this for the data
directory: “C:\Program Files\SuperTux 0.3.3\data” It should look
something like this for your Executable directory: C:\Program
Files\SuperTux 0.3.3\supertux2"
Restart and it should look like this:

Once you've done that, we can finally start some editing!
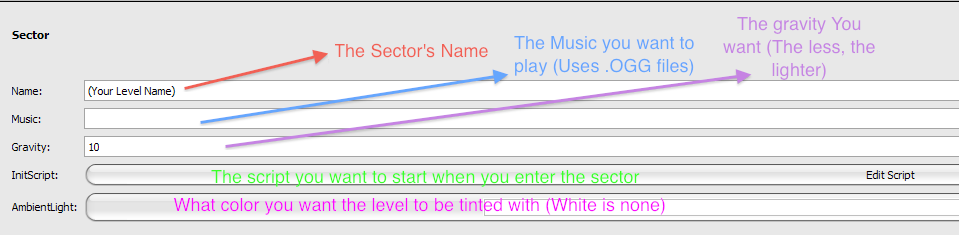
Before you start editing, you should edit the properties of the sector. Right click the word “main” on the top left (Not all the way to the top though,) and select “Properties.” You should see a few fields and buttons.
Refer to the diagram below for information on these things.
Before you go gung-ho about making a level, I strongly suggest you read this section to get a grip on how things work: http://supertux.lethargik.org/wiki/Editor_FAQ Now you don't need to read all of this, but read this to understand the stuff you don't in this guide.
Okay, you've finished the properties. Now click the button on the top.
 It should have a forest background. If not, then click this: 
It should have a forest background. If not, then click this: 
Select “Preferences” and redo what I told you to do above.
If you see a forest background, great!
To start, select this button: 
There should be a bunch of tiles. The tiles are the little squares you put down.
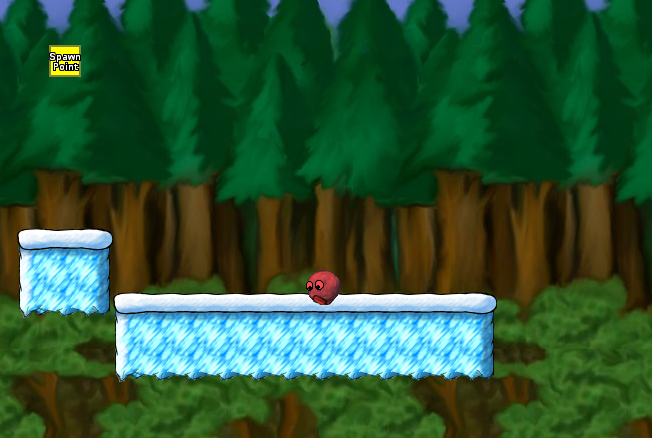
Lets make a basic level. First, select the little drop down menu above all the tiles, then select “Snow.”
 Afterwards, while holding down the right mouse button, drag the cursor down so the snow brick thing is highlighted in blue.
  Then place it on the map below the thing that says “Spawn Point”
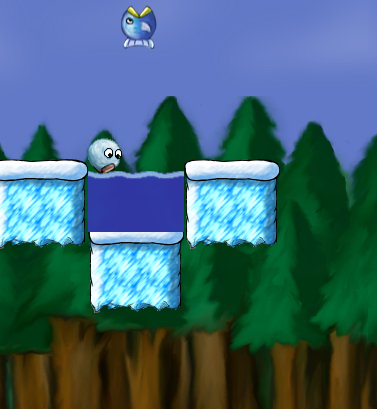
Now, to see the level, click the “Play” button on the top left, shaped like a triangle pointing to the right. You should fall out of the sky and land on the snow. .png)
Good job! You can use many other tiles. You can individually place them by left clicking one, and placing it on the tilemap. (The area where you placed the snow.)
Now you're going to learn how to place objects, such as enemies, (Badguys) moving platforms, script triggers, ladders, and more. First, you'll want to make some more snow. So add another snow platform. This time, make it longer. First select the “Objects” button.

Then, select a snowball (Like the one on the icon for the objects) and place it on the new snow you made. It should look like this:
Test the level again, and kill the snowball!
Snowballls: Snowballs walk around. When they come to the end of the platform, they fall off. They can be killed by you jumping on them, and if they walk into you, you will be downgraded or killed.
Frankly, there are lots of enemies like the snowball. If you have played Mario, then you will notice a lot of enemies are like the ones in Supertux. The Icecrusher is like the Thwomp, the Snowball is like the Goomba, the Icecube is like the Koopa, oh, and big surprise, Tux is Mario, and Penny is Peach.
So since you tried it, if you didn't kill the snowball, it probably bumped into the wall, turned around, and fell.
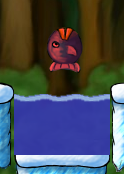
Now we are going to learn about advanced enemies. An example is the fish. In order for the fish to work, (jump out of water) you must have water for it. So go back to the tile selection screen and click on the snow one (If it isn't already selected) and make three snow bricks for the water to be contained in.
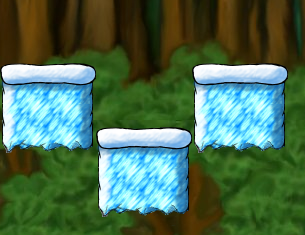
I guess it doesn't have to look like that, but for the sake of simplicity, this is what I'm using. So next select some water from the drop down tile menu. Click “Misc” and you will se something like this.

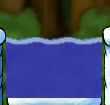
Now select the water. You'll notice one is slightly darker than the other. That one is more translucent, so you will be able to see through it a bit. I will be using that one.

Now, you need to put some water in between the bricks.
It doesn't look very clean, but hey, it works. Now go back to the Objects menu and select the fish and place it.
Okay, now that you did that, you can test it. It should be like this. (The snowball is falling in the water because I put the three bricks right next to the first part of the level, therefore, he wanders over.)
So now you've learned how to make fish work. If you spawn them above the snow, they will face plant in it and wont do much, but if you touch them, you die.
The best way to learn how to use Badguys is experimenting. So, lets move on.
So now we're going to learn how to use Advanced Tile Techniques.
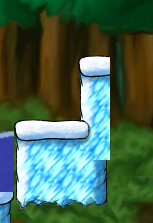
So first we are going to make a basic “Staircase” type thing. First make sure you are in the snow selection screen from the drop down, then, select this part:

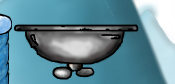
I'm assuming you are building it out of the water bowl thing. Now, place it on the edge of the brick, like this:

Next, you'll want to put this part above that little thing you just placed.

And put it above the actual snow, and then you want to put some of the parts that fit on the side there too. It should end up like this:

Now, you need to fix the top part. Select two of the top right corner pieces on the brick above.

Now place it above the in complete part on the top, replacing one of the tiles, like so...
Now the other side, with these two tiles...

And place.

Now, on the right side, us the right piece,

And fill in the right part of the “Z.”

Now, we need to finish the bottom. So, get the bottom part of the snow brick.

Now, place it underneath that bottom right part of the “L” shape.

Then, you need to select the part right next to the bottom right corner piece, that will look like this:

Then place it right next to the last piece, to the left.

And finally, get the middle piece, that is in the snow brick,

Place it above the last piece replacing one other, And it is finished! You just made your first stairs!

Easy: Click the thing that says “Background IMG” on the left and it should be pretty self explanatory.
Now before we jump in to really advanced multiscripts, we are going to learn a few basic scripts, to make your level a little more, eh, snazzy. I know I was bountiful with pictures with the last lesson, but with scripts, the text will all tell.
So, click objects, then you will see something that looks like this.
(I have changed my background to the blue mountains, by the way.)
So place it. (How about by the stairs!) Now, you need to right-click the platform. Click “Edit Path” A little red block should appear at the top left corner of it. That is the starting node. So, click in front of the platform, and it will make a new white square, (red, depending on the editor) but there will be a line connecting the two.
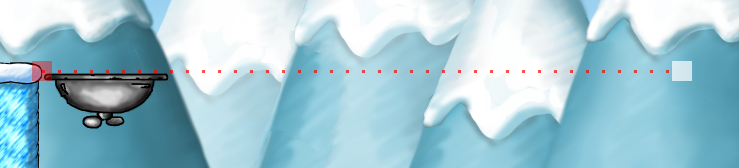
Good! Now click the object elector again, and select the platform again. Now with the property editor at the bottom, name your platform something simple. How about, “Move1”.
Great! Now in the object selector, select the little pink box that says “Script.” It is third from the bottom, all the way to the left. Now, this part is a little hard to explain, so I will break out a picture. Woo-Hoo. Click above the [stairs](#Advanced Tile Techniques).
