How to use HaccTheHub
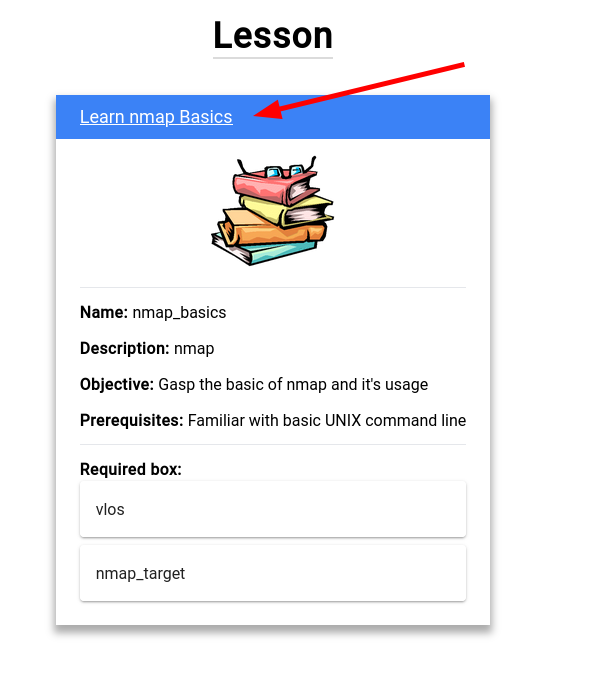
After starting the system and open up the WebGUI as described in the README.md file, look at the lesson that you're interested in. In this example we'll be using Learn nmap Basics. Under the lesson name, besides the description, objective and prerequisites of the lesson, you can see a list of boxes required for the lesson.
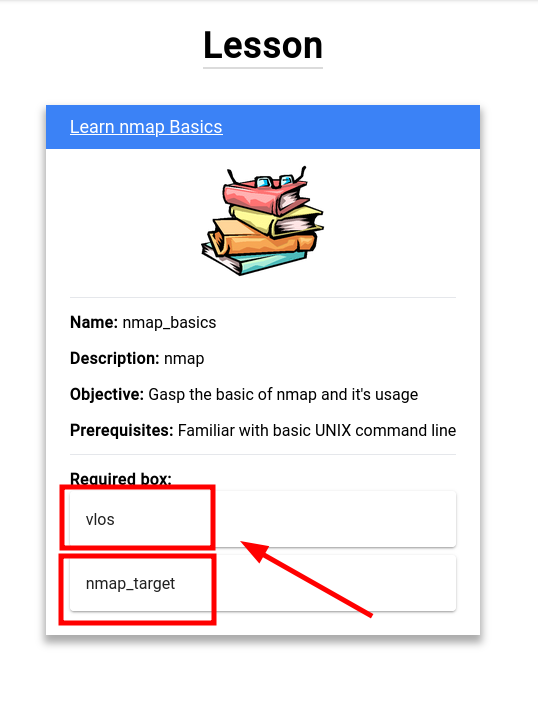
To see these boxes, you can click on the Box tab on the sidebar. Before doing that though, you should start the network on which all of the boxes will lives which is very important to do.
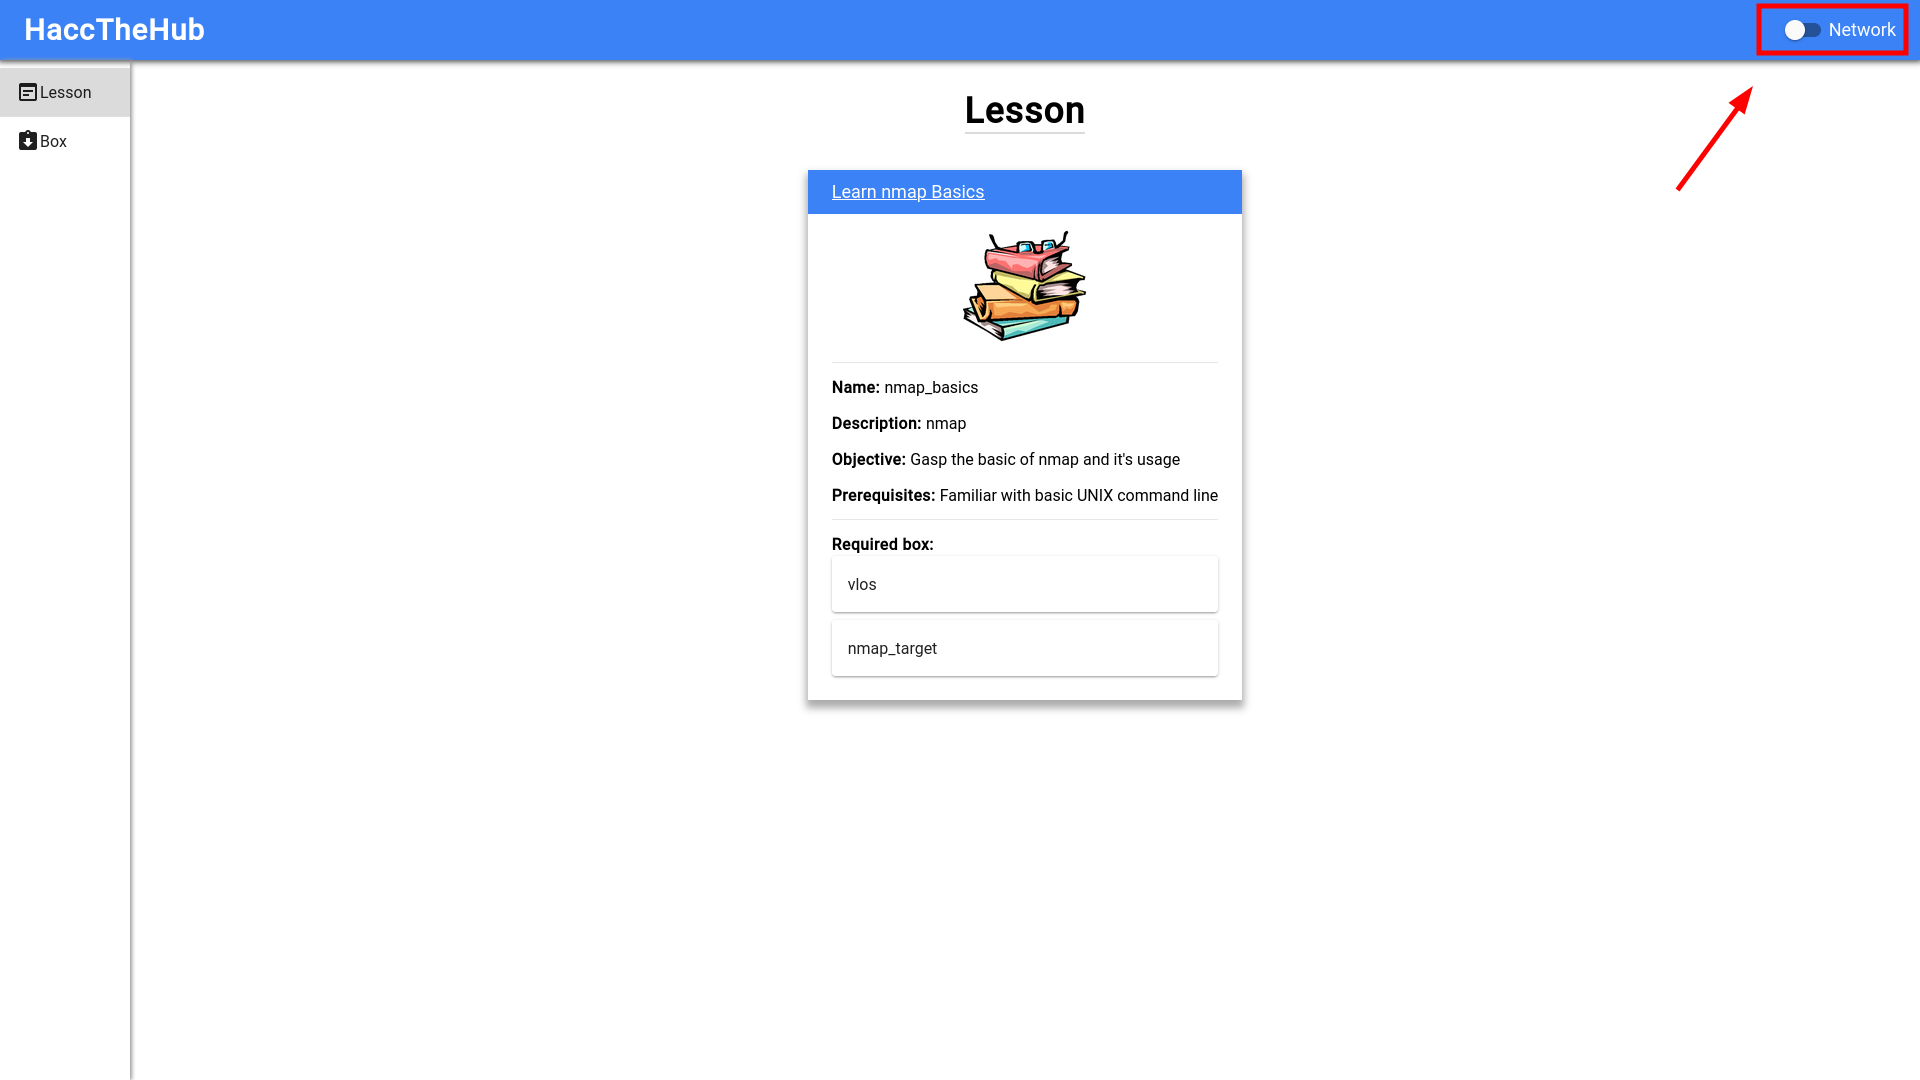
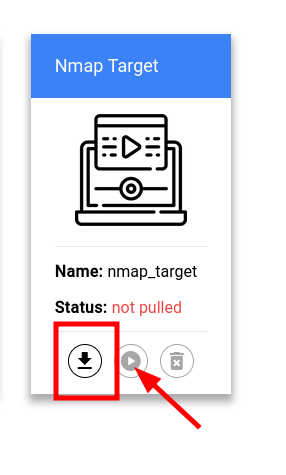
On the Box tab, we have a list of predefined boxes with vlos already pulled and ready to be started while nmap_target isn't.
To download nmap_target, we can click on the download button at the bottom of the box and wait for it to be pulled from Docker Hub.
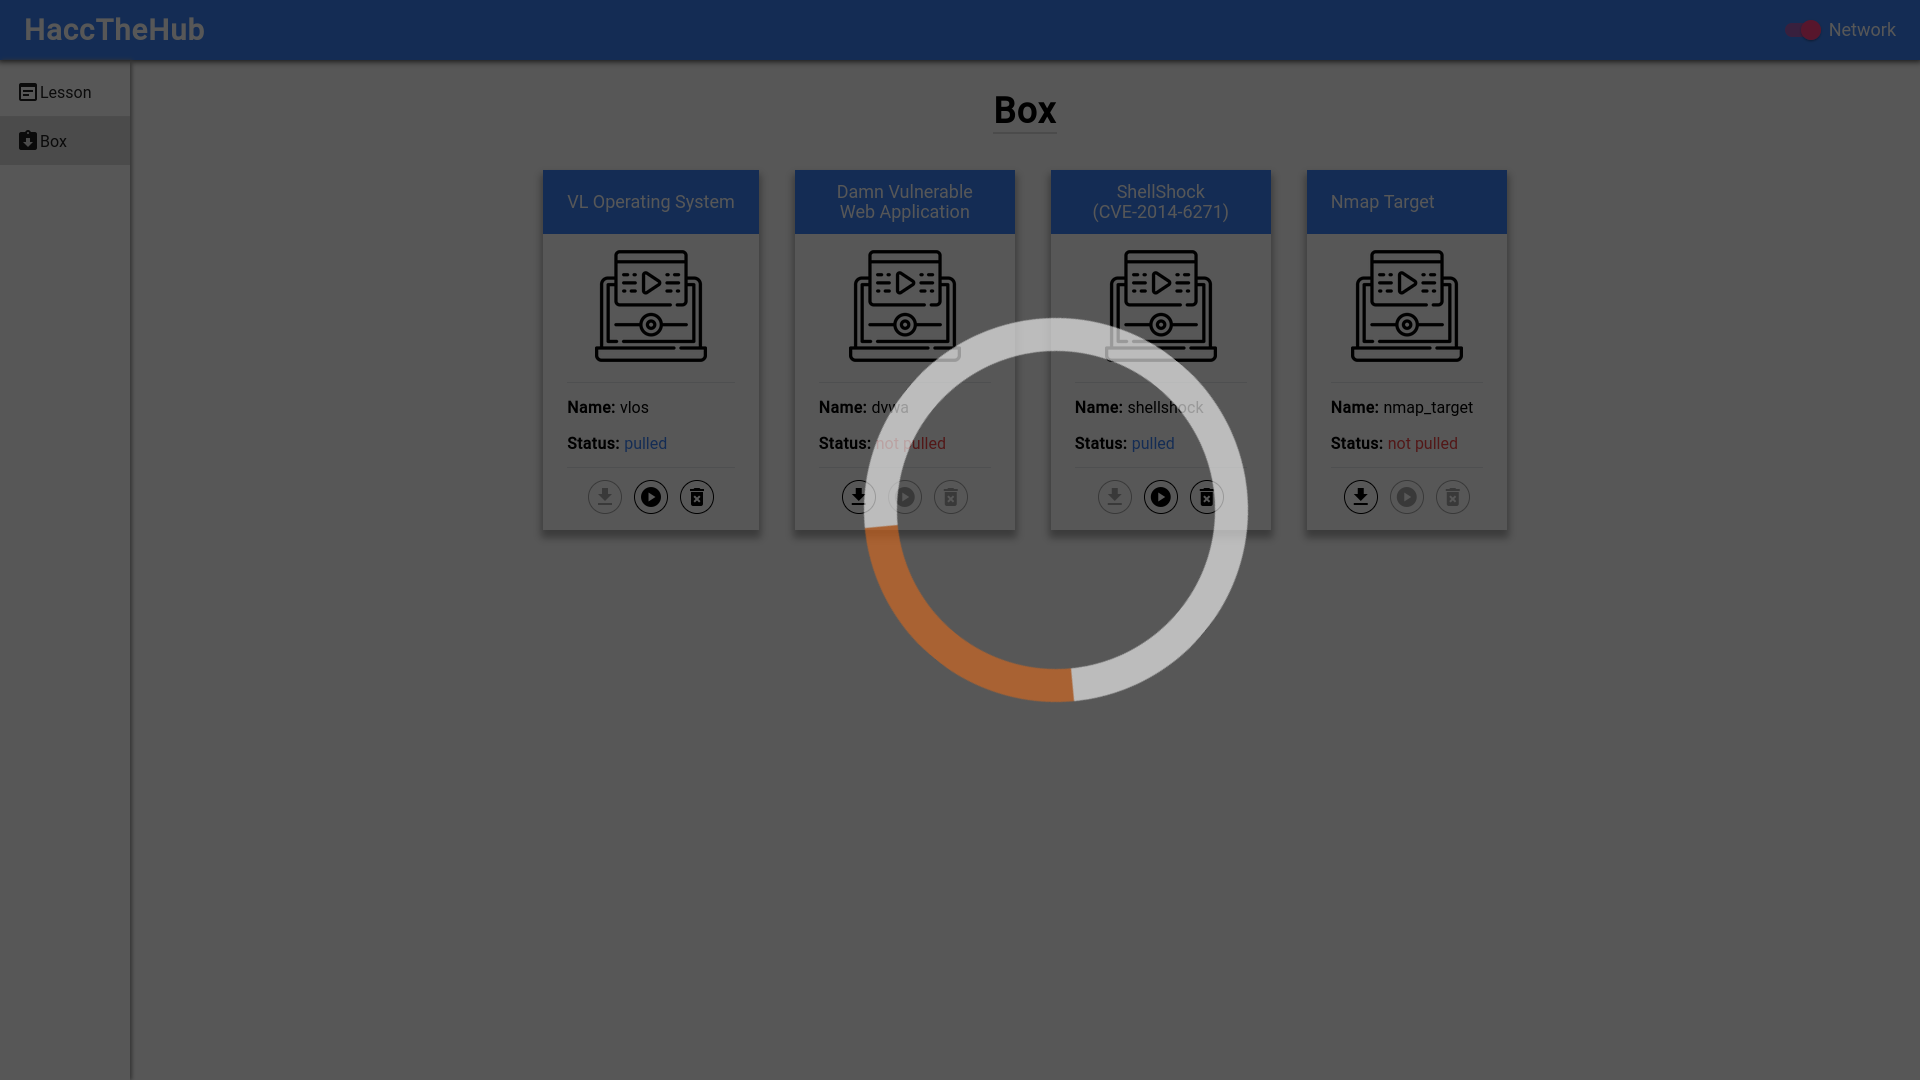
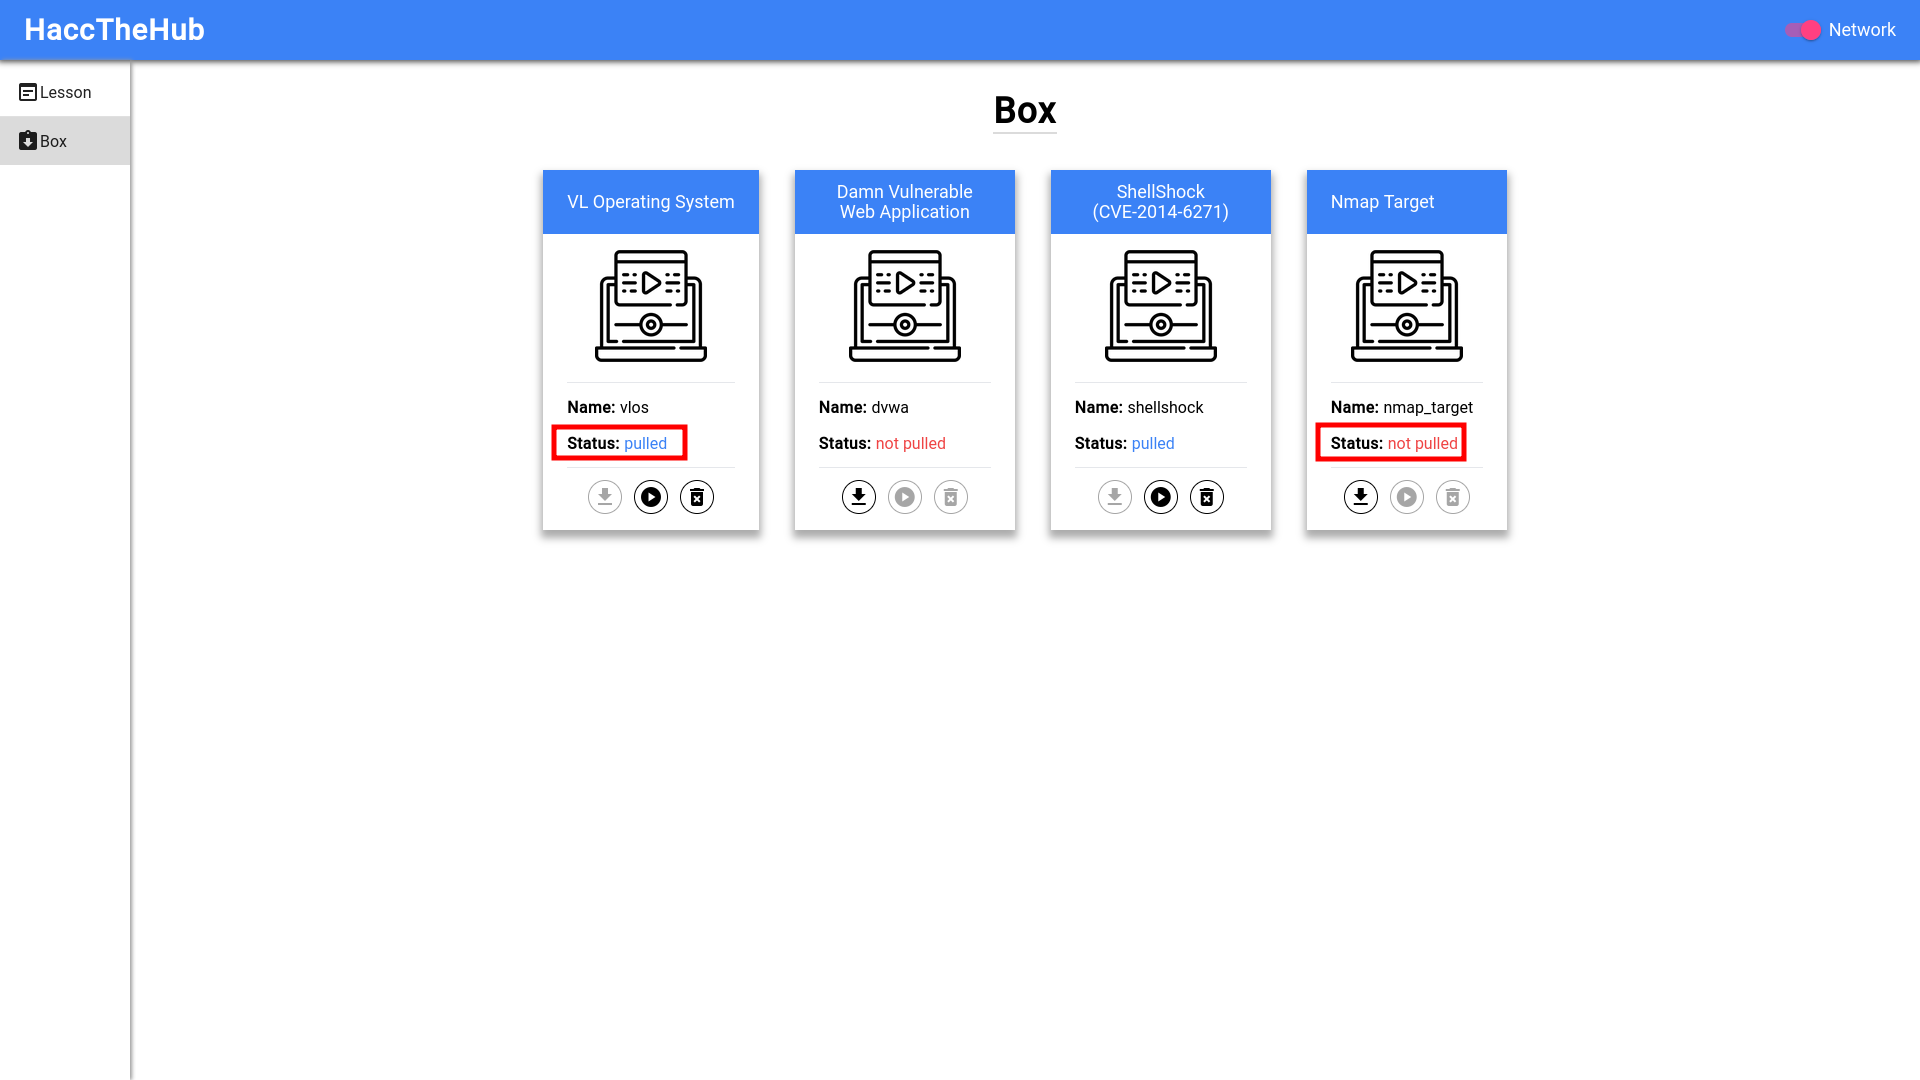
When that is done, we can finally start up the two required boxes by clicking on the play buttons beneath them.
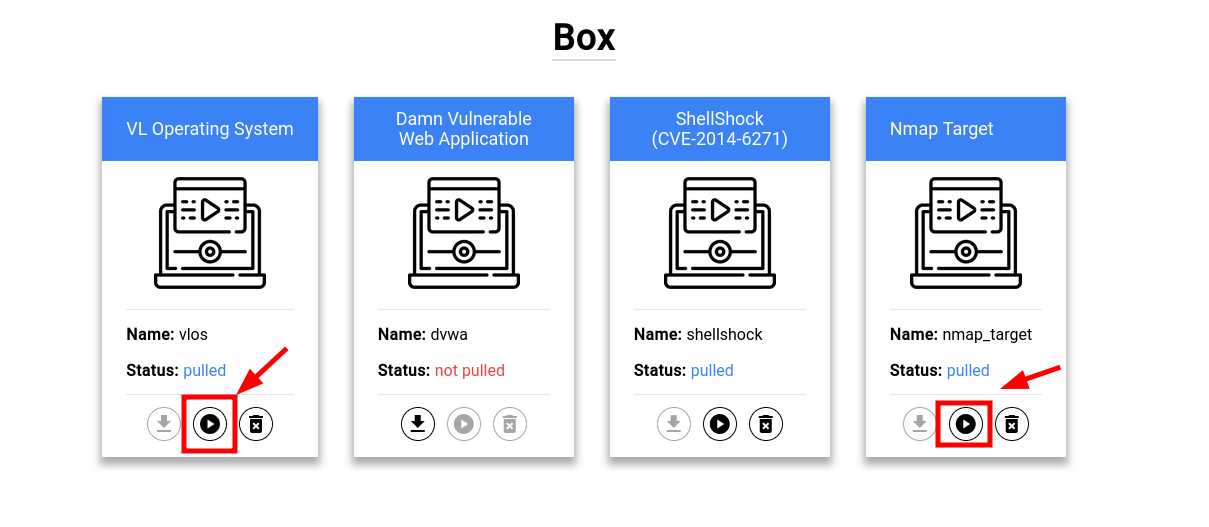
We can see that the status of these two boxes changed from pulled to running

To enter the lesson, click on Lesson on the sidebar then click on the Lesson name
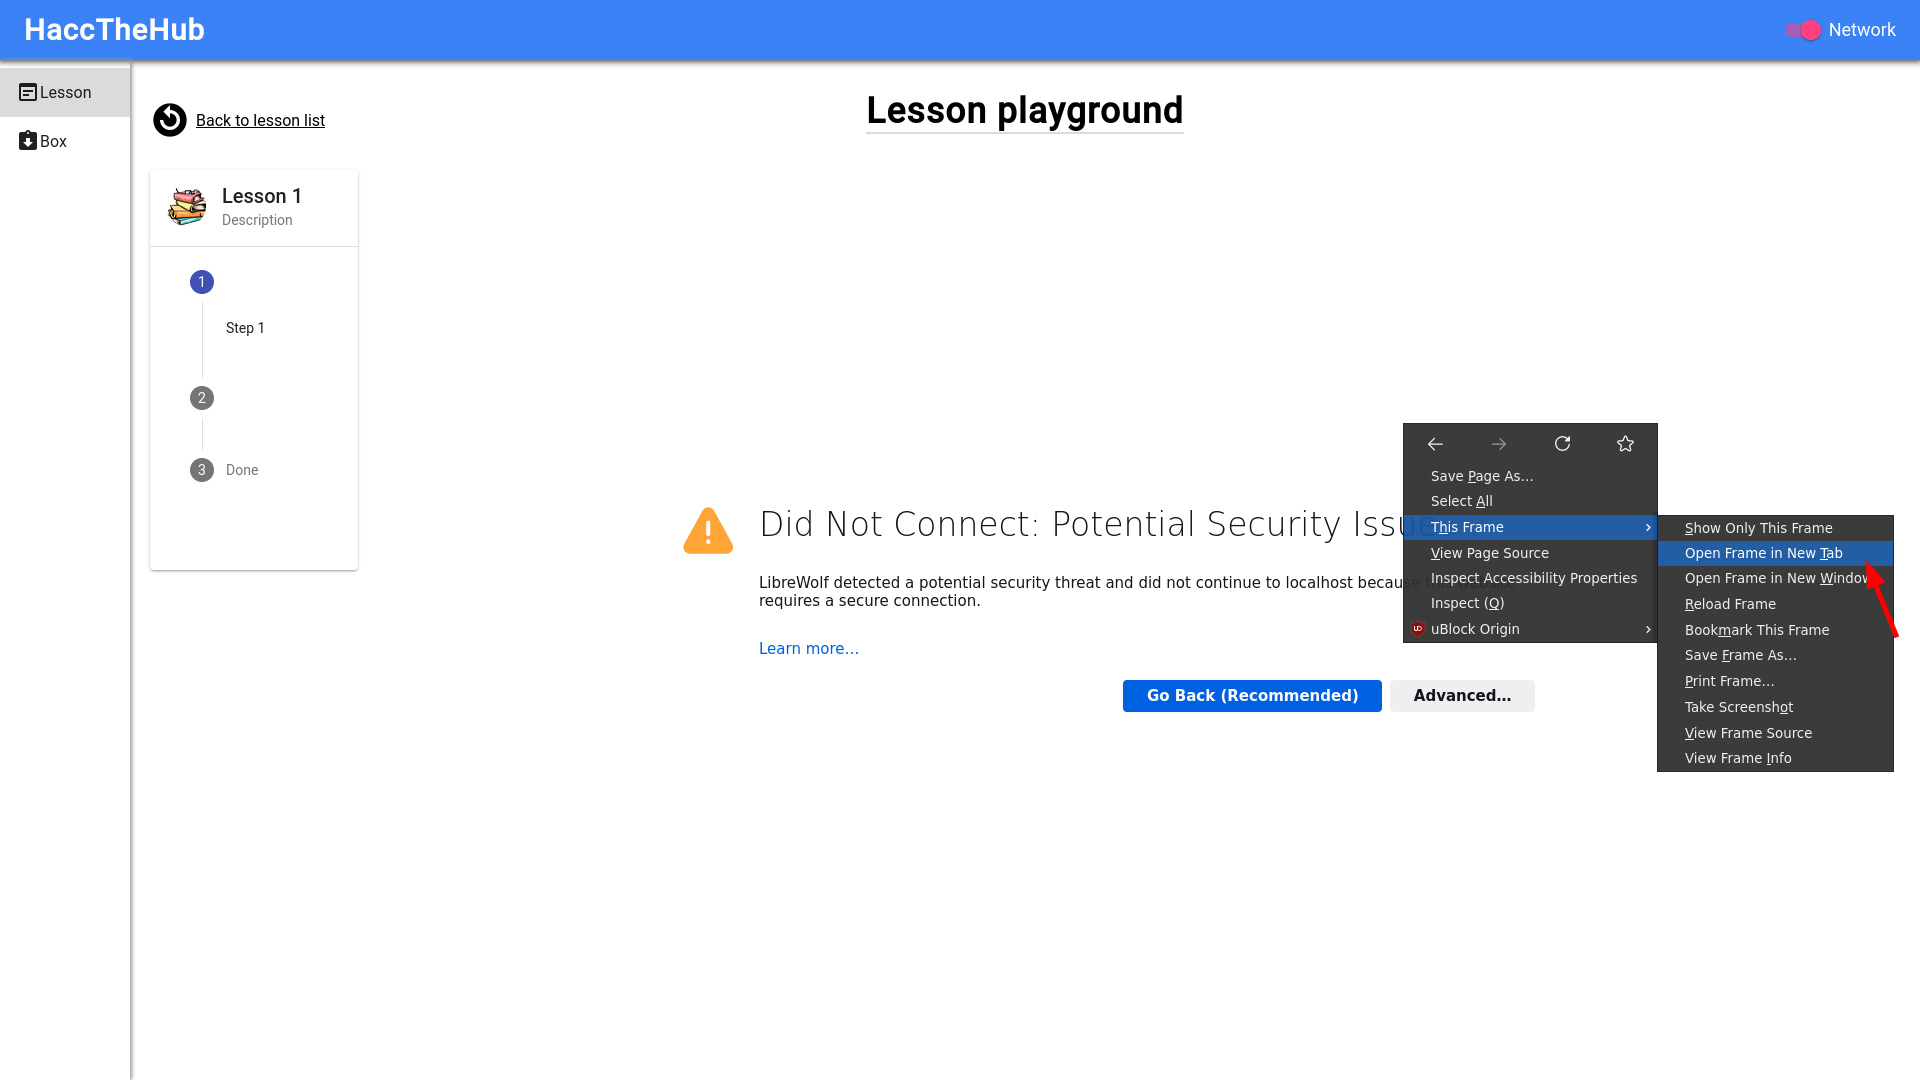
Since we're using a self-signed certificate for the noVNC WebGUI and browsers aren't exactly fond of allowing those to be rendered in iframes, you would need to take some extra steps in order to get the VNC working properly.
Right-click on the region of the error then This Frame > Open Frame in New Tab.
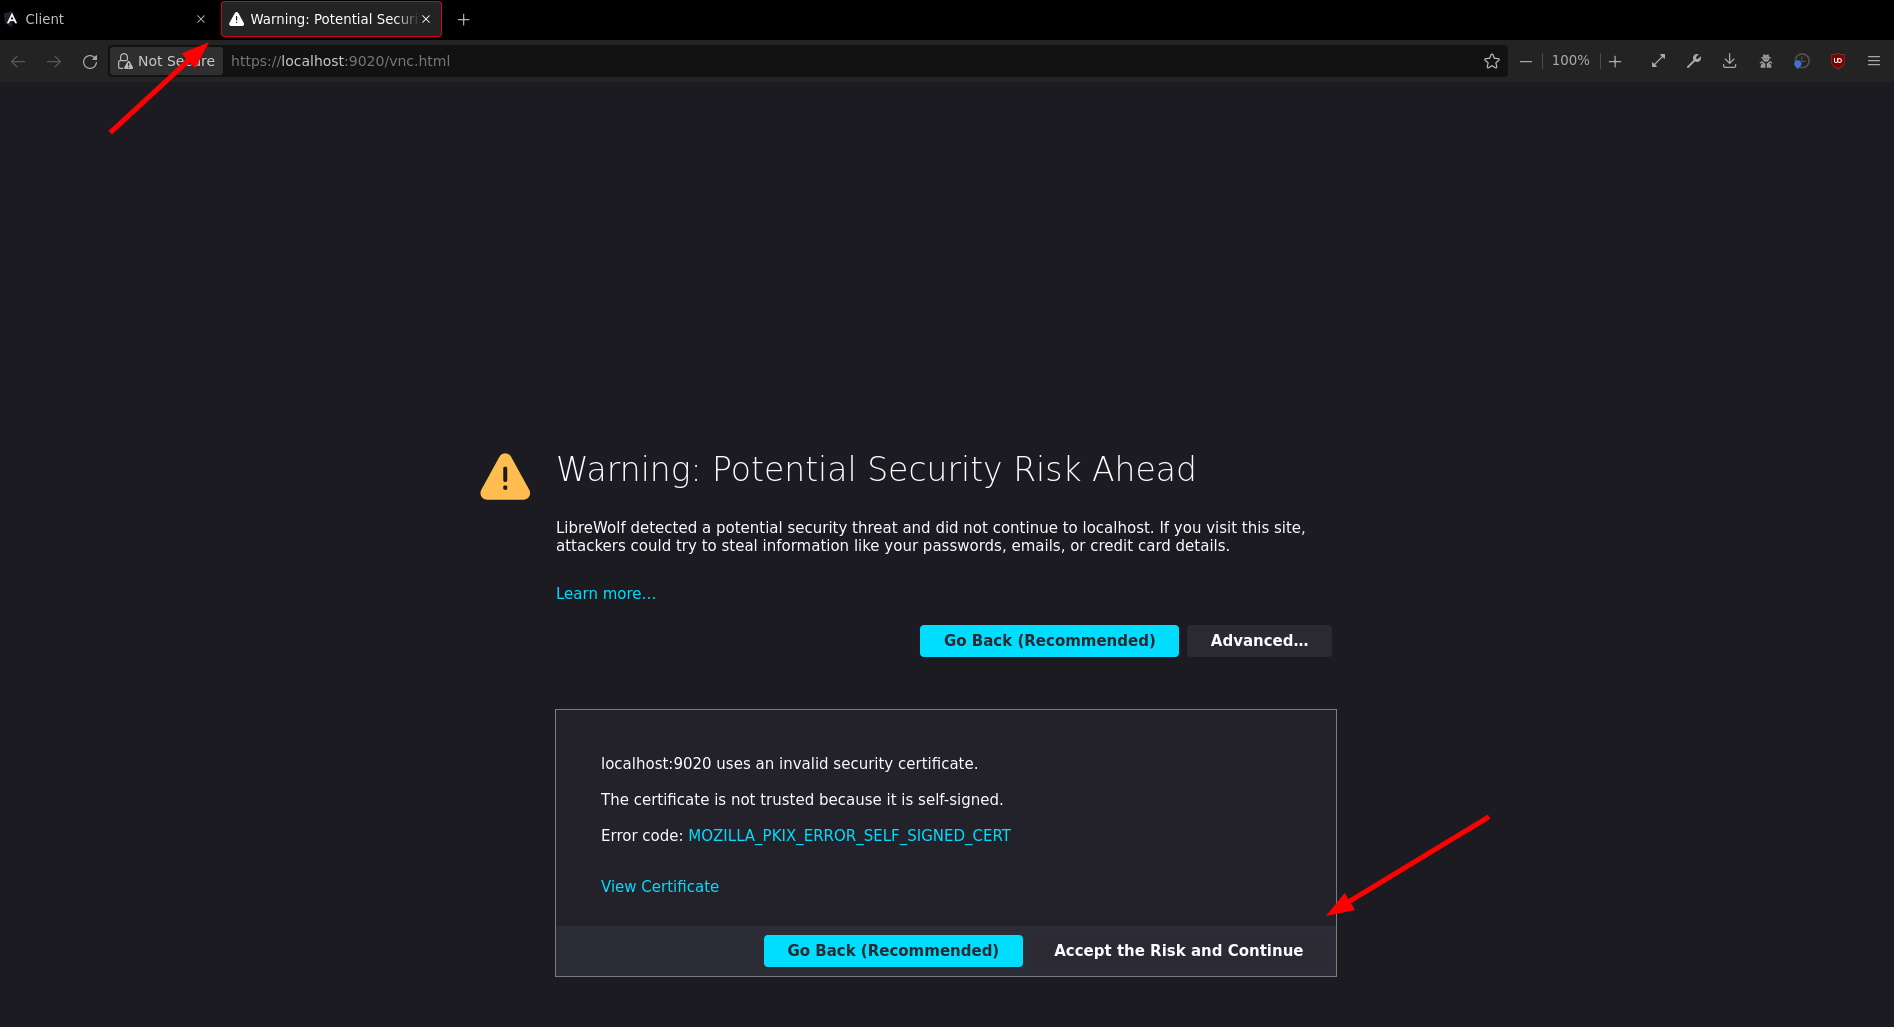
A new tab will be opened and you can click on Advanced > Accept the Risk and Continue to accept the self-signed certificate
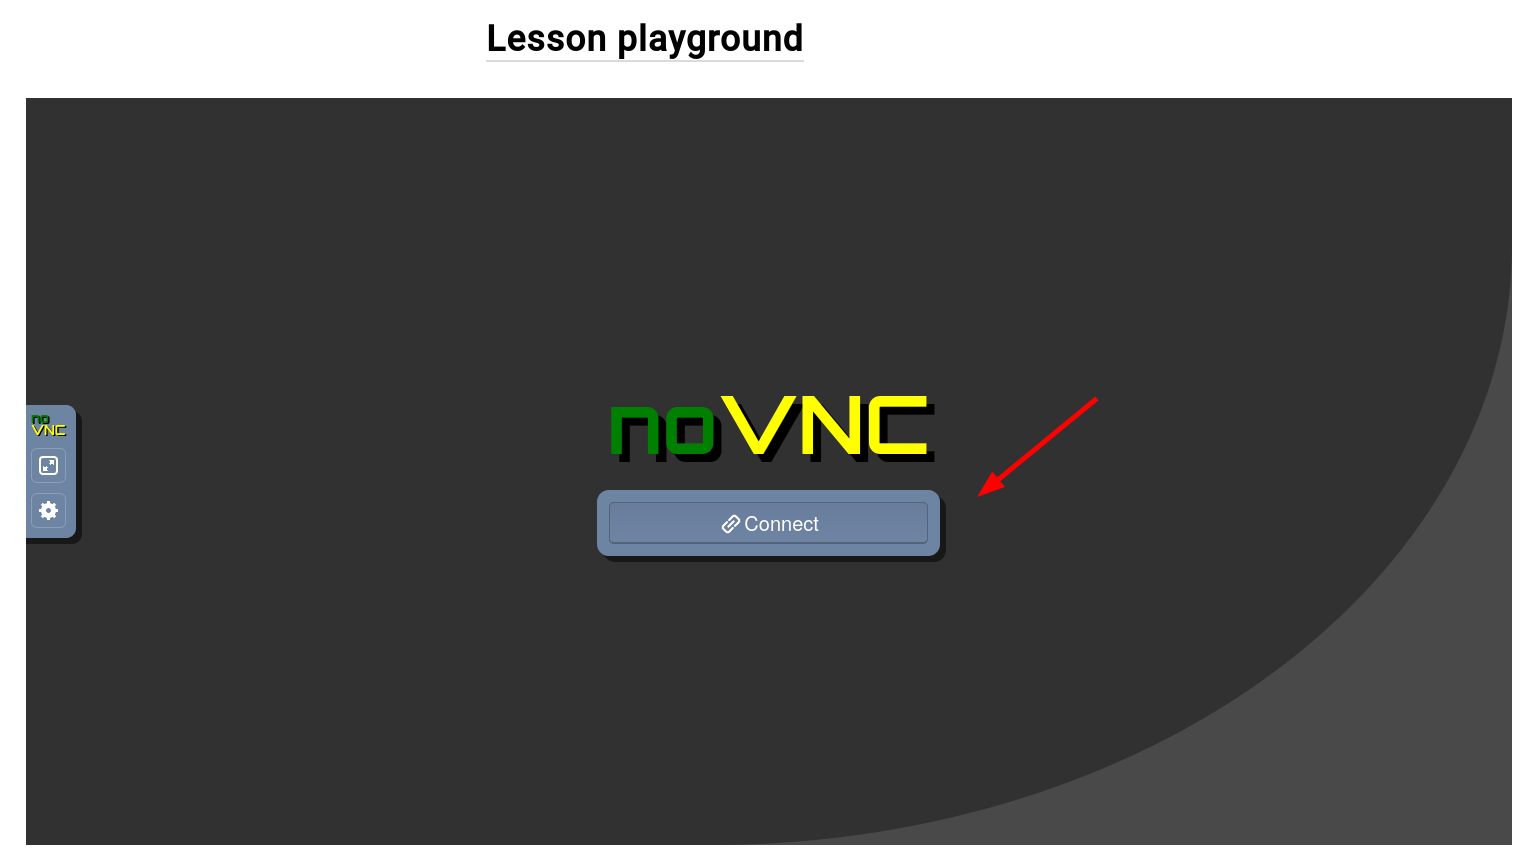
Close the new tab and refresh the playground page. VNC should now be working correctly.
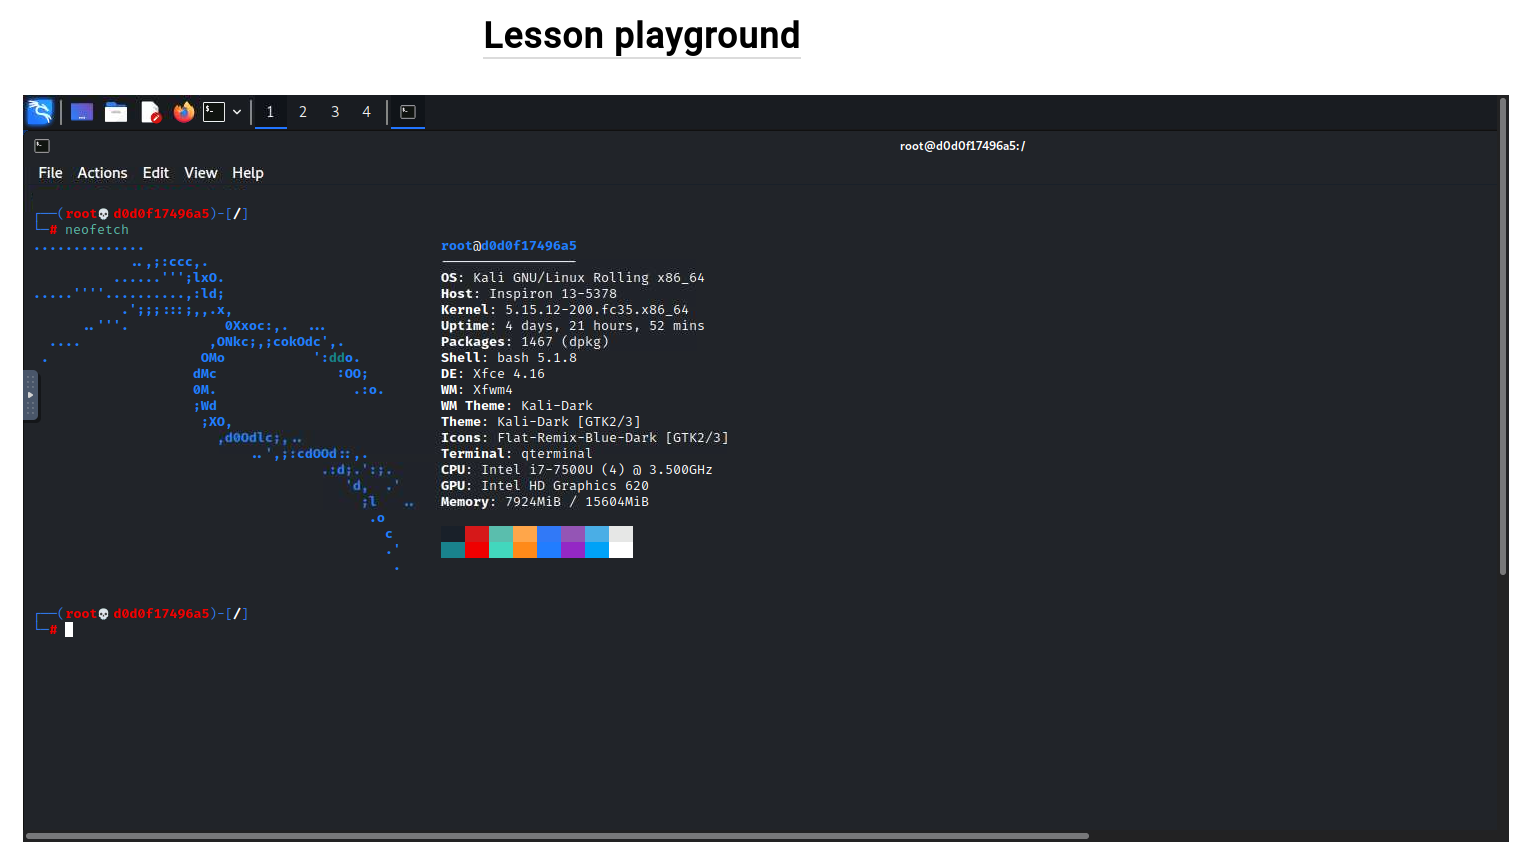
After clicking on Connect
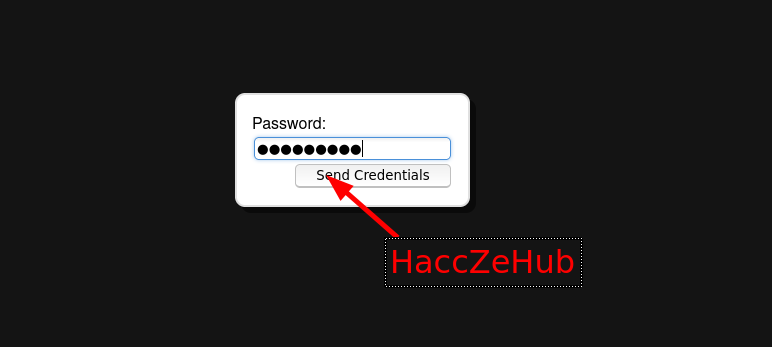
And then fill in HaccZeHub as the password.
Voilà, you're now ready to learn cybersecurity. Happy learning!