-
Notifications
You must be signed in to change notification settings - Fork 83
Streaming to Mac PC
The main use-case of VTube Studio is to use your smartphone for face tracking, render your model in the Mac/PC app and then use OBS (or recording similar software) to stream to YouTube or Twitch. Any Windows/Mac recording software should work with VTube Studio.
If you use an iPhone/iPad for tracking, you can use WiFi or USB to stream the face tracking data to the PC app. On Android, you can only use WiFi.


VTube Studio uses your local network (TCP/UDP) or USB to send face tracking data from your smartphone to your PC or Mac. Depending on your home network setup, there may be connection issues, most frequently caused by your firewall configuration. For more info, check out the chapter:
Connection Issues & Troubleshooting

Streaming the face tracking data from your smartphone to PC/Mac is easy. First, make sure both your smartphone and PC/Mac are on the same local network, otherwise they will not be able to see each other.
Then, start the desktop app. In the settings, you can activate the server after choosing a port (please try leaving the default port first, 25565).
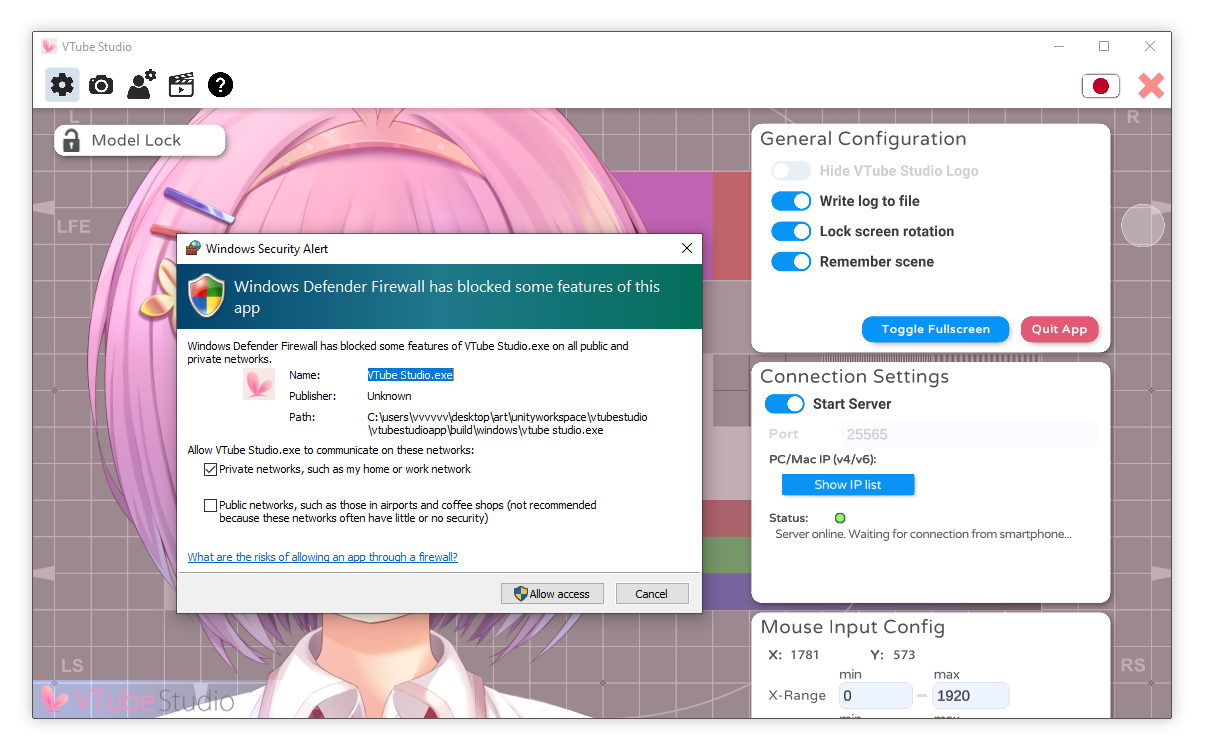
This will start the VTube Studio server on your PC on every available network device. Since your PC may have multiple network devices, you may see multiple IPs when clicking the "Show IP list" button.
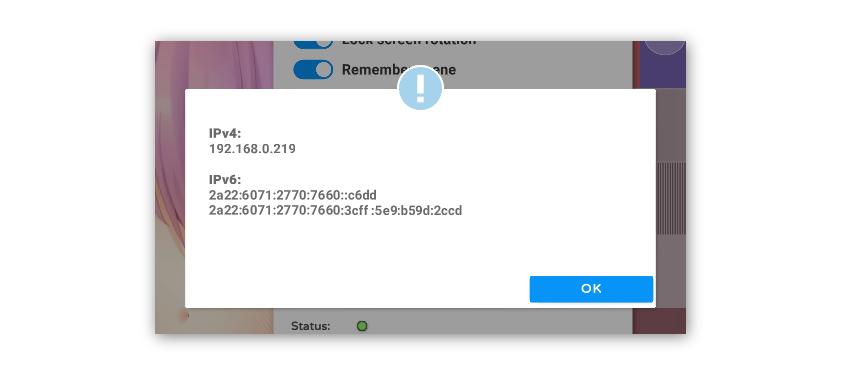


While your IPv4 shown here is typically a local, internal address and cannot be publicly accessed over the internet, your IPv6 addresses are likely to be public addresses! Please be careful to block them out if you post screenshots on the internet. Stay safe!

When starting the server for the first time, you may see a popup from the Windows Defender Firewall. Make sure you click "Allow access" and "Private networks" is checked. Otherwise, your smartphone will not be able to connect to the PC app as connections will be blocked by the firewall.
The server is now active and is listening for connections from the smartphone app. Leave it this way.
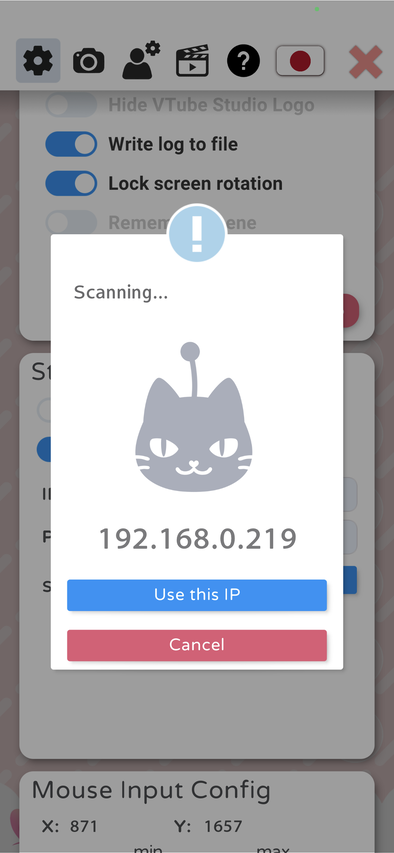
Next, start the app on your smartphone. In the settings, you can manually type in the IP and port from the desktop application or use the "Find Server" button to automatically scan for the server and use its IP and port. This scan should not take longer than 5 seconds.
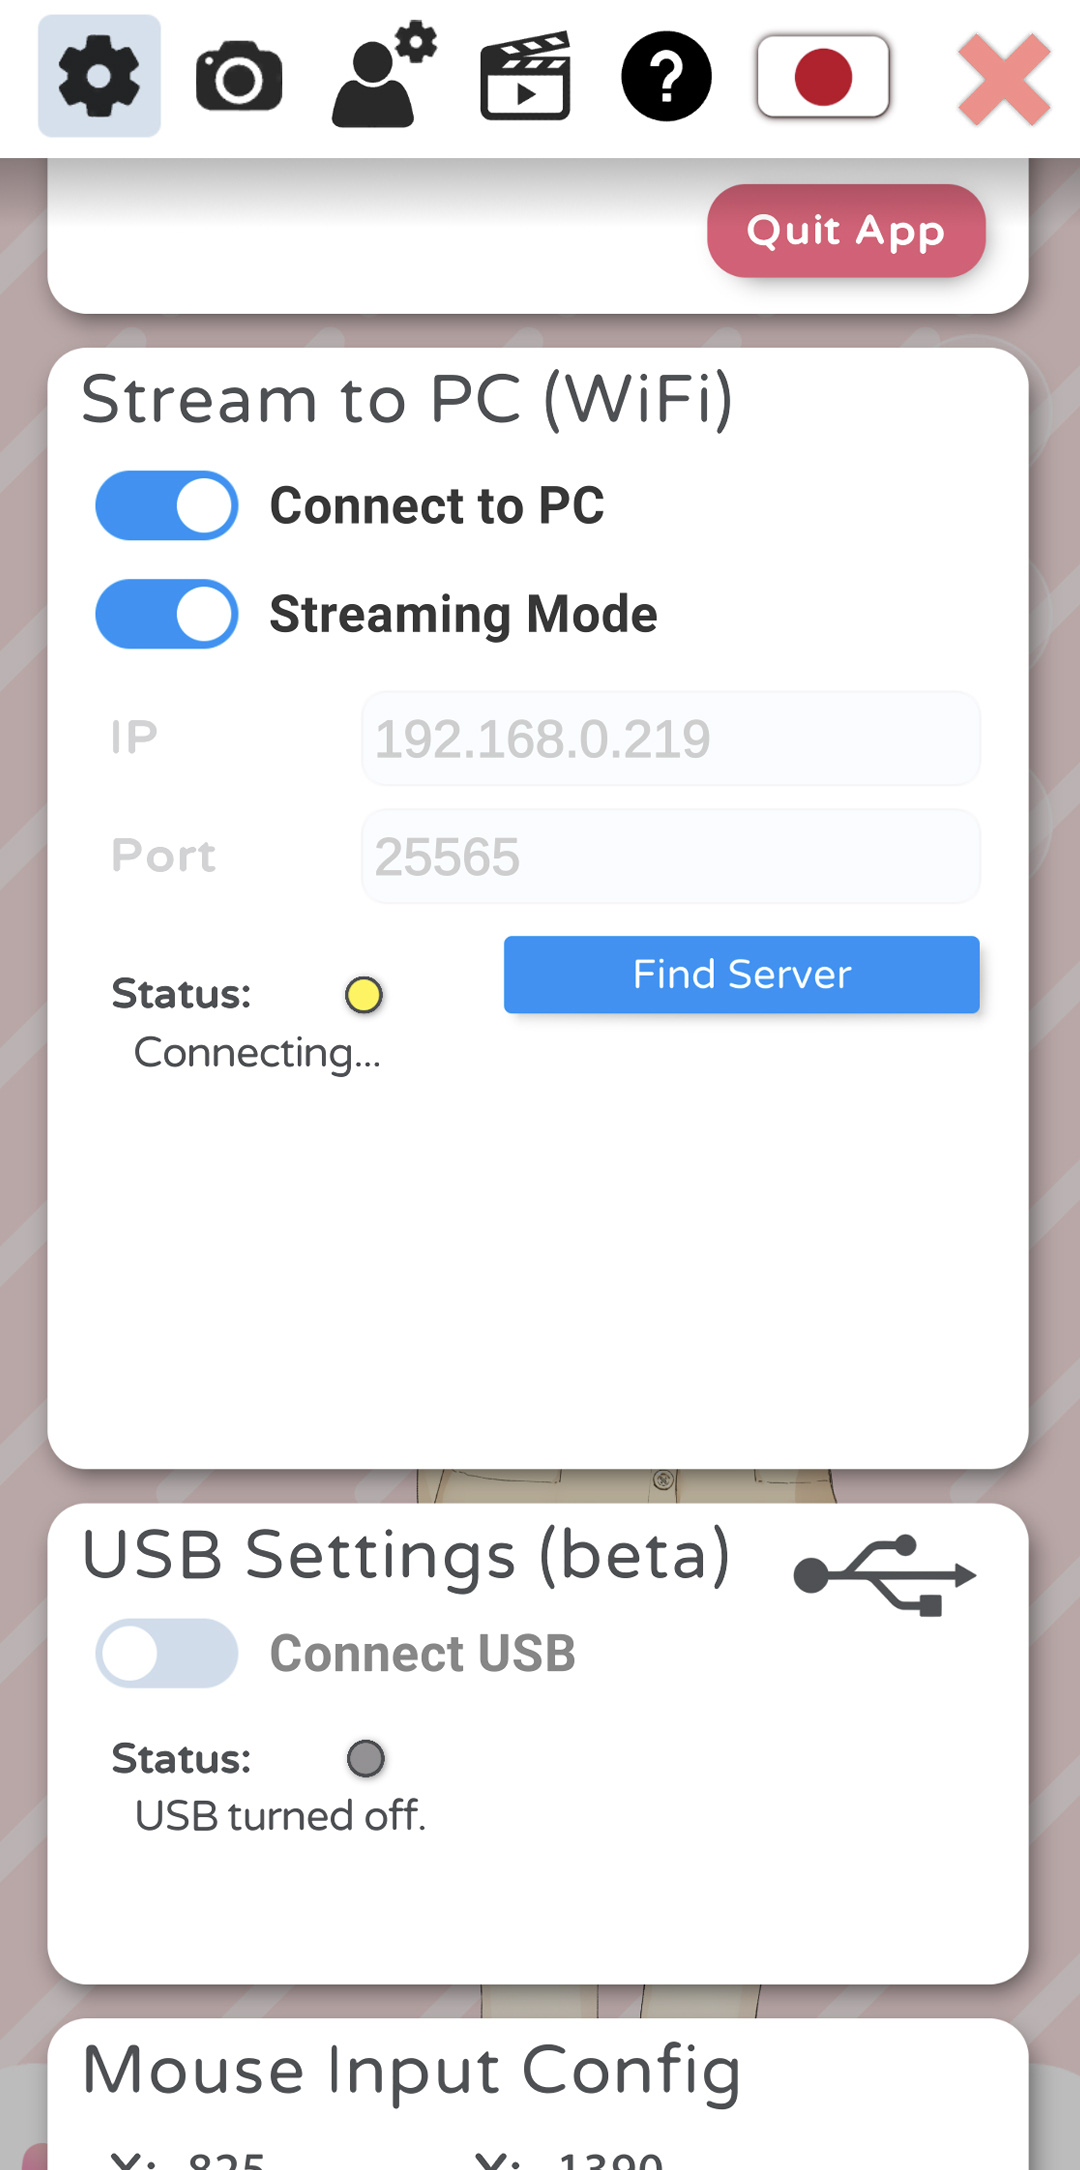
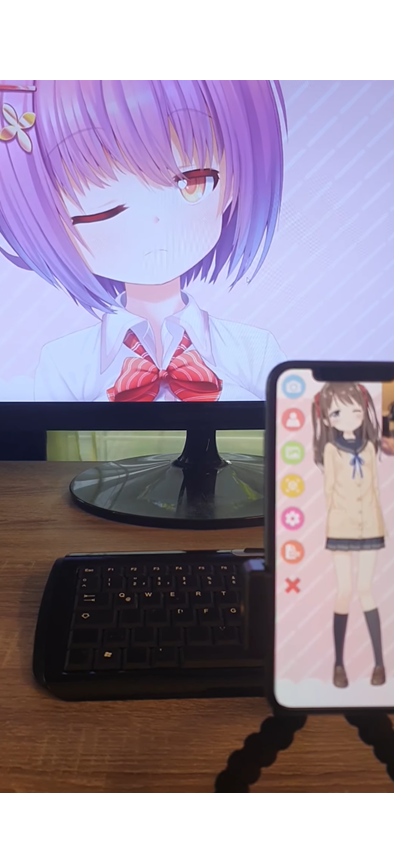
Now, click "Connect to PC". The app will now connect to the server. If the connection is lost for some reason, the app will try to re-establish the connection automatically.
Congratulations. You are now streaming your face tracking data to your PC. You can now open a VTS model in the desktop application and it will use the face tracking data from the smartphone. You can also have the same or a different model open in the smartphone app at the same time if you’d like.


You do not need to have a model open on your smartphone when streaming to PC. In fact, it is recommended to not have one open for performance reasons. When using "Streaming Mode", any opened models on your smartphone will be automatically unloaded when connecting.

If you use an iPhone/iPad for tracking, you can also use a wired USB connection to send over the face tracking data in real time. This is very reliable and more stable than WiFi but also a newer feature so it’s now as well tested. Right now, this is the recommended way to stream face tracking data.
To start a connection, activate the "Connect USB" switch on your phone first. If a face tracking WiFi connection to your PC is active, this will also deactivate it as they cannot be running at the same time. Afterwards, activate the “Connect USB” switch in the app on your PC/Mac.

If your device doesn’t show up or fails to connect, make sure all of the following are true.
- iOS device is connected to the PC per USB cable.
- iOS device is unlocked and running the VTube Studio app.
- The app on iOS says "USB started. Waiting for PC app to connect."
- The iPhone is "paired" with the PC (the phone must "trust" the PC). This can be checked by making sure iTunes can see the contents of the iPhone.
- Important: Make sure you have installed iTunes!! iTunes starts some background services on Windows/MacOS that are required for communication with iPhones. iTunes doesn’t have to be running, but make sure it is installed on your PC/Mac and has been started at least once. If the USB connection fails, try starting iTunes once before VTube Studio.
On your PC in VTube Studio, choose the Color Picker background. On Windows, you can use the "Transparent in capture" option here, which will make the window background transparent when the window is recorded in OBS so you don’t need to use greenscreen/chroma keying.
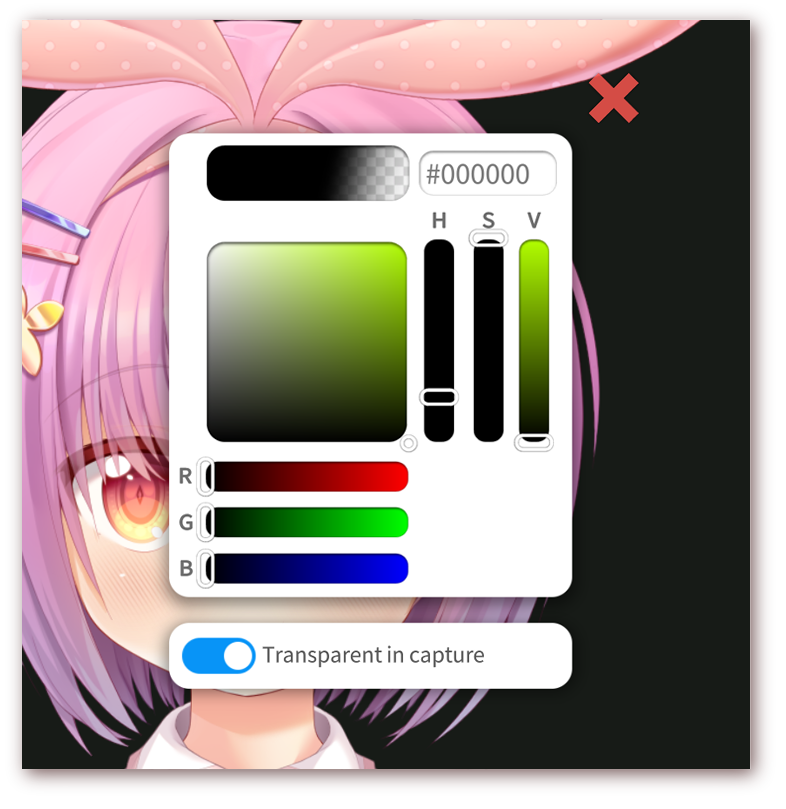
On macOS, this feature is not supported by OBS, so choose any color you want here. You can remove that color from the video capture in OBS using a "Chroma Key" filter. Keep in mind that you can't use that color in your Live2D model, otherwise some parts of your model may be transparent as well.
Add a background in OBS, then add a capture for VTube Studio. To do that, select "Game Capture". This supports transparent backgrounds but is only available on Windows. On macOS, this option is called "Syphon Client", but does not work after macOS 10.14 Mojave (see https://github.com/zakk4223/SyphonInject), so you need to use a regular window capture and a chroma key filter.
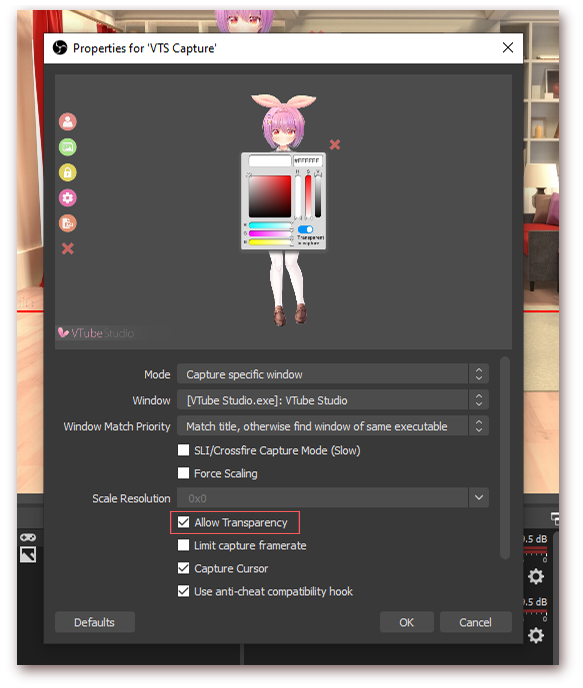
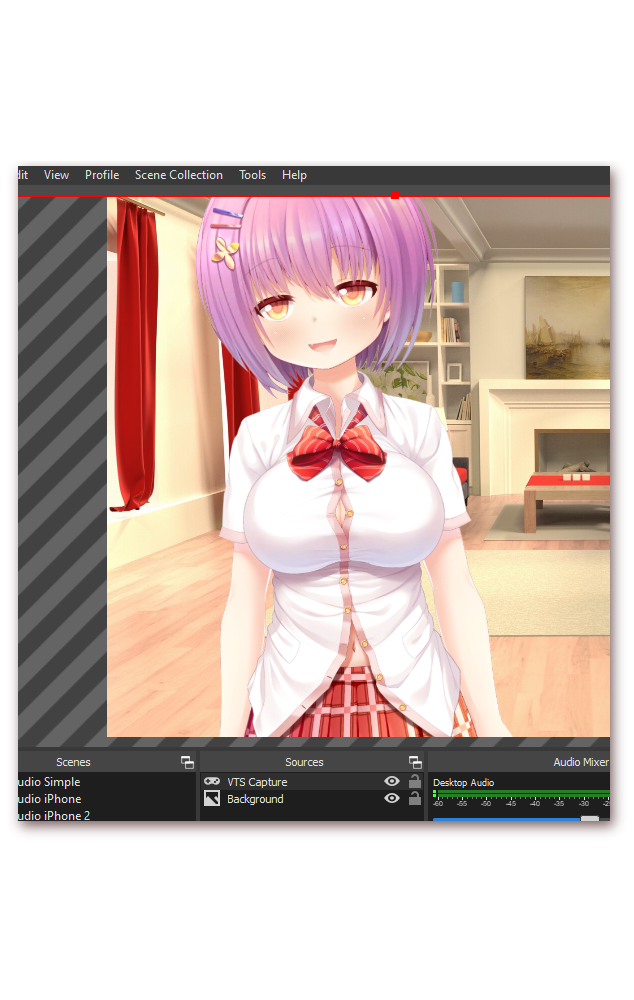
Your capture is now active. On macOS, you need to add a filter to remove the green (or whatever color you selected) background using Right Click your capture → Filters → Add Filter → Chroma Key.
You can now place your character anywhere on screen by moving/scaling/rotating it in directly in VTube Studio or in OBS.
Alternatively, you can use the Virtual Webcam feature or NDI in VTube Studio to create a webcam stream and then directly use that in apps like Zoom, Discord, etc. (see FAQ).
It is recommended to use OBS "Game Capture" to record the VTS window. Alternatively, you can use the Virtual Webcam or Newtek NDI (Network Device Interface) to create a video stream that can be used as input for software such as OBS.
The quality and latency of NDI streams is very good. It also supports a transparent background (no chroma/color key needed) and does not record the VTube Studio UI at all. CPU utilization of VTS may increase when using NDI. OBS plugins exist for macOS and Windows.
OBS Plugin Page: https://obsproject.com/forum/resources/obs-ndi-newtek-ndi%E2%84%A2-integration-into-obs-studio.528/
OBS Plugin Download (Win/Mac): https://github.com/Palakis/obs-ndi/releases/tag/4.9.1
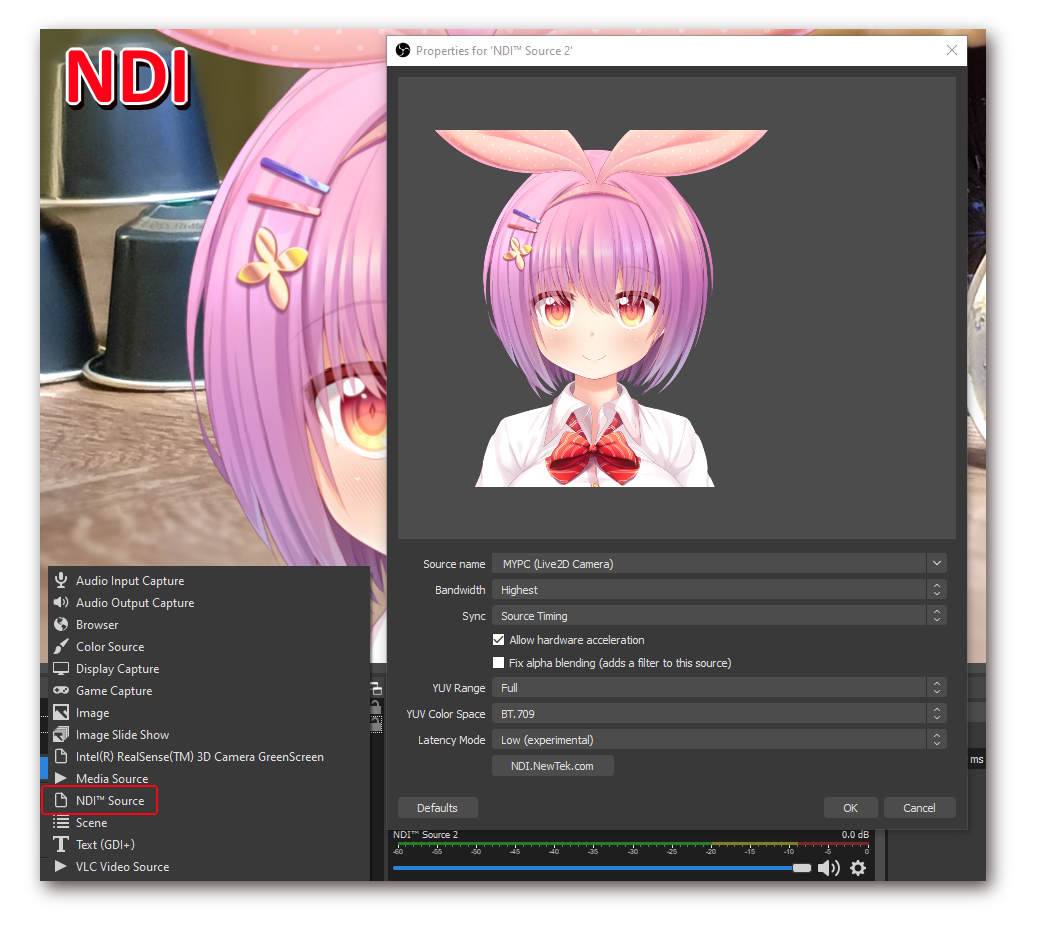
To use NDI, download the plugin from the GitHub-page linked above (.exe for Windows, .pkg for macOS) and install it. In VTube Studio, activate the NDI toggle in the "Camera Settings" tab. It is possible but not recommended to have NDI and the Virtual Webcam active at the same time.
VTube Studio lets you choose between NDI 4 and 5. It is recommended to use NDI 5 if it works without lag on your PC. By the way, NDI streams created by VTube Studio will be visible in your whole local network, so you could even have OBS running on a different PC and it will be able to read the NDI stream from VTube Studio (unless a firewall or network security settings prevent it).
Unlike with the Virtual Webcam, which only supports one stream, if you have multiple VTube Studio instances open, they will all show up as different (numbered) NDI sources in OBS.
In OBS, the following settings are recommended:
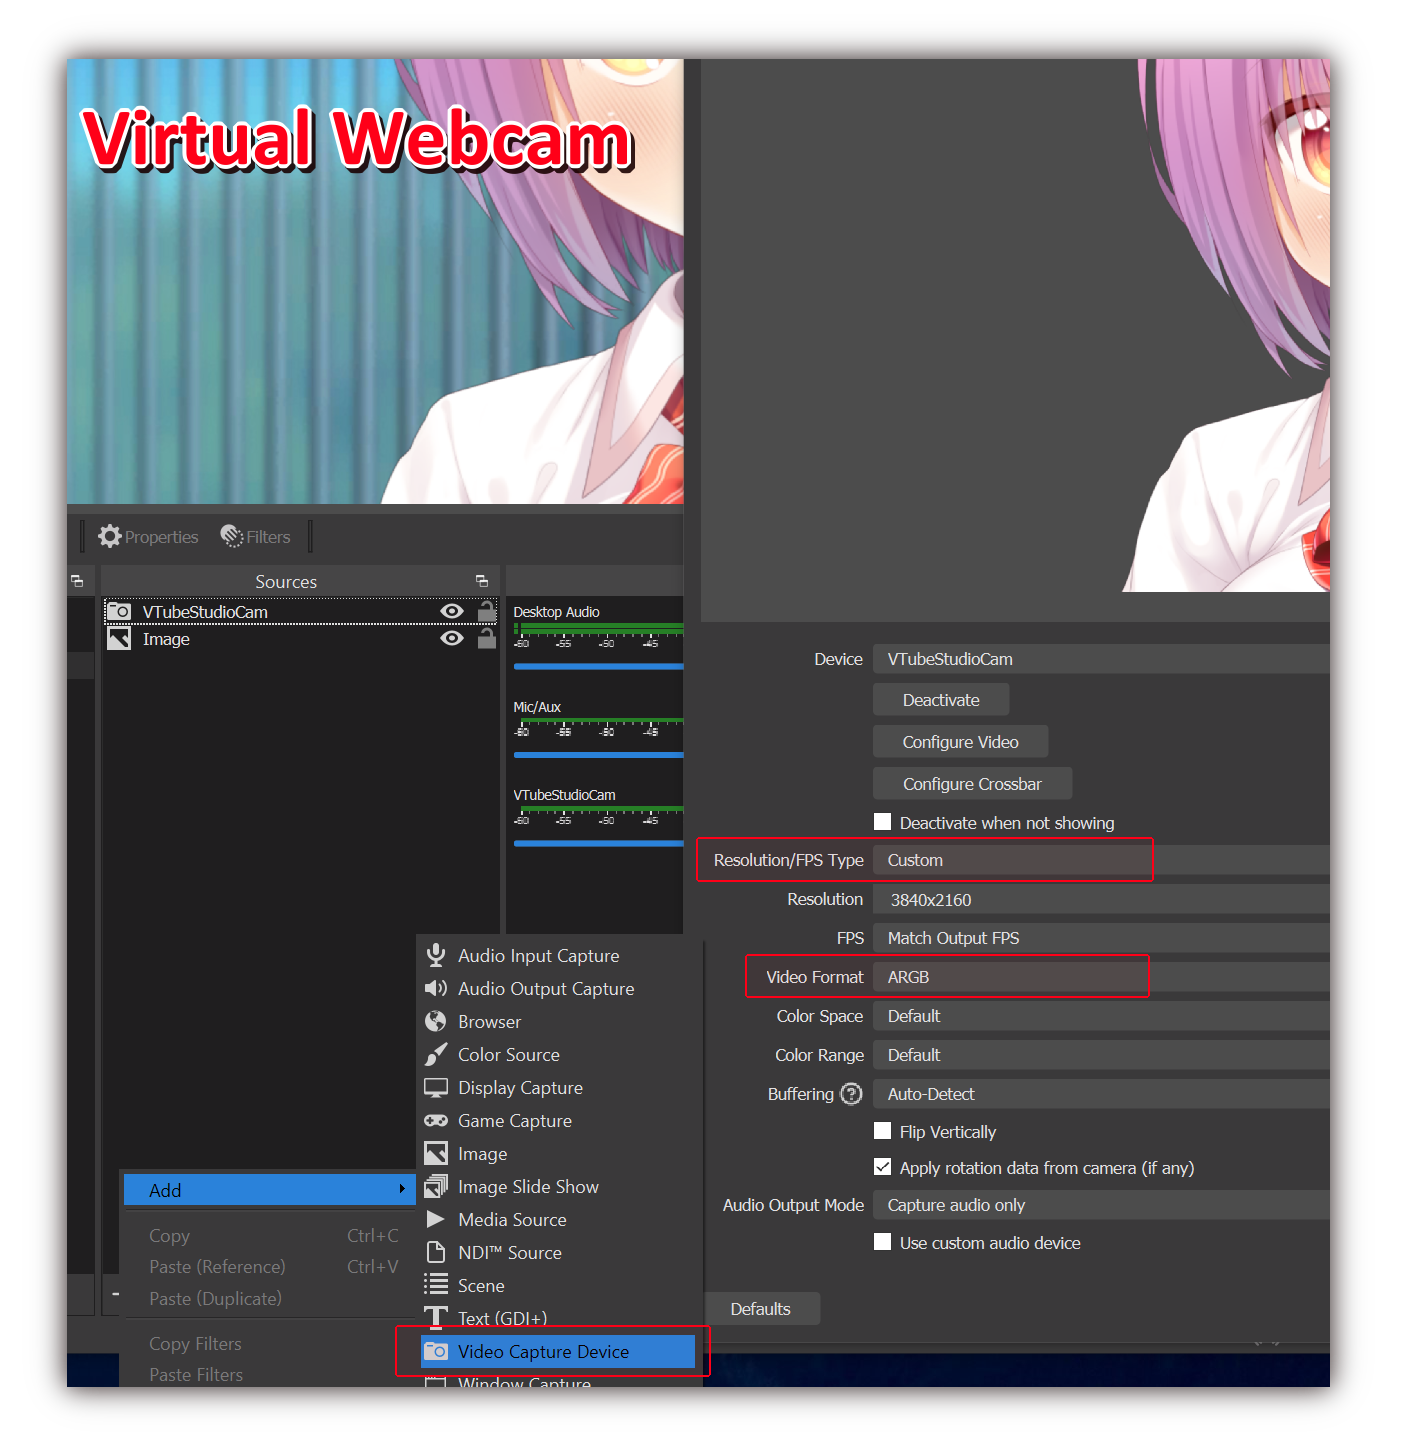
This works similar to NDI. Just activate the Virtual Webcam in the VTube Studio settings, go to the color picker background and make sure you've checked "Transparent in OBS".
In OBS, you should now see a webcam called "VTubeStudioCam". Add it to your scene with the following settings (except the resolution):
![]() If you have any questions that this manual doesn't answer, please ask in the VTube Studio Discord
If you have any questions that this manual doesn't answer, please ask in the VTube Studio Discord![]() !!
!!
- Android vs. iPhone vs. Webcam
- Getting Started
- Introduction & Requirements
- Preparing your model for VTube Studio
- Where to get models?
- Restore old VTS Versions
- Controlling multiple models with one device
- Copy config between models
- Loading your own Backgrounds
- Recoloring Models and Items
- Record Animations
- Recording/Streaming with OBS
- Sending data to VSeeFace
- Starting as Admin
- Starting without Steam
- Streaming to Mac/PC
- VNet Multiplayer Overview
- Steam Workshop
- Taking/Sharing Screenshots
- Live2D Cubism Editor Communication
- Lag Troubleshooting
- Connection Troubleshooting
- Webcam Troubleshooting
- Crash Troubleshooting
- Known Issues
- FAQ
- VTube Studio Settings
- VTS Model Settings
- VTube Studio Model File
- Visual Effects
- Twitch Interaction
- Twitch Hotkey Triggers
- Spout2 Background
- Expressions ("Stickers"/"Emotes")
- Animations
- Interaction between Animations, Tracking, Physics, etc.
- Google Mediapipe Face Tracker
- NVIDIA Broadcast Face Tracker
- Tobii Eye-Tracker
- Hand-Tracking
- Lipsync
- Item System
- Live2D-Items
- Between-Layer Item Pinning
- Item Scenes & Item Hotkeys
- Add Special ArtMesh Functionality
- Display Light Overlay
- VNet Security
- Plugins (YouTube, Twitch, etc.)
- Web-Items
- Web-Item Plugins

