-
Notifications
You must be signed in to change notification settings - Fork 72
Home
- Getting Started
- Pairing the Brick
- References
- Creating a Brick Object
- Events and Ports
- Connecting to the Brick
- Direct, System, and Batch Commands
- WinRT Permissions
- Phone Permissions
- More Information
- Known Issues
Please note that this library requires firmware v1.03H or higher to be installed on the brick. You can install this firmware with the LEGO MINDSTORMS desktop software from the Tools -> Firmware Update menu item.
This project contains libraries for Windows desktop (WinForms, WPF, Console, etc.), Windows Phone 8, and WinRT (Windows 8.1 and higher). You will also find several tester and sample applications that demonstrate the library in action and how to use it in your own applications. In addition, here are some quick examples to get you started...
The LEGO EV3 brick can be connected via USB (except for Windows Phone), Bluetooth or WiFi.
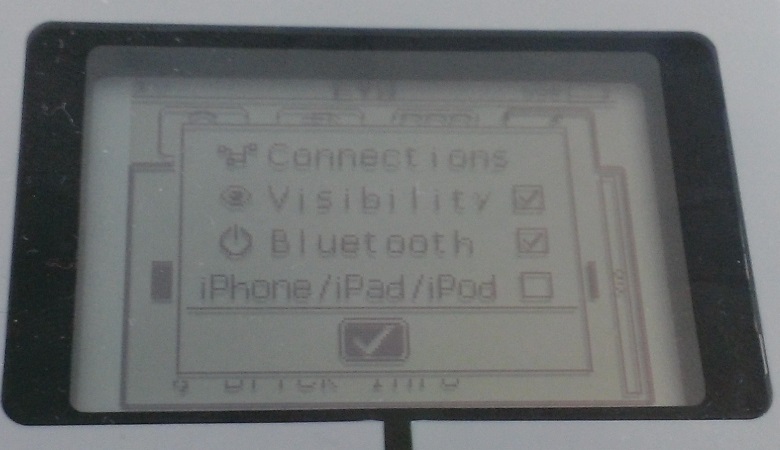
To enable Bluetooth on the brick, navigate to the Settings tab (the wrench icon) and select Bluetooth. Make sure the Visibility and Bluetooth items are both checked as shown:

The pairing process via Bluetooth will be different with each platform. In summary, you will need to open your Bluetooth settings, search for devices, find the one named EV3, pair, entering the code 1234 when prompted, and the devices should pair.
WiFi is not built in to the EV3 brick. The only adapter that is compatible and supported is the NETGEAR N150 USB device (WNA1100), which can be plugged into the USB port on the side of the brick. You can also configure WiFi by opening the desktop MINDSTORMS software, starting a project, and configuring by clicking on the wrench icon in the lower right of the screen, selecting your access point, clicking the Connect button, and configuring the password:

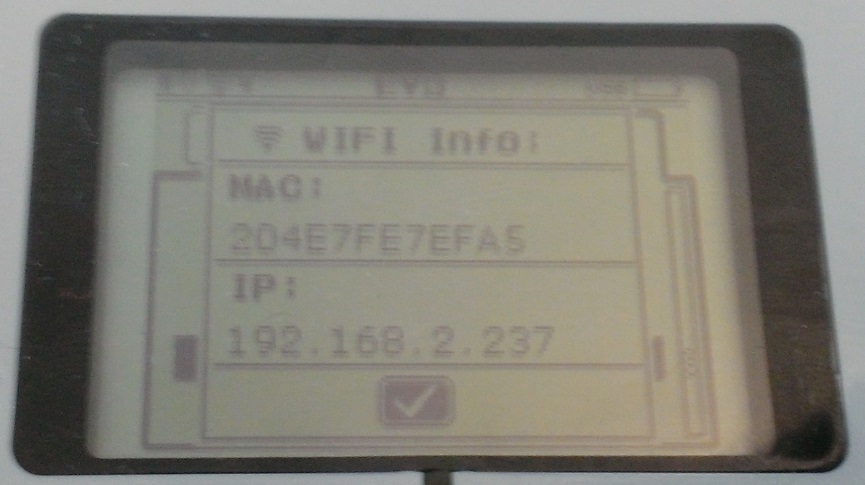
You can also do this via the brick itself from the WiFi section under the Settings tab. Once enabled and connected, you will be able to determine the brick's IP address by selecting the current connection in the list of connections on the brick.


First off, you will need to set a reference to the appropriate library for the application type you're creating. You can find the library and set a reference easily using NuGet. The three libraries are named:
- Lego.Ev3.Desktop
- Lego.Ev3.Phone
- Lego.Ev3.WinRT
With the reference set, you can create a Brick object and start communicating with the physical EV3 brick. However, you will also need to pass an instance of an object that implements the ICommunication interface to the Brick constructor, which will determine how the library will talk to the brick. Here are the options:
- Desktop
- BluetoothCommunication (requires the COM port the brick is hosted on while paired)
- UsbCommunication
- NetworkCommunication (requires the IP address of the brick)
- Phone
- BluetoothCommunication
- NetworkCommunication (requires the IP address of the brick)
- WinRT
- BluetoothCommunication
- UsbCommunication
- NetworkCommunication (requires the IP address of the brick)
The following snippet of code will create a new Brick object communicating over USB:
Brick brick = new Brick(new UsbCommunication());The Brick object contains a BrickChanged event. You can hook this event to receive a notification every time some property on the brick changes. For example, when someone presses a button on the brick face, the value of a sensor changes, a sensor/motor is added/removed, etc.
The Brick also has a dictionary collection of Port objects. These map to the physical ports on the EV3 brick. You can get the type/value/mode/etc. of anything plugged into any port at any time. Or you can use the event.
You can hook the event as follows:
brick.BrickChanged += OnBrickChanged;

...

void OnBrickChanged(object sender, BrickChangedEventArgs e)
{
    // print out the value of the sensor on Port 1 (more on this later...)
    Debug.WriteLine(e.Ports[InputPort.One].SIValue);
}
Or, to get the value of the sensor on Port 1 at any time, just use the Ports collection:
Debug.WriteLine(brick.Ports[InputPort.One].SIValue);Once the Brick is created and the event is hooked (or not), it's time to connect to the brick. This is done using the ConnectAsync method. By default, this will setup a timer which will poll the brick for data every 100 milliseconds. If you wish to poll more quickly or slowly, you can pass in a TimeSpan object for the polling time you require. Or, to disable polling altogether, use the TimeSpan.Zero constant. Here's how to connect:
await brick.ConnectAsync();There are 3 types of commands that can be sent to the brick:
DirectCommand - these commands are "one off" commands and are executed immediately. These are great if you only need to do a single operation at a time, but can be very slow when calling a series of them in very quick succession. In this case you'd want to use...
BatchCommand - these commands are queued up until the SendCommandAsync method is called, at which point the entire queue is sent in a single packet and executed.
SystemCommand - these commands are also "one off" but cannot be batched. These commands are for uploading files and other system-level functions.
You will find these inside of the Brick object as DirectCommand, BatchCommand and SystemCommand properties, each of which contains their corresponding methods.
Up to 4 motors can be hooked up to the ABCD ports on the EV3 brick. There are a variety of methods to interact with the motors which you can find in the API documentation. As an example, here is a DirectCommand which will turn the motor on Port A for 5 seconds at 50% power:
await brick.DirectCommand.TurnMotorAtPowerAsync(OutputPort.A, 50, 5000);Up to 4 sensors can be hooked up to the 1234 ports on the EV3 brick. Additionally, each motor also acts as a sensor and can return positional/rotational data. Each sensor/motor may also have the ability to return its data in a variety of different modes. For example, the Touch sensor can return whether the button is pressed, or it can return the number of times it has been pressed since it was last reset. To set the mode of a port, use the SetMode method as shown:
// assuming a Touch sensor is installed on Port 1, set it to return
// the number of presses, not whether it is pressed
brick.Ports[InputPort.One].SetMode(TouchMode.Bumps);
Sensor data is also returned in 3 different formats: Raw, SI (International System of Units), and Percentage. In most cases, the SI value is the one you want to use:
// print the current value of the sensor plugged into Port 1
Debug.WriteLine(brick.Ports[InputPort.One].SIValue);
System commands can be used to upload files, delete files, etc. Here's an example to upload a sound file from your PC to a specific location on the brick:
await brick.SystemCommand.CopyFileAsync("Overpower.rsf", "../prjs/Tester/Overpower.rsf");Here is an example of a Batch command to set the speed of one motor to 50%, the power of a second motor to 50%, and play an audio tone:
brick.BatchCommand.TurnMotorAtSpeedForTime(OutputPort.A, 50, 1000, false);
brick.BatchCommand.TurnMotorAtPowerForTime(OutputPort.C, 50, 1000, false);
brick.BatchCommand.PlayTone(50, 1000, 500);
await brick.BatchCommand.SendCommandAsync();When creating a WinRT application which uses this library, certain capabilities must be added to the application manifest file. To do this, open the package.appxmanifest file in the XML editor and add the following to the Capabilities section, based on the type of communication you will be using (any or all can be used at once):
Bluetooth
<m2:DeviceCapability Name="bluetooth.rfcomm">
    <m2:Device Id="any">
        <m2:Function Type="name:serialPort" />
    </m2:Device>
</m2:DeviceCapability>
USB
<m2:DeviceCapability Name="humaninterfacedevice">
    <m2:Device Id="vidpid:0694 0005">
        <m2:Function Type="usage:ff00 0001" />
    </m2:Device>
</m2:DeviceCapability>
Network (note that this one CAN be set from the manifest editor UI)
<Capability Name="privateNetworkClientServer" />When creating a WinRT application which uses this library, certain capabilities must be added to the application manifest file. To do this, open the WMAppManifest.xml and add the following capabilities:
- ID_CAP_PROXIMITY (for BluetoothConnection)
- ID_CAP_NETWORKING (for NetworkConnection)
Check out the Getting Started video on Channel9 for more info! Also, read more on how the firmware works with LEGO's docs.
- WinRT documentation is currently missing but will be provided once we can properly build it. In the mean time, refer to the Desktop and Phone documentation which is 99.9% identical.
- An exception may be thrown when connecting/disconnecting rapidly via Bluetooth on Phone and WinRT.
- USB communication with the Desktop library is a bit laggy.
- When using Bluetooth on WinRT, the brick must be named the default "EV3".
- The library can only be used with a single brick at a time. Multiple brick communication is not supported.