This tutorial draws on two 3scale Repos:
- 3scale CLI
- API discovery 3scale Repo
For now this is non core functionality to 3scale but shortly we will be significantly enhancing our support for this area in the product. We will be constantly evolving this tutorial but for now we will import 4 OAI (Swagger) specs into 3scale - each of which will form an element of our catalog.
Access to a 3scale Account - either SaaS or On Prem
First, get your 3scale domain.
With SaaS it's the portion of your Admin URL between https:// and -admin.3scale.net. e.g. with https://plugin-admin.3scale.net it's plugin
With On Prem, it's the portion of your Admin URL between https:// and the dot preceding the start of your host or IP. e.g. with https://3scale-admin.amp.52.15.150.46.nip.io it's 3scale-admin.amp. We'll refer to this as your 3scale-domain.
Next, get your 3scale Access token (used to initialize the CLI). Go to Gear sign - Personal Settings - Tokens
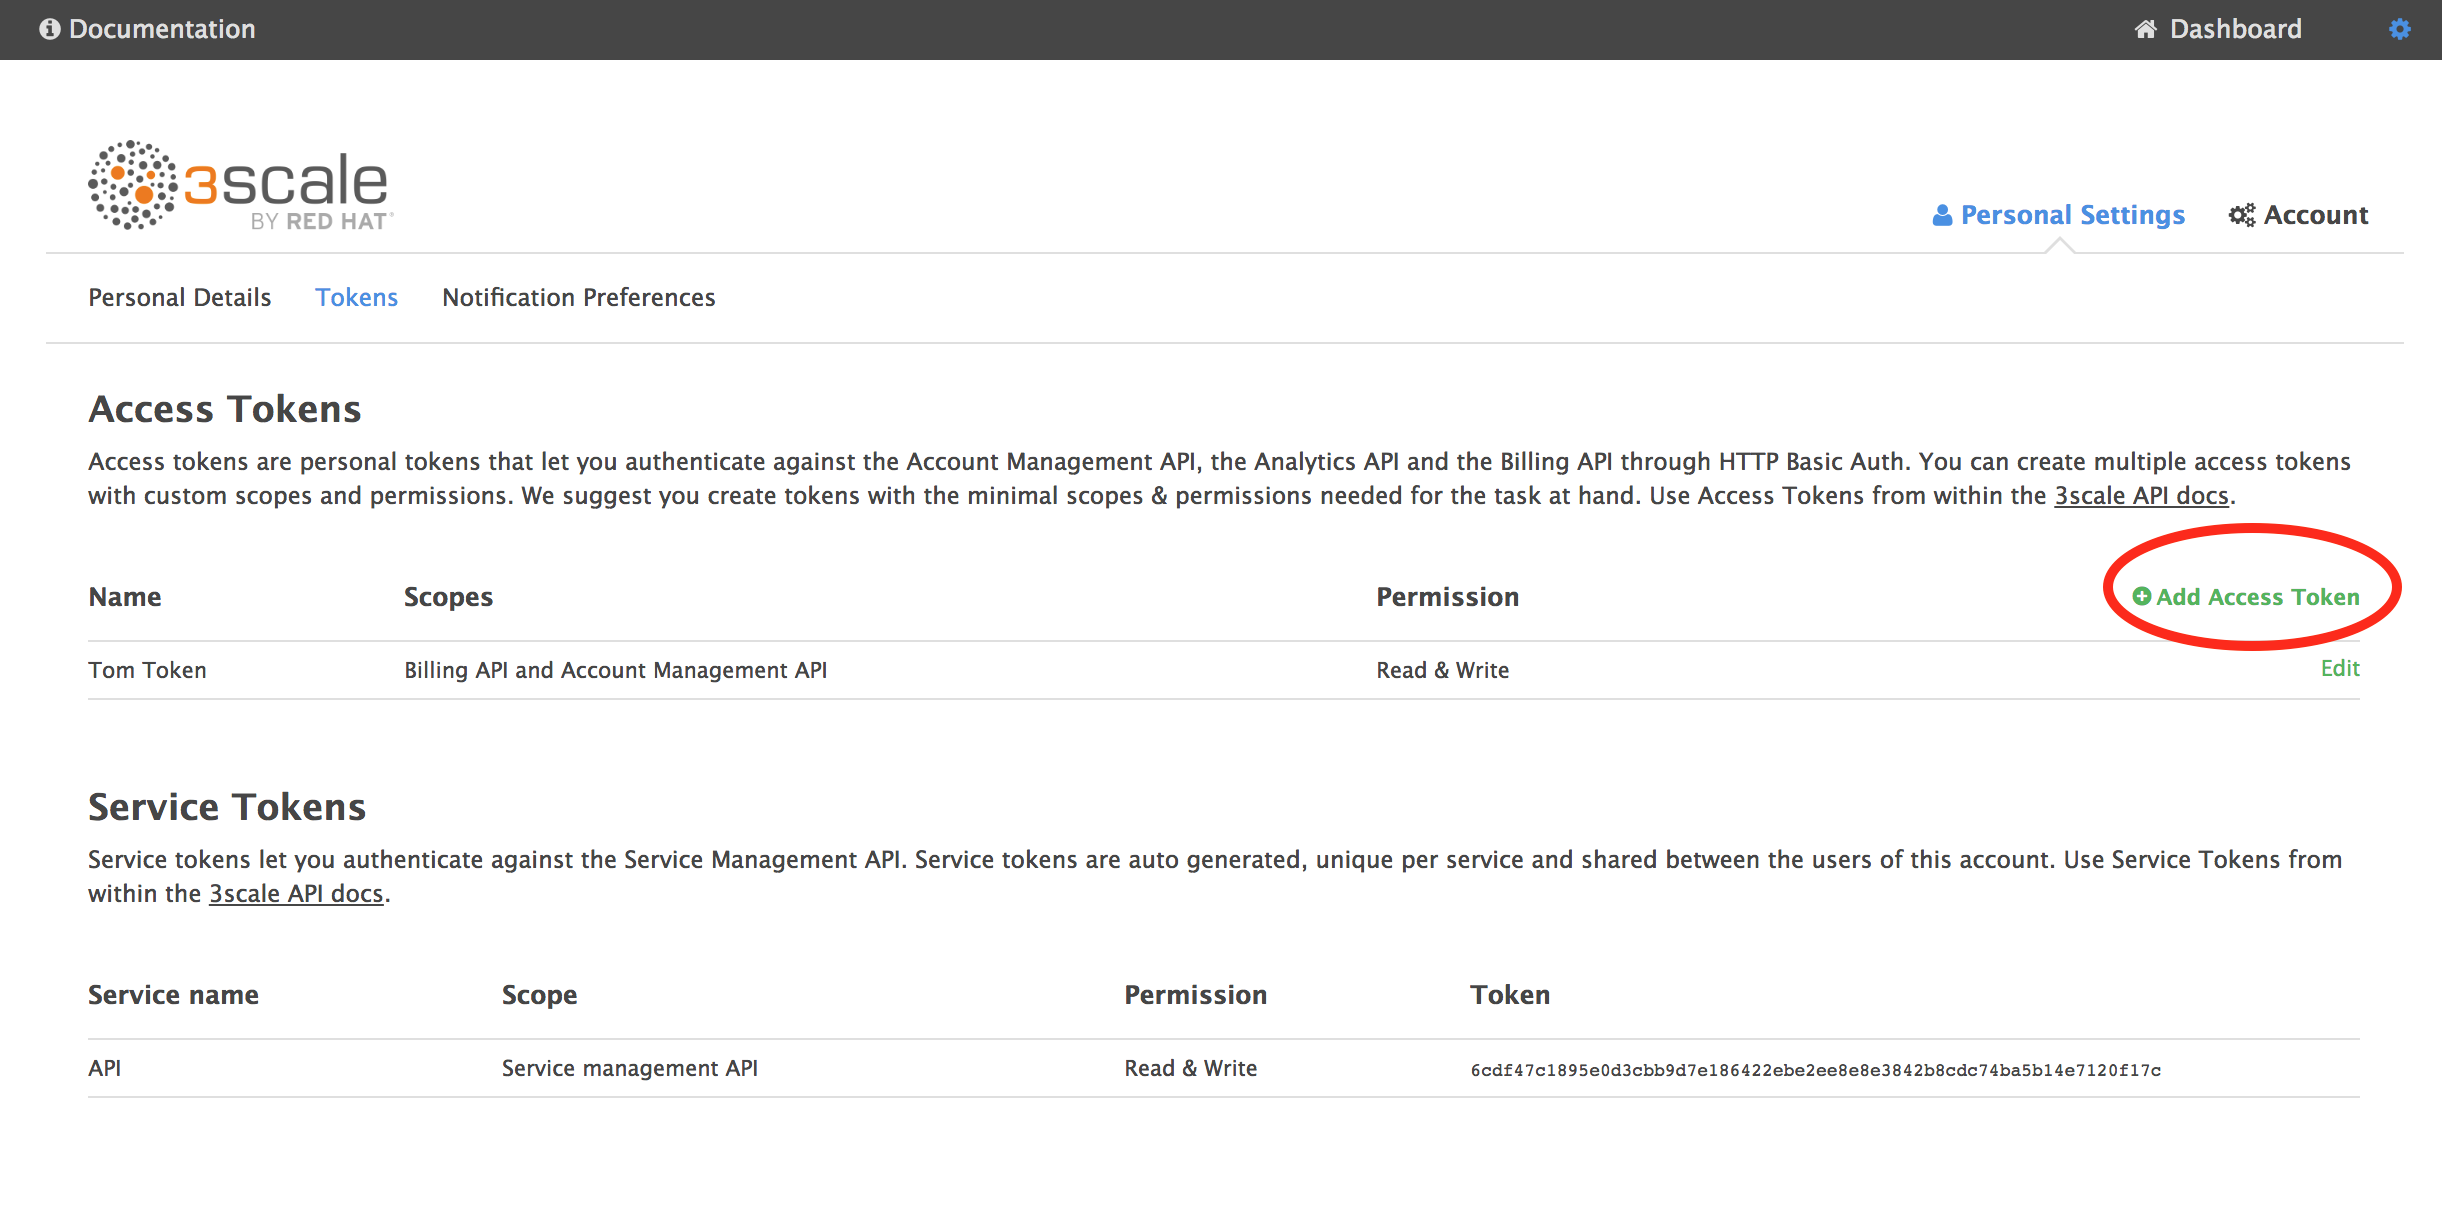
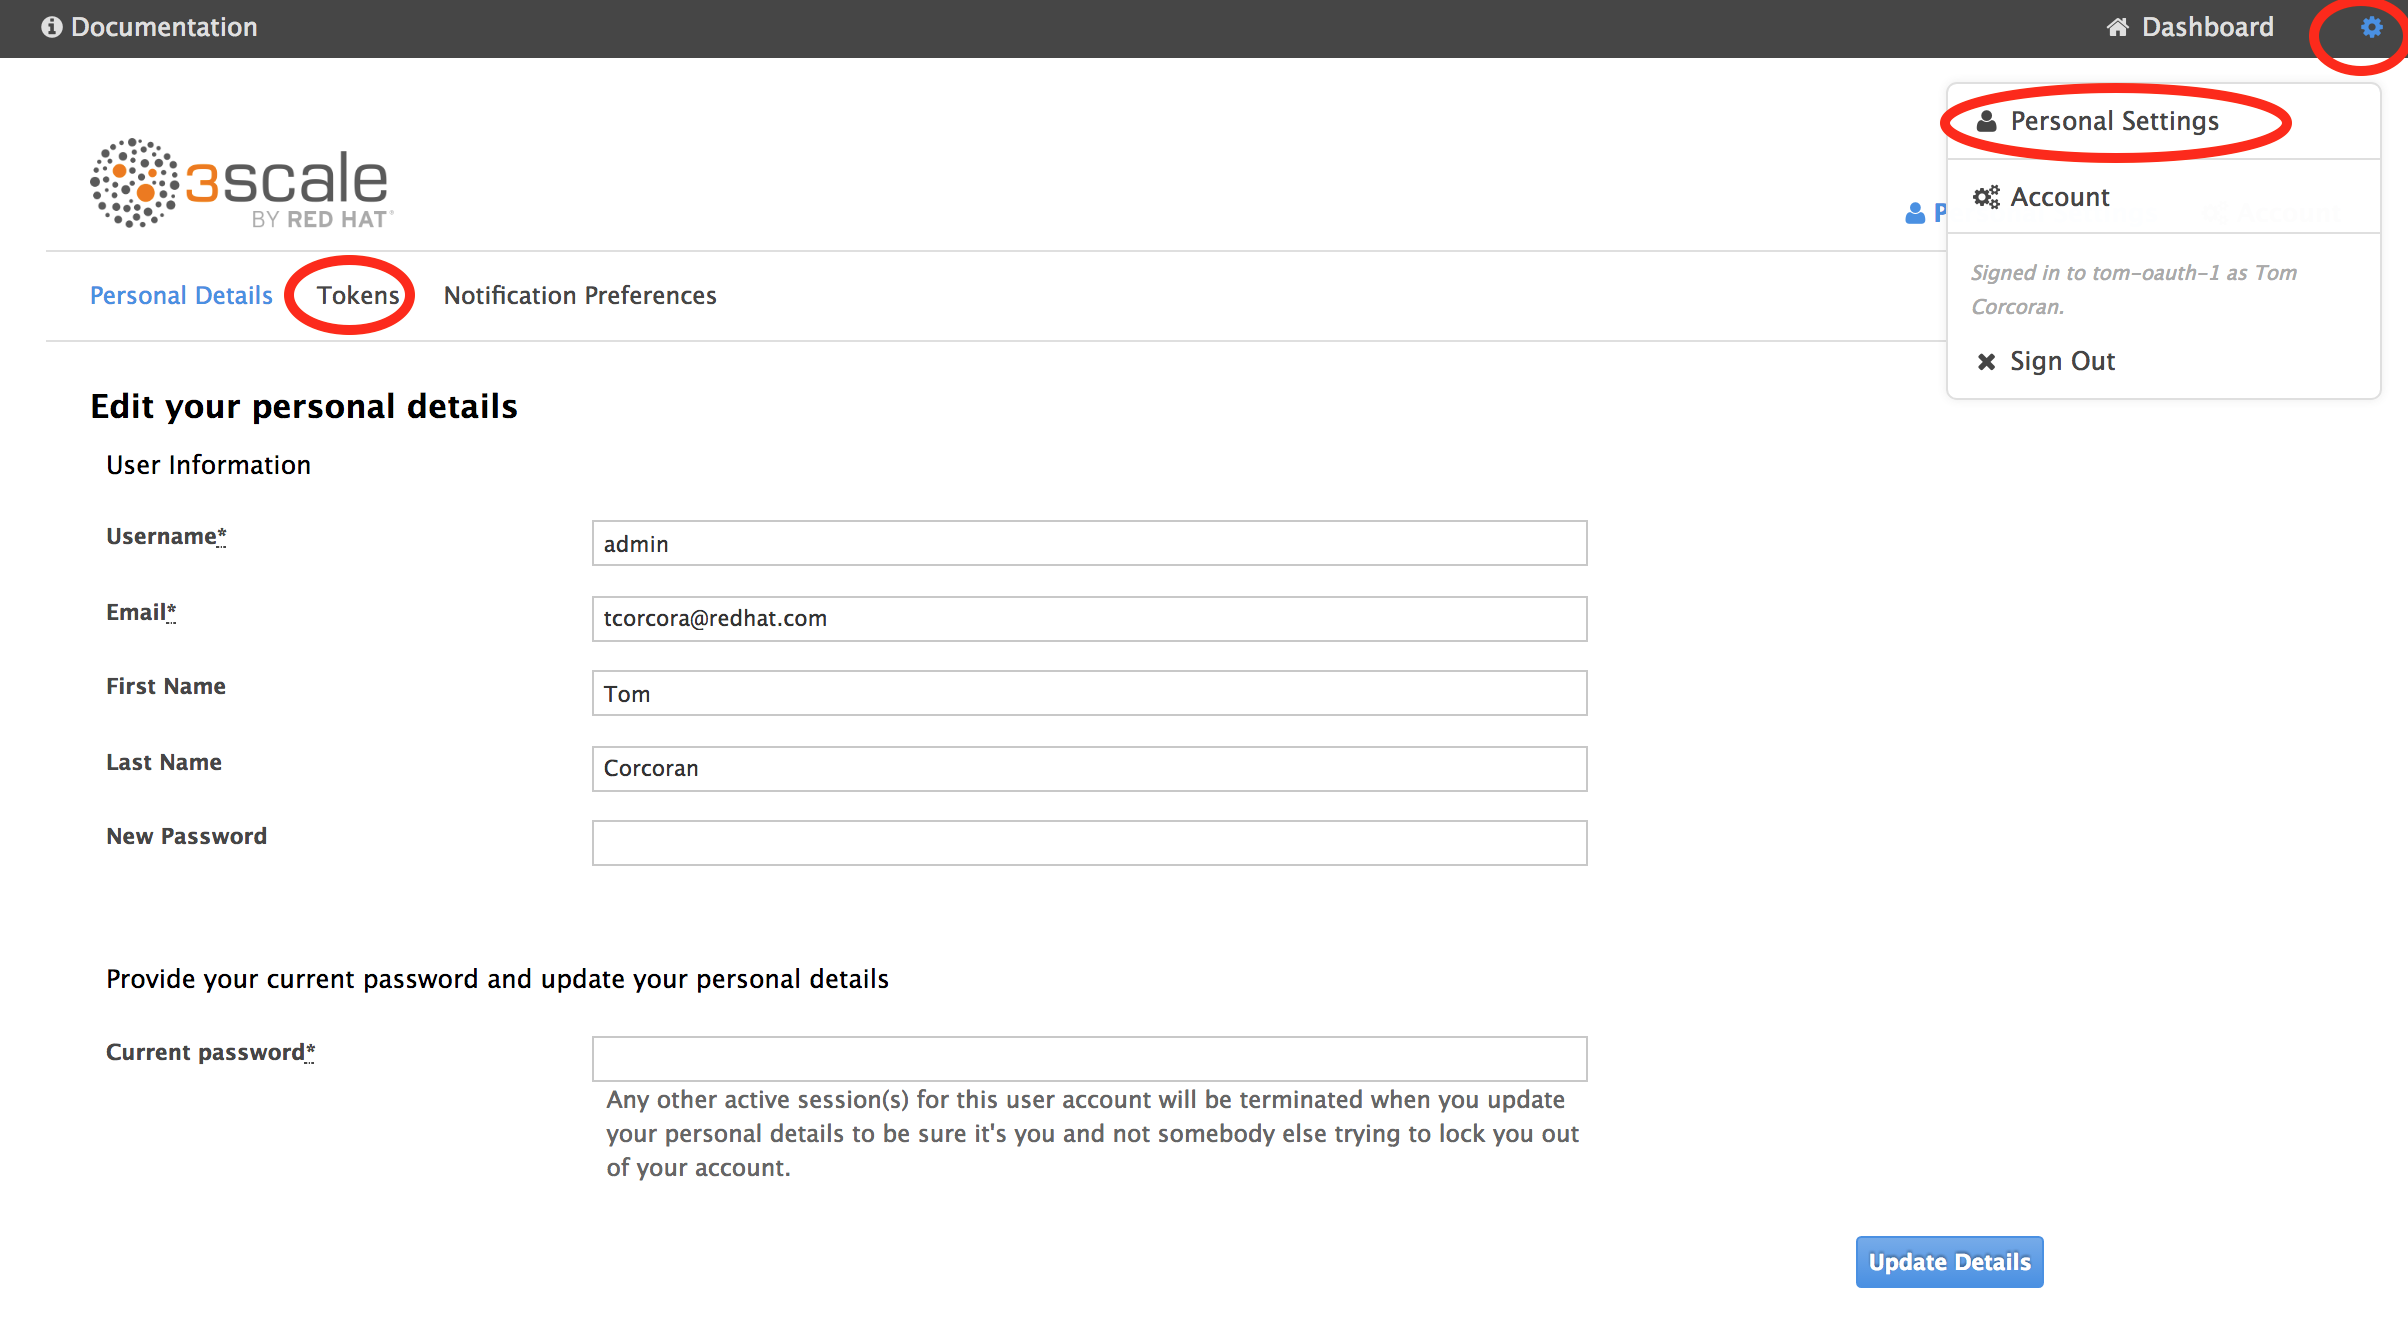 Add Access token
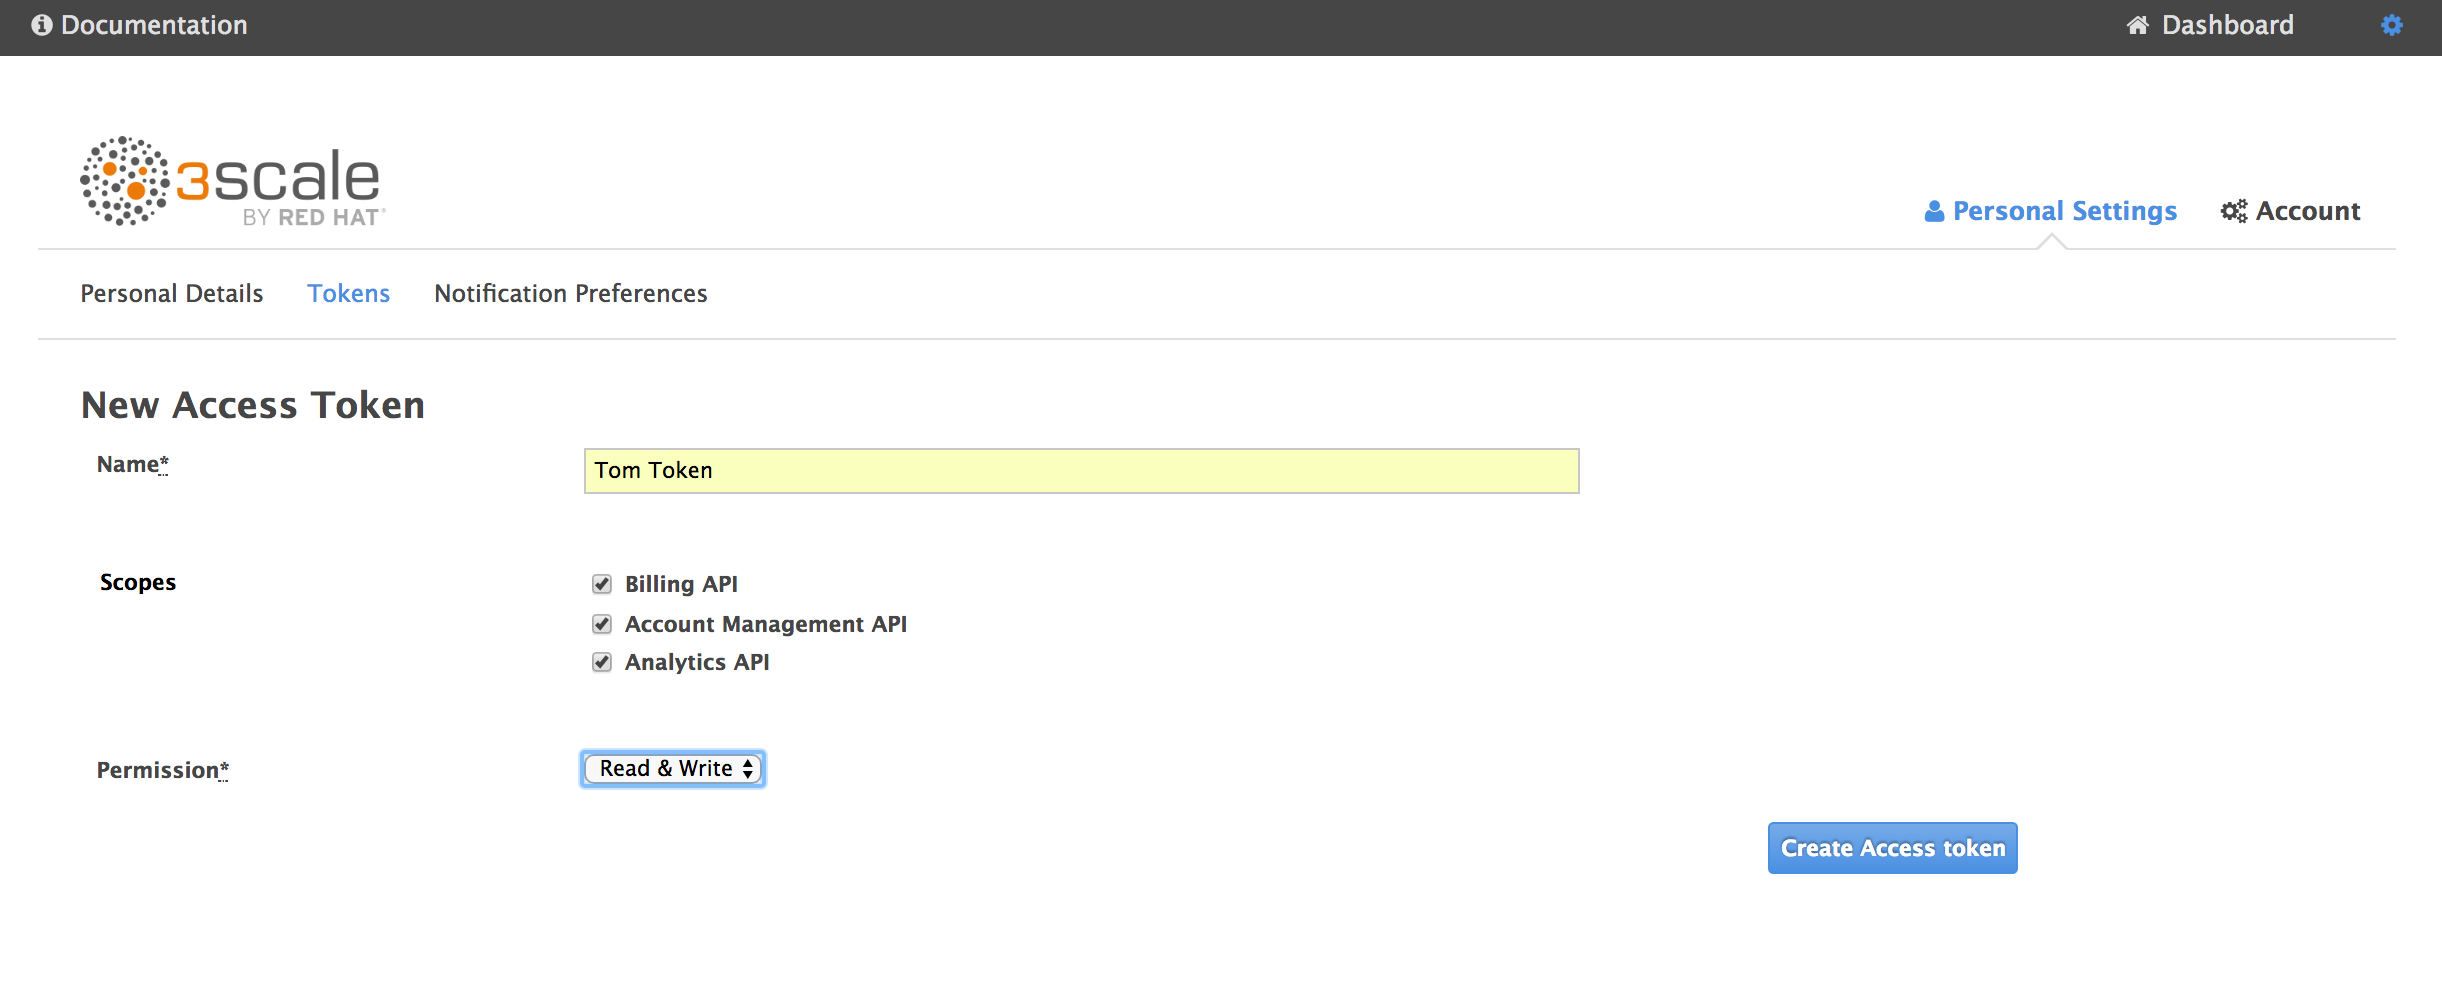
 Name it, give it read/write access to all scopes and Create Access token. Copy it (you won't be able to see it again).
We'll refer to this your 3scale-access-token
git clone this repo
Go to the 3scale CLI for full instructions. Run the following:
npm install -g node-3scale-cli
3scale-cli config
? 3scale access token: (enter your 3scale-access-token)
? 3scale id: (enter your 3scale-domain)
? 3scale wildcard domain : (3scale.net or the rest of your 3scalehost)
In your terminal, cd to where you cloned this repo. Run the following commands to import the OAI specs as Active Docs (Interactive Documentation) into 3scale. Each one will take couple of minutes:
3scale-cli activedocs create -f ./oai-spec-1-core-v1.json
3scale-cli activedocs create -f ./oai-spec-2-openshiftIo_v1.json
3scale-cli activedocs create -f ./oai-spec-3-autoscaling_v1.json
3scale-cli activedocs create -f ./oai-spec-4-oauth-api.json
core-v1
appsOpenshiftIo_v1
autoscaling_v1
oapi
Openshift Core API (system name openshift-core-api)
Openshift IO V1 API (system name openshift-io-v1-api)
Openshift Autoscaling API (system name openshift-autoscaling-api)
Openshift Oauth API (system name openshift-oauth-api)
This is a good OAI spec validator: http://bigstickcarpet.com/swagger-parser/www/index.html
First we are going to add some images to our 3scale Developer Portal. Go to Developer Portal - New File - New File as shown. First upload openshift.png in _catalog-images in this repo. Set the details as follows choosing this png file.
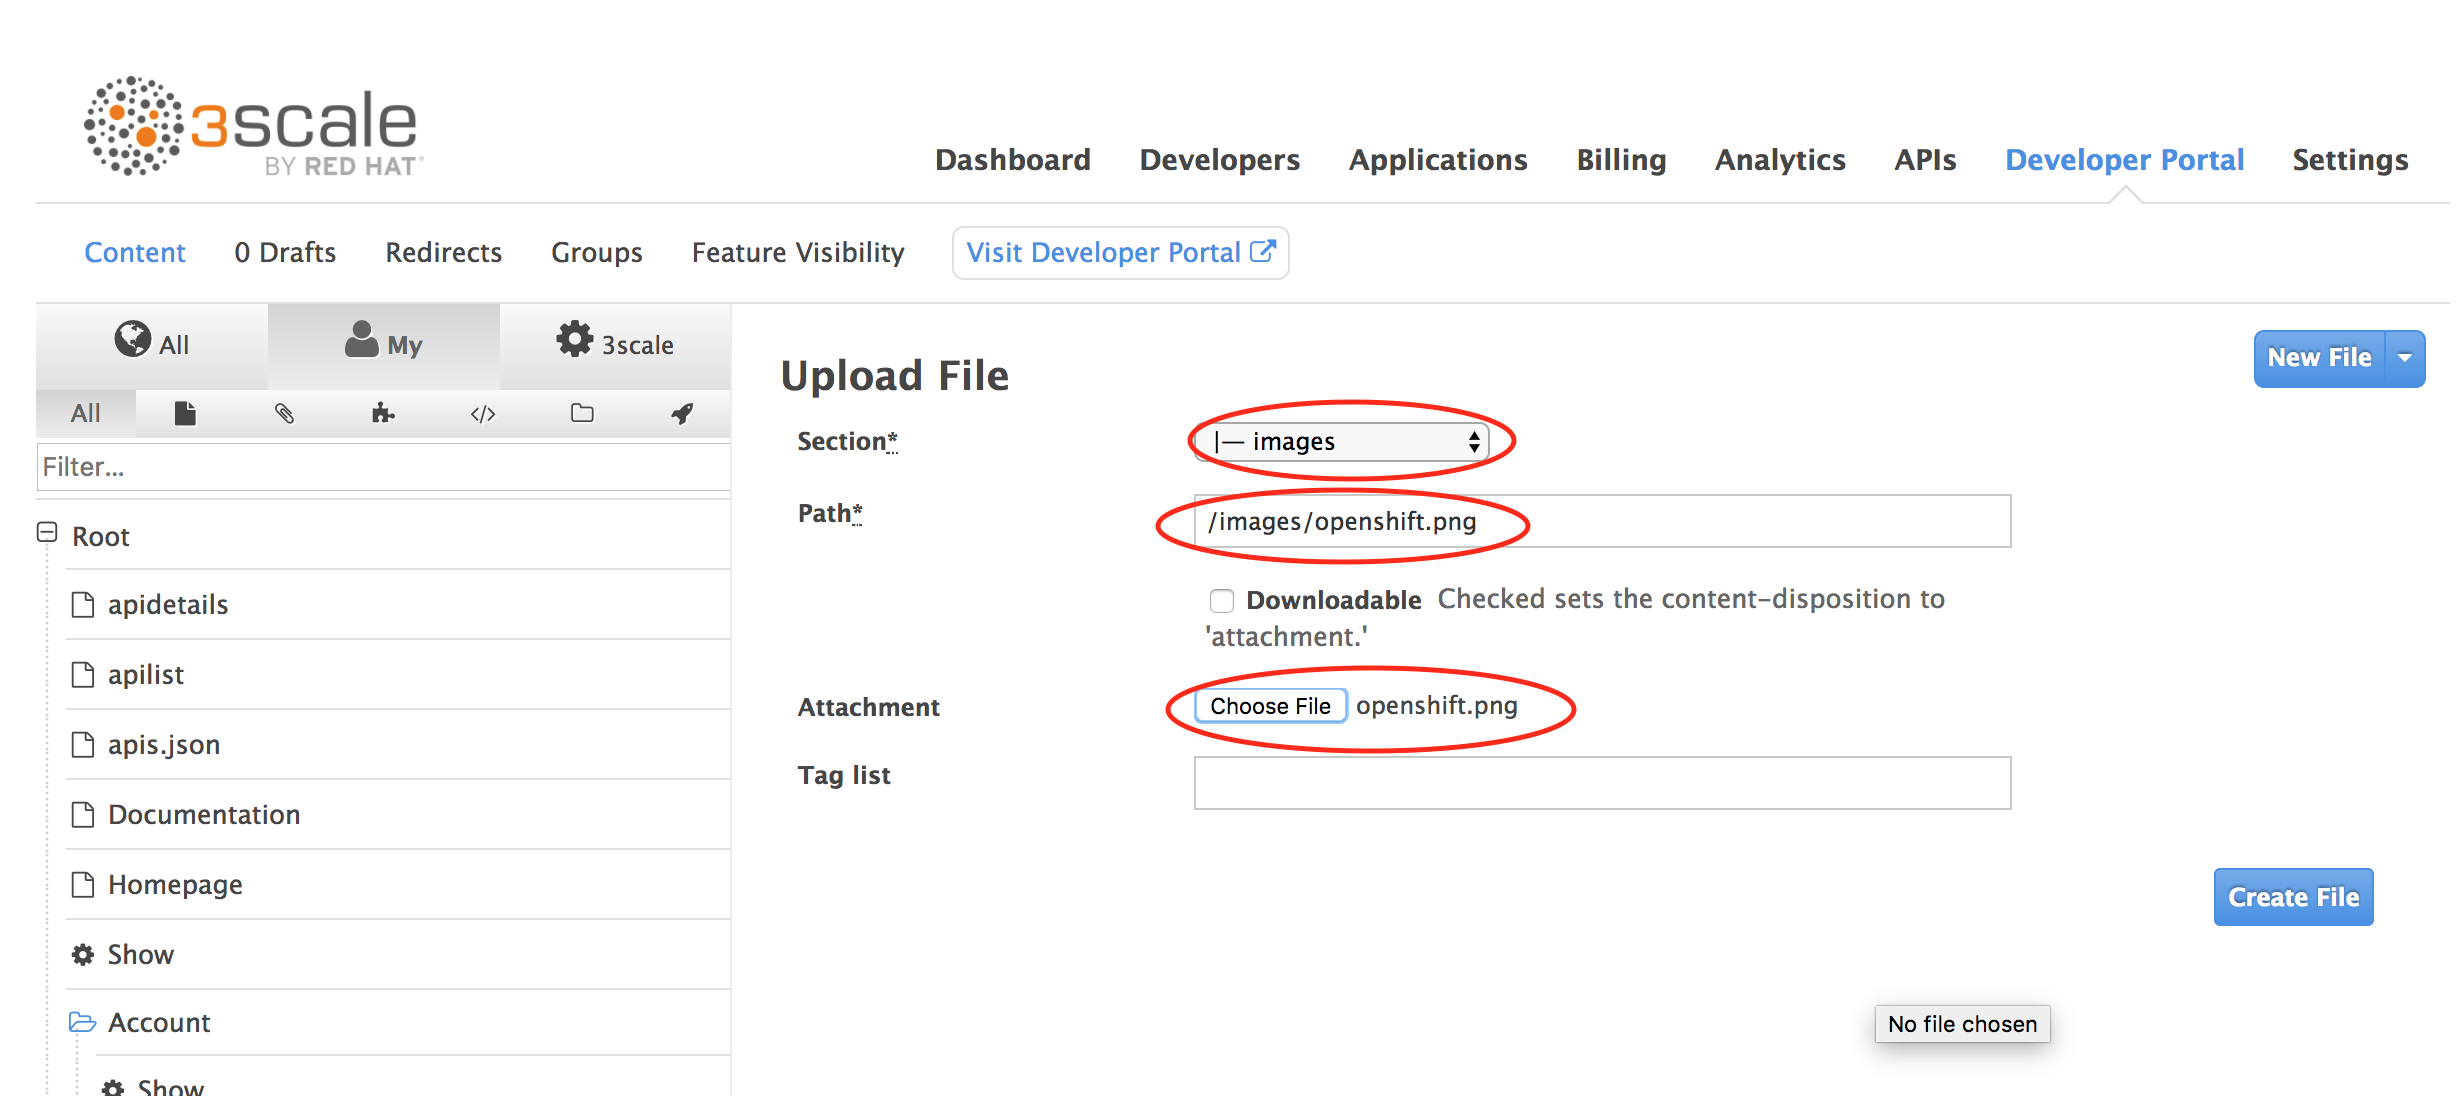
Create File
Do the same with:
_catalog-images/openshift-by-redhat.png
_catalog-images/version-1.png
_catalog-images/openshift-autoscaling.png
_catalog-images/oauth.png
Next, go to API discovery 3scale Repo
Clone the Repo or just copy the 3 files to your hard drive: apidetails.html, apilist.html and apis.json
Import each of them into your 3scale Developer Portal, i.e. with each, in 3scale go to Developer Portal - New File - New Page as shown:
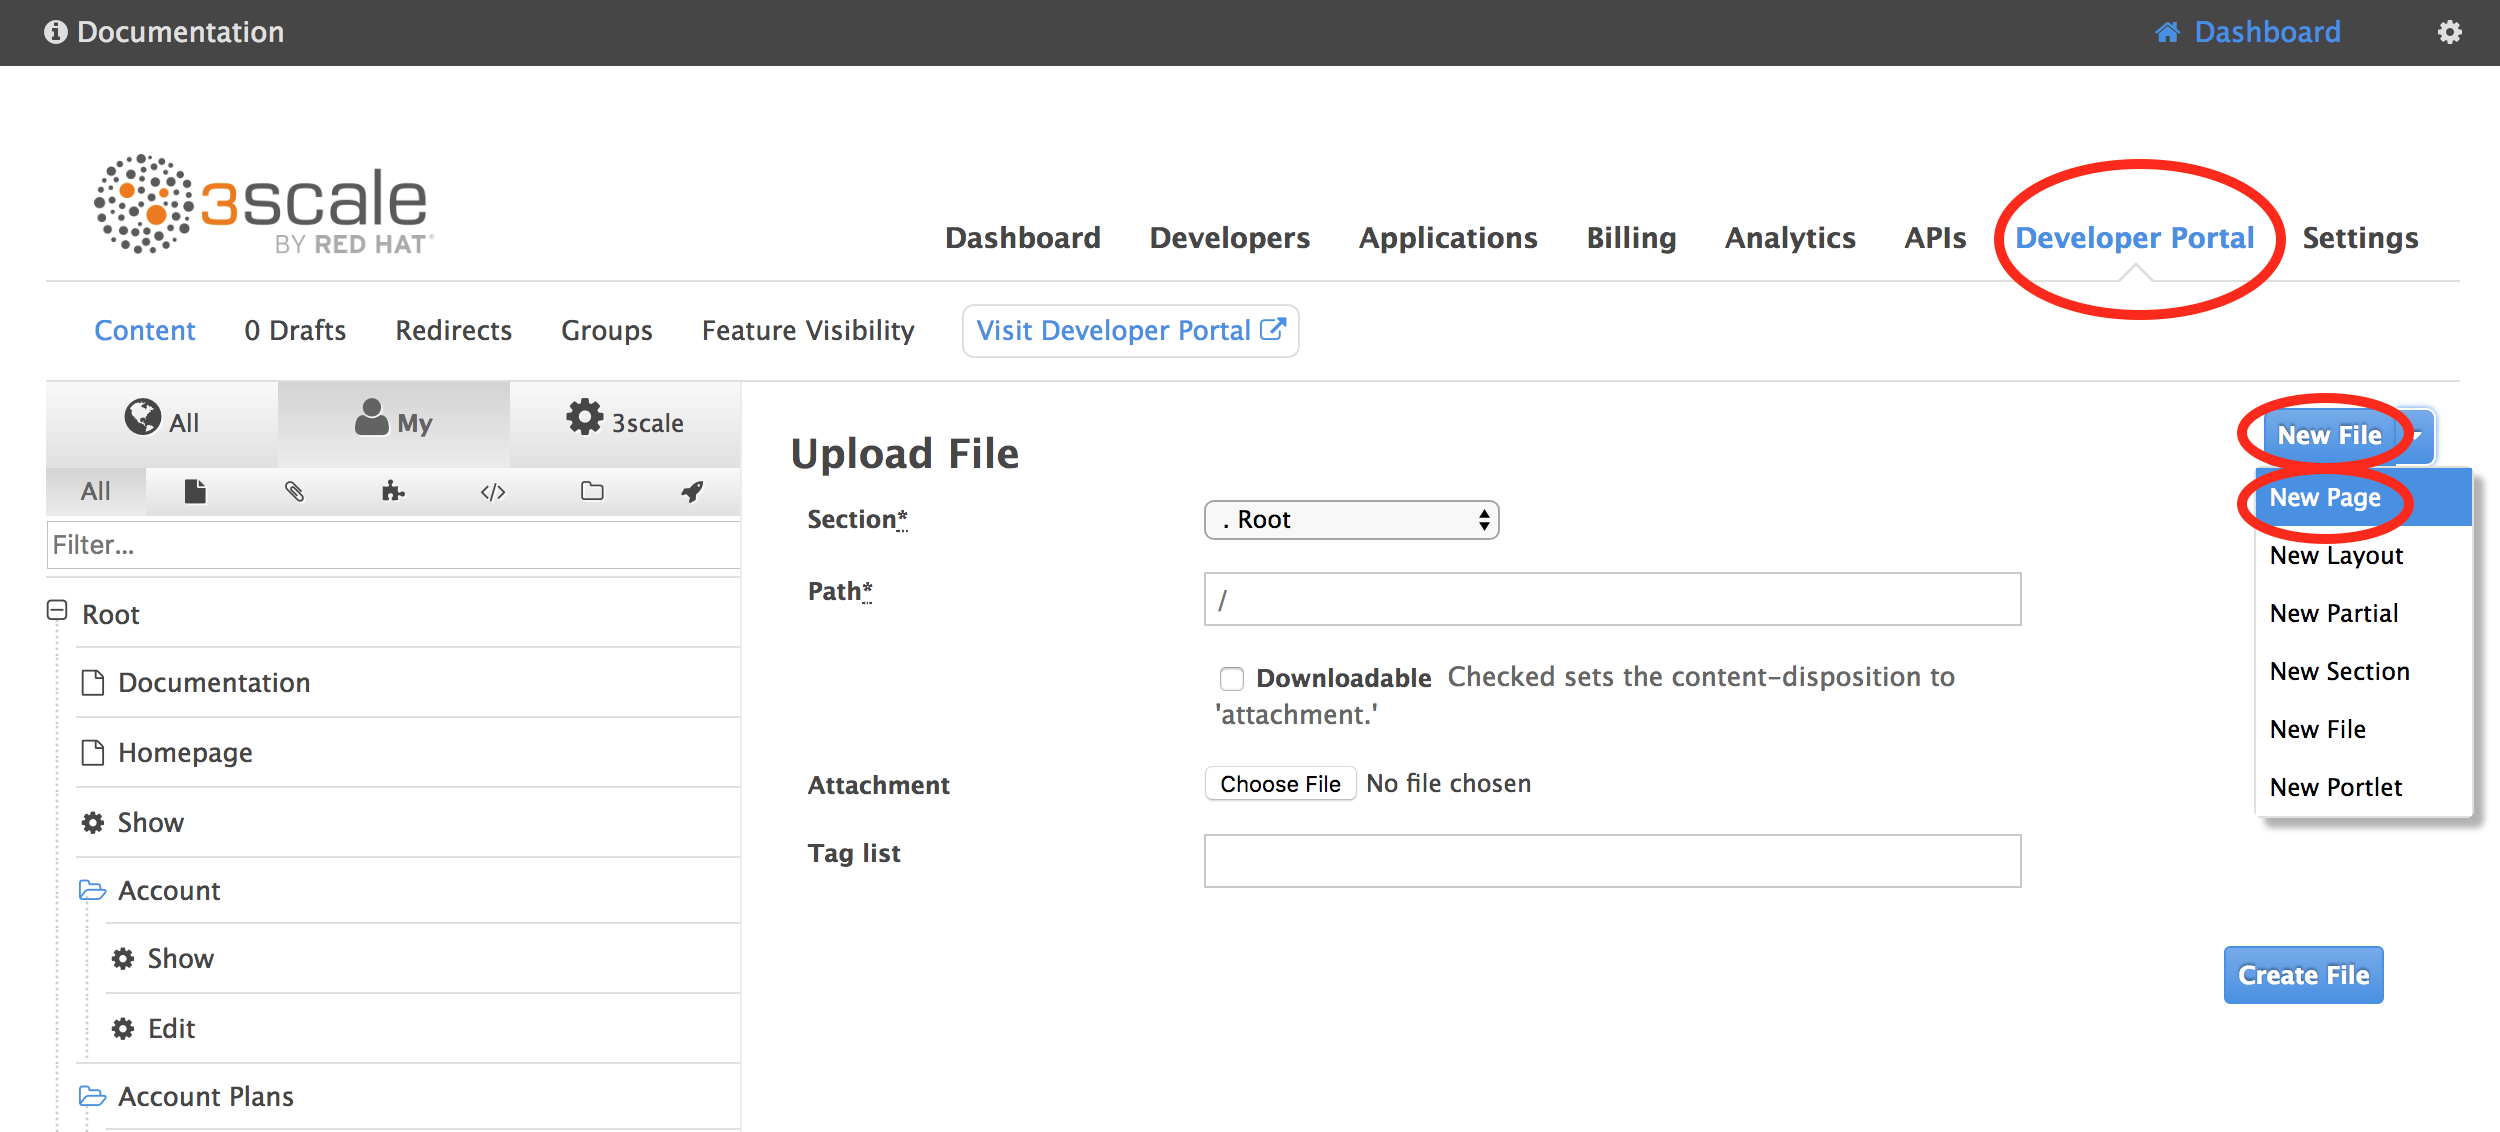
Configure them as follows:
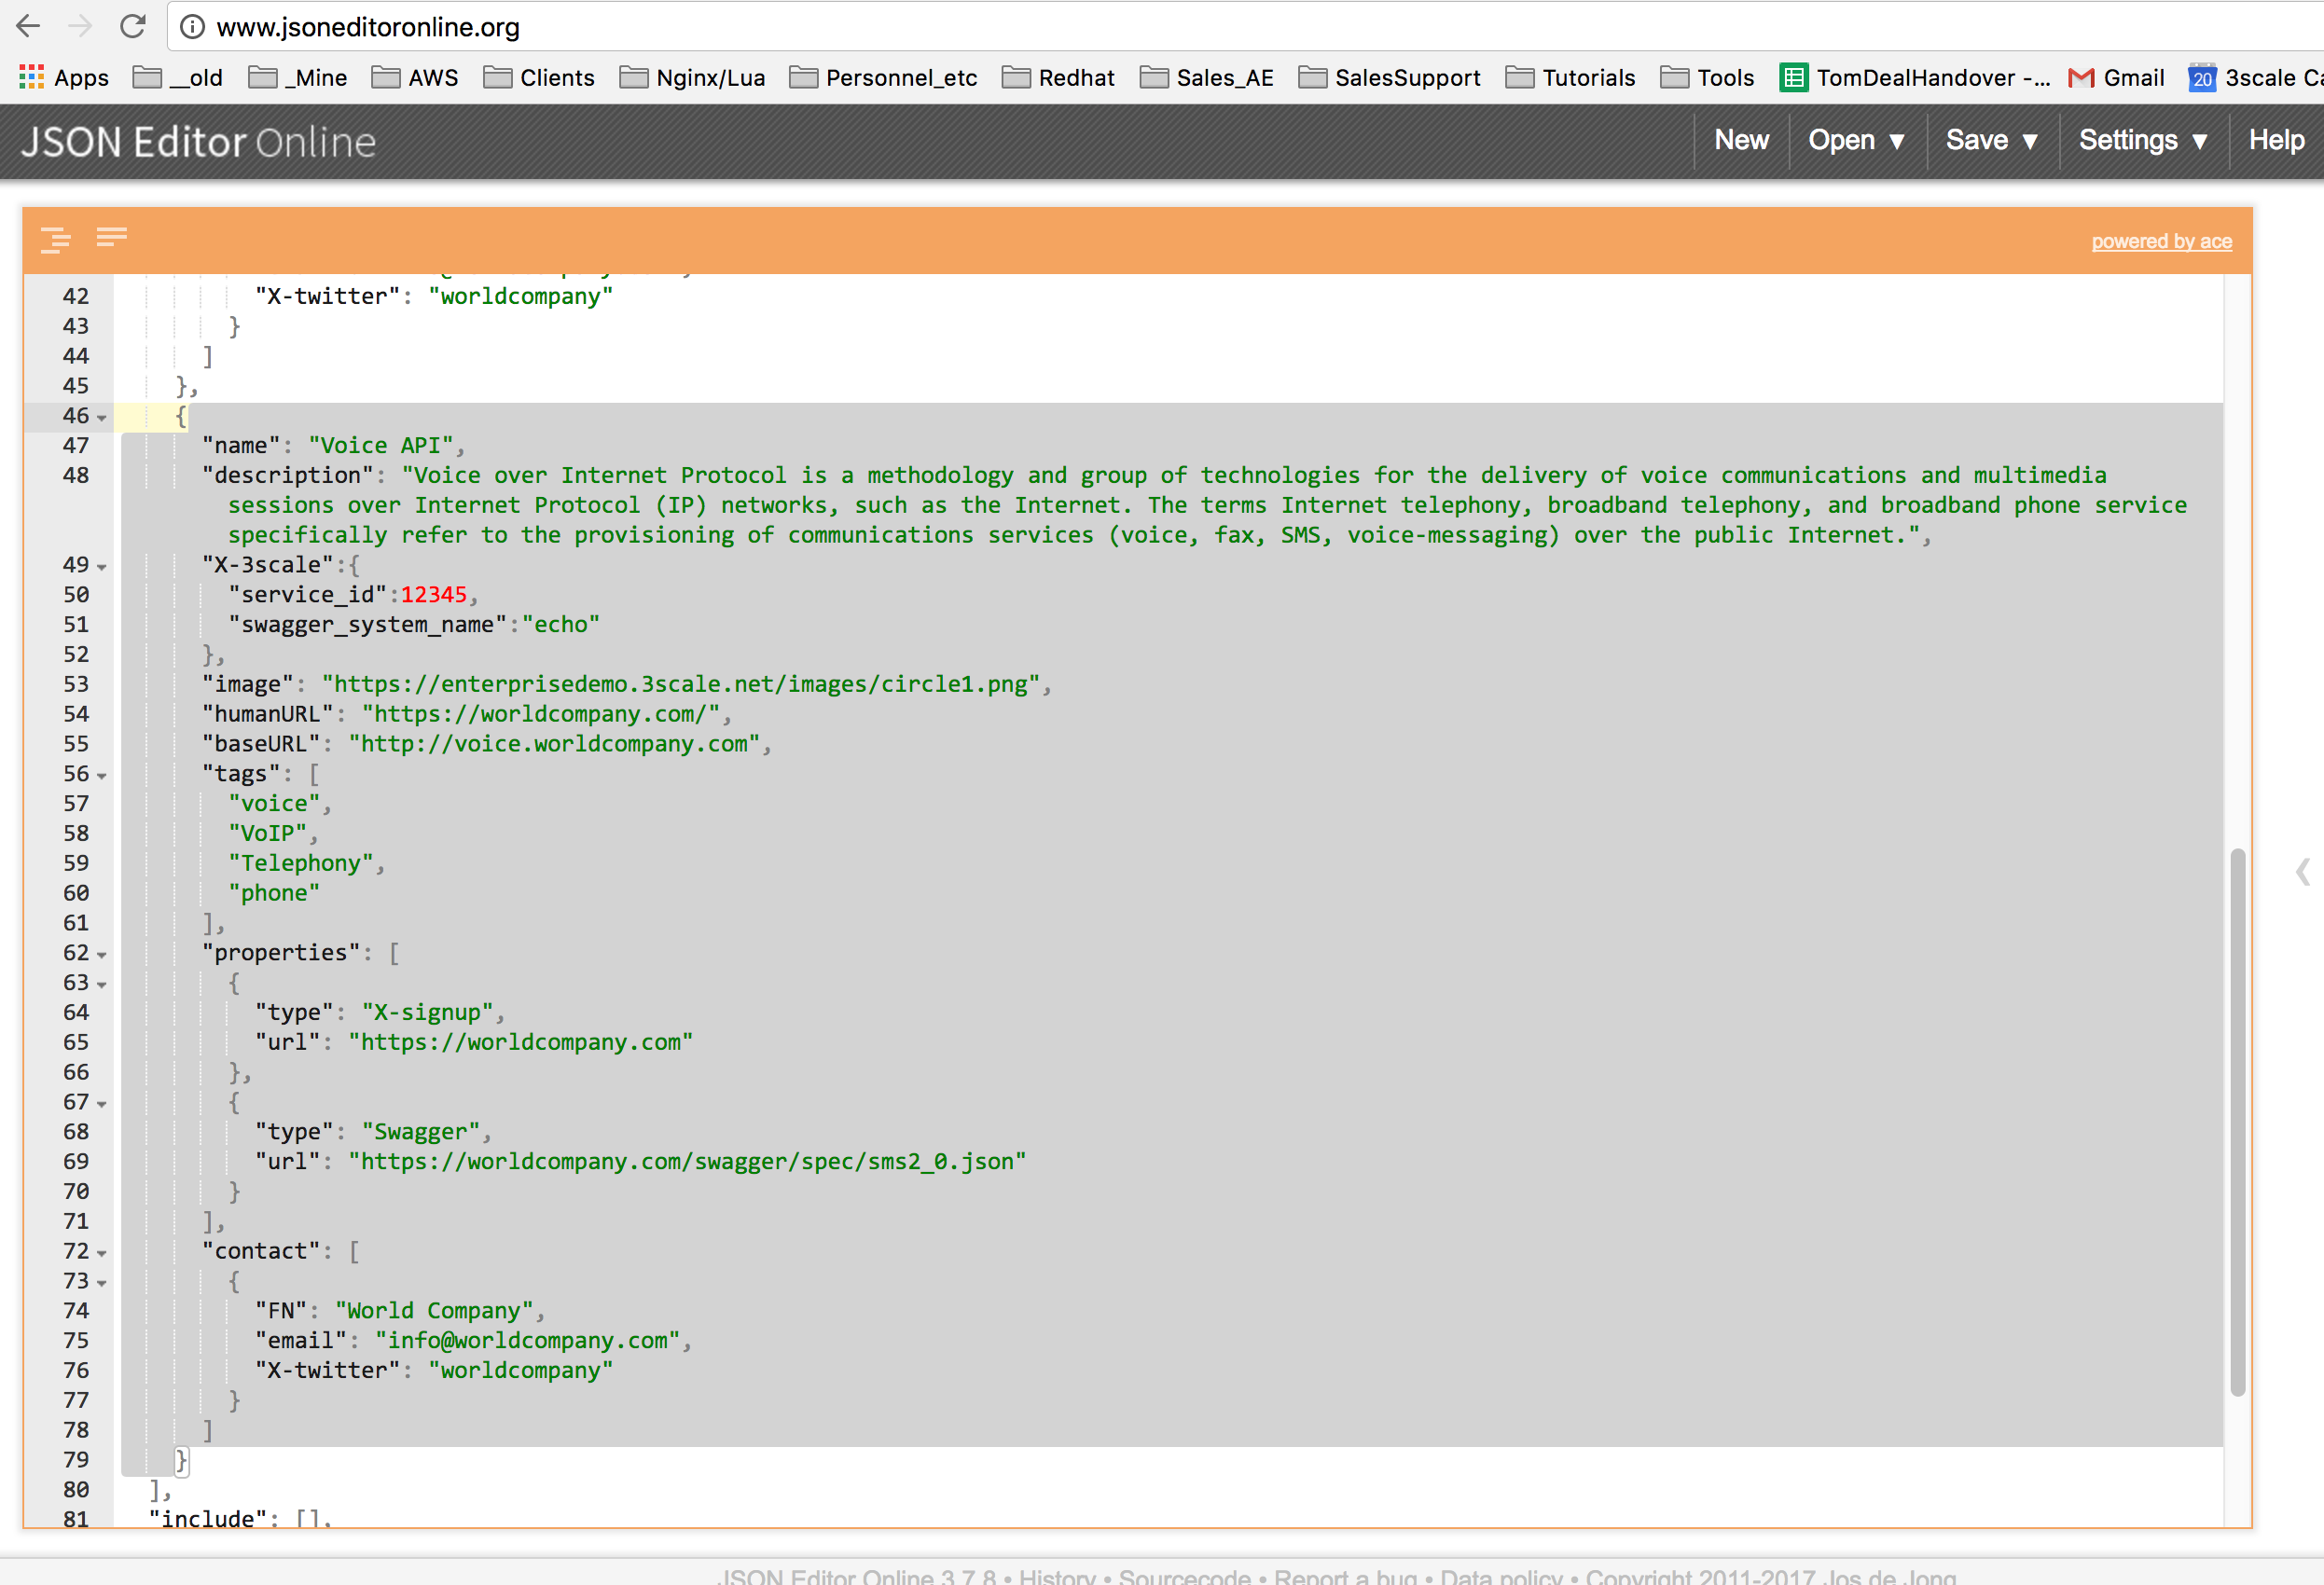
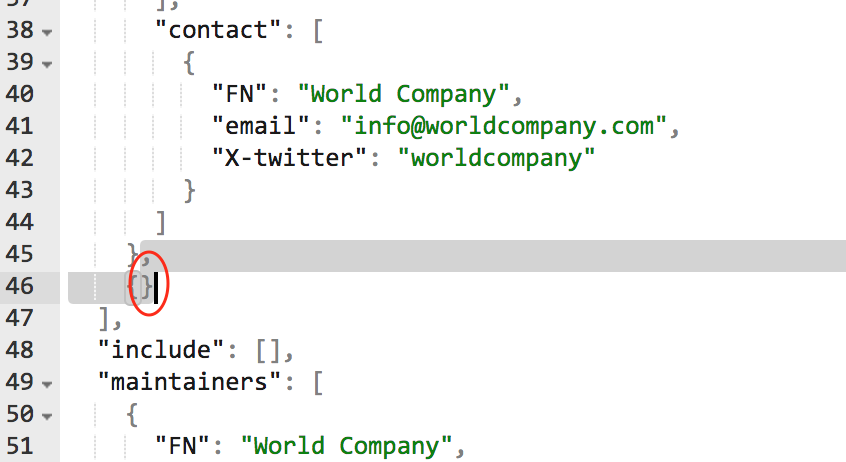
First apis.json. Before you import it, remove the Voice API entry. Copy the files to an online editor like http://www.jsoneditoronline.org. Double click just above "name": "Voice API" and to the right of the curly brace. The entire section will highlight. Delete it.
Now delete the remaining comma and curly braces:
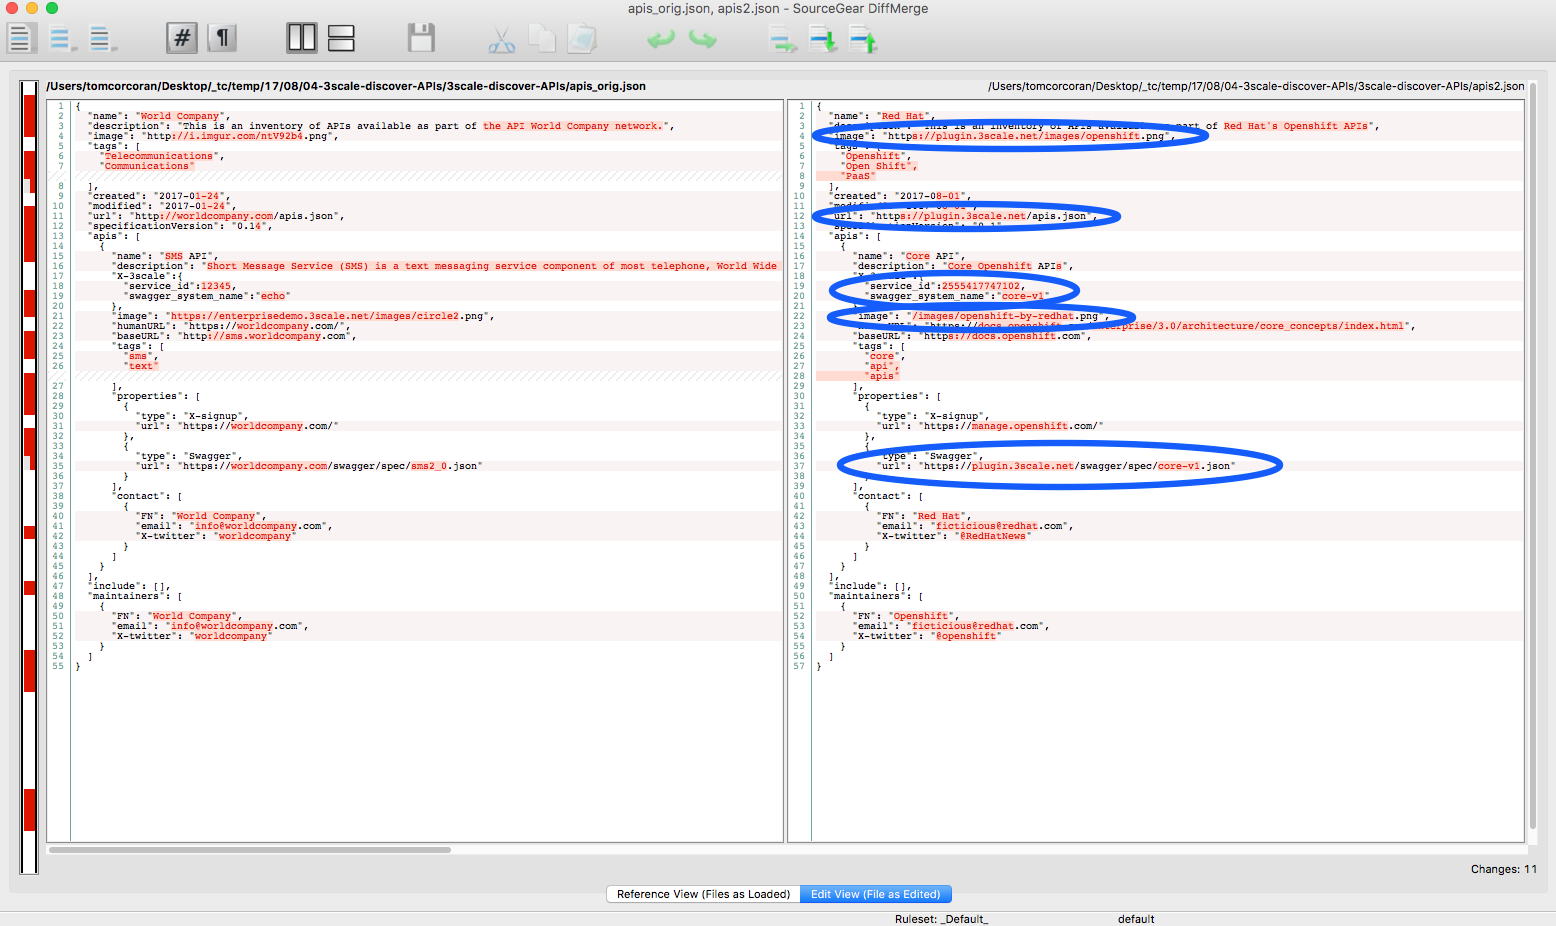
See comparison image below. The blue highlighted areas will need to be changed. The section between lines 15 and 47 will need to be repeated per API or catalog entry.
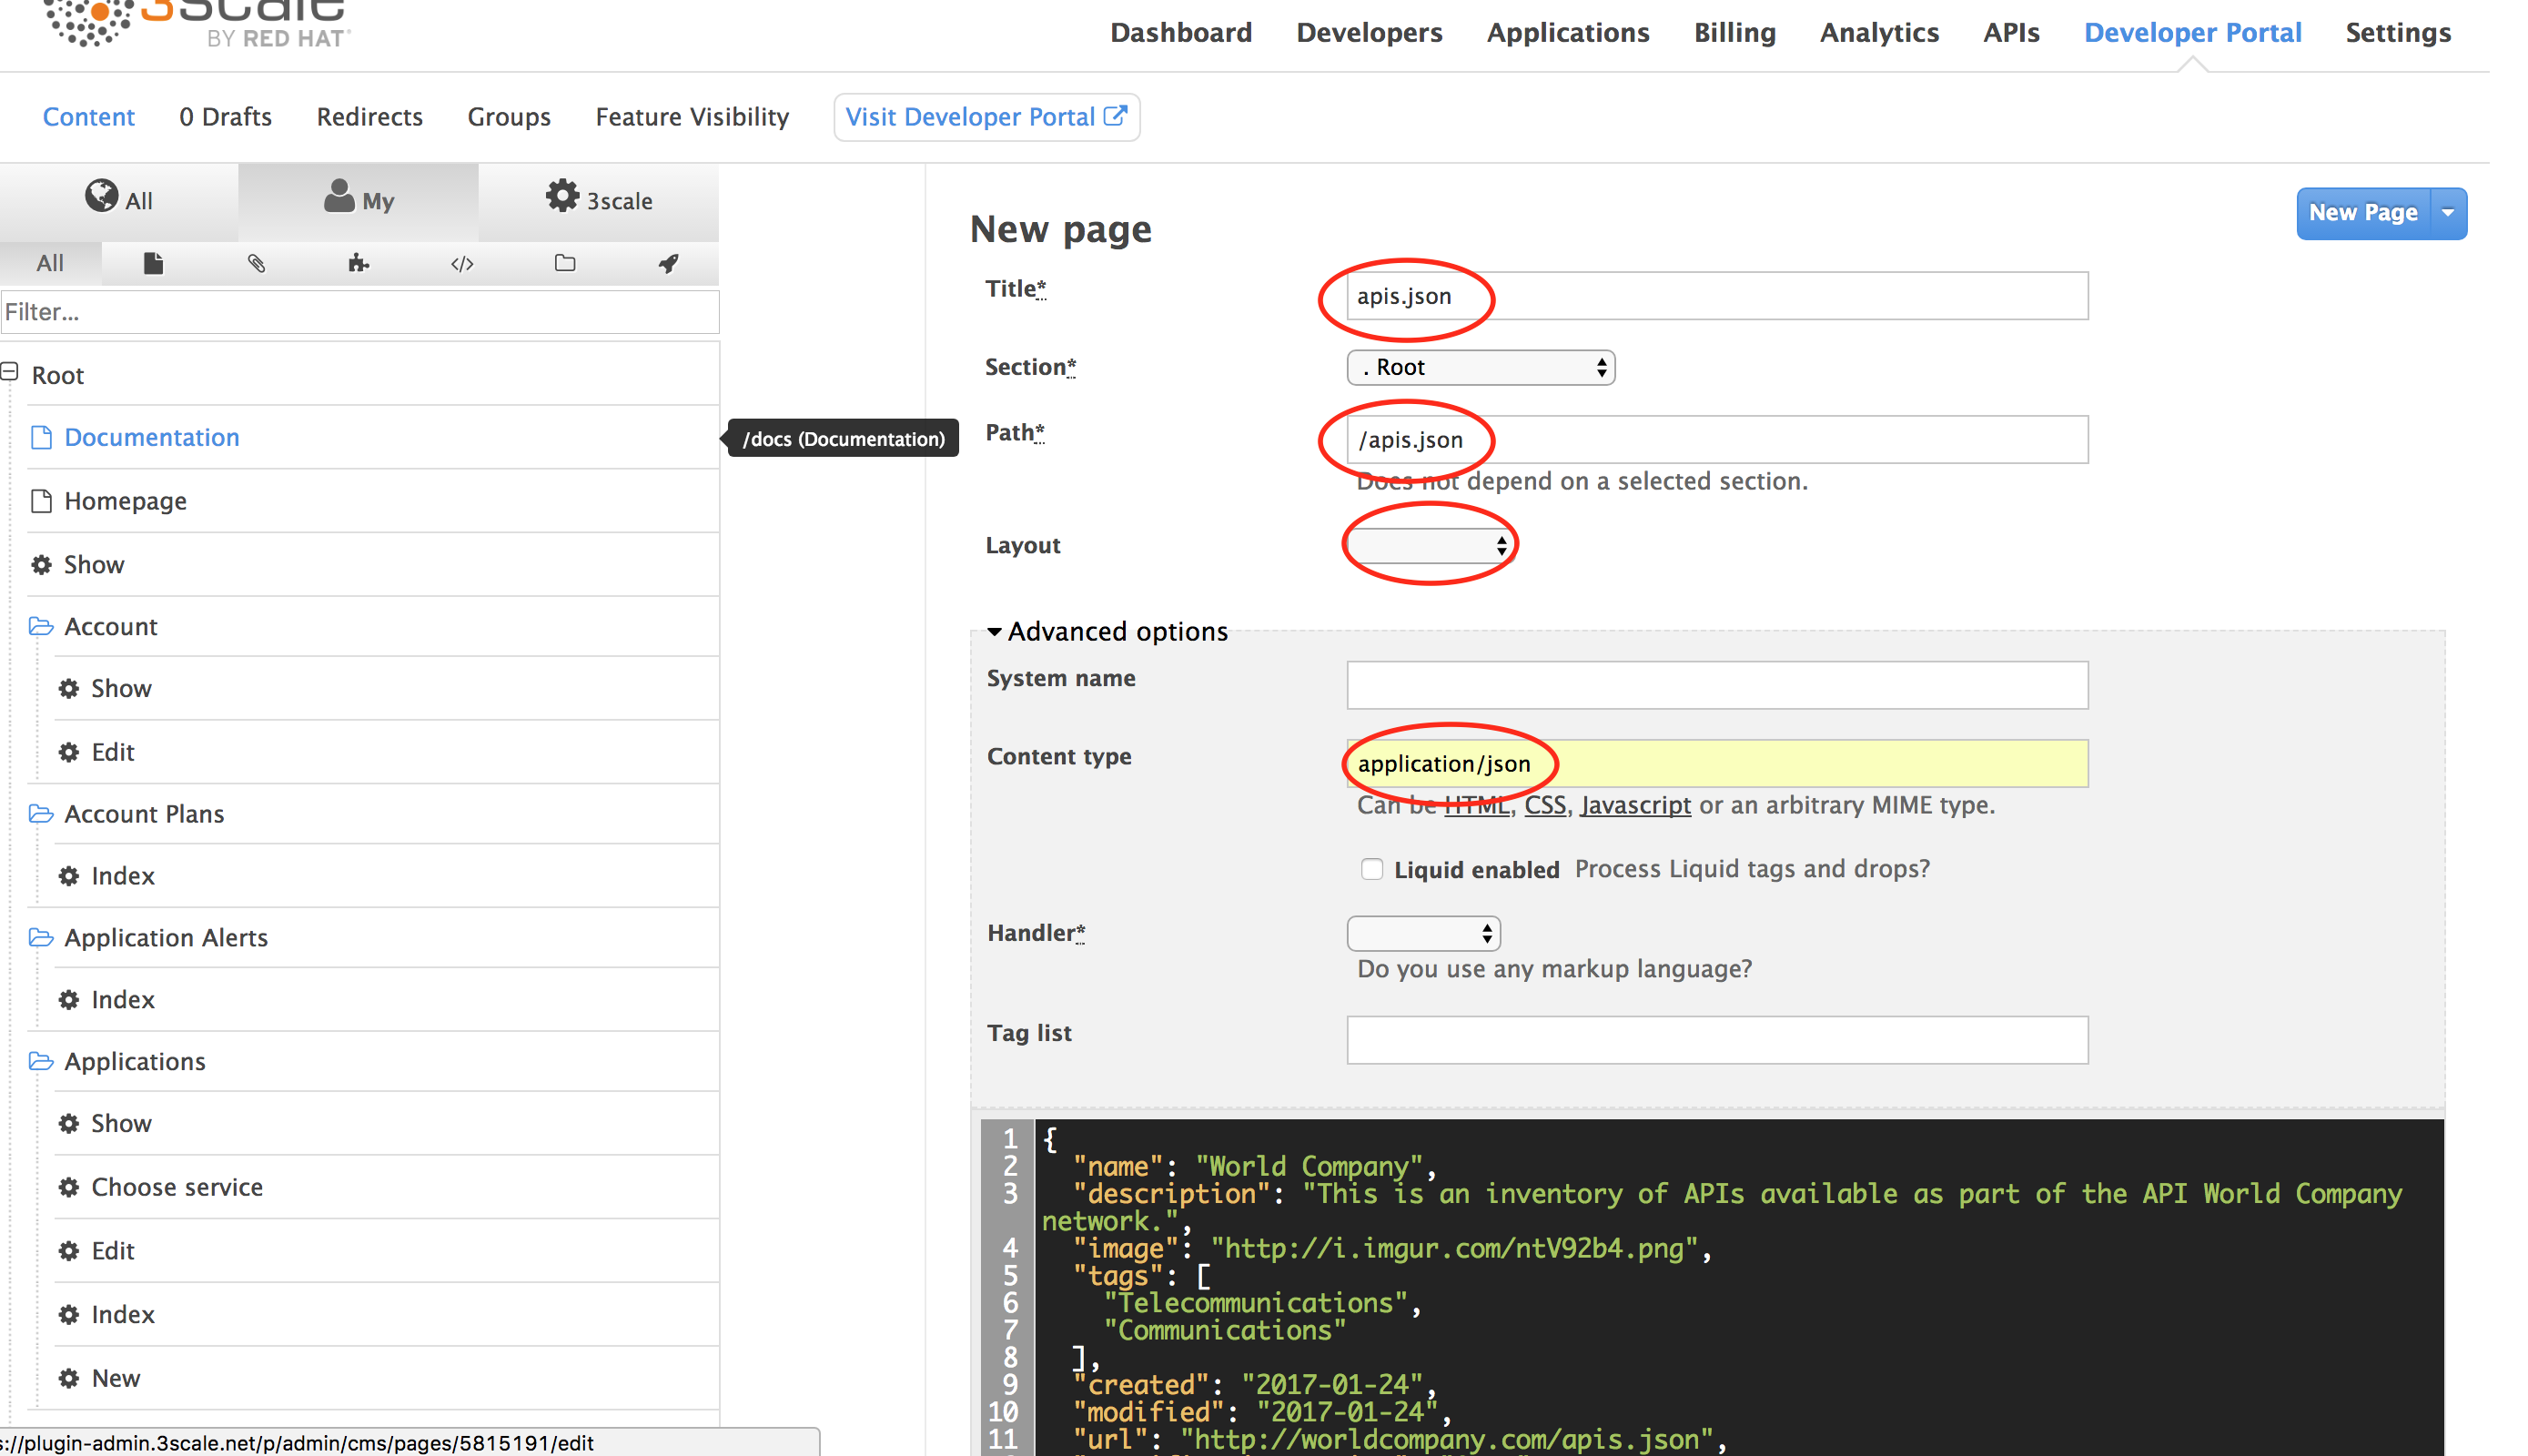
Copy the contents of the file into the text box and configure the 3scale page as follows (noting the highlighed fields we've changed):
Click Create Page. After it is created, click Publish.
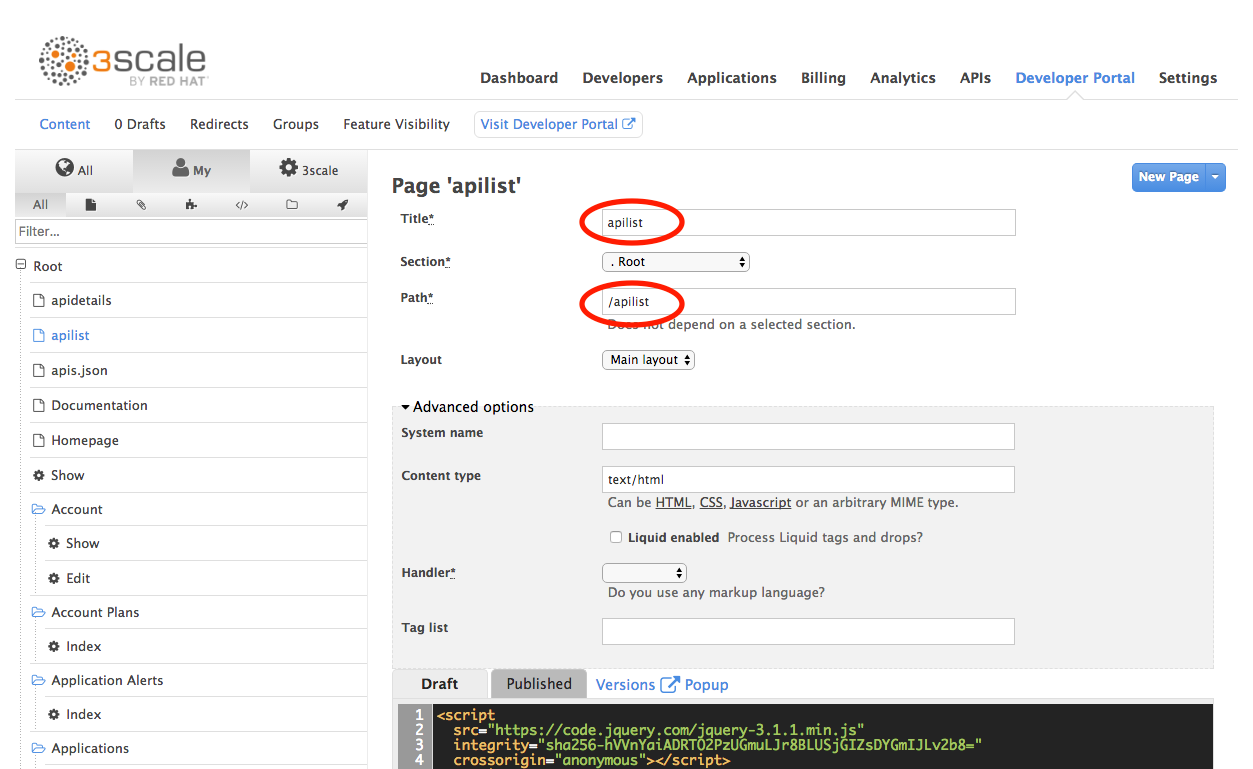
Next apilist.html, the catalog/search page. Create a New Page as shown above and then configure it as follows (noting the highlighted fields we've changed), copying the contents of the 3scale-discover-APIs repo apilist.html file into the text box:
Click Create Page. After it is created, click Publish.
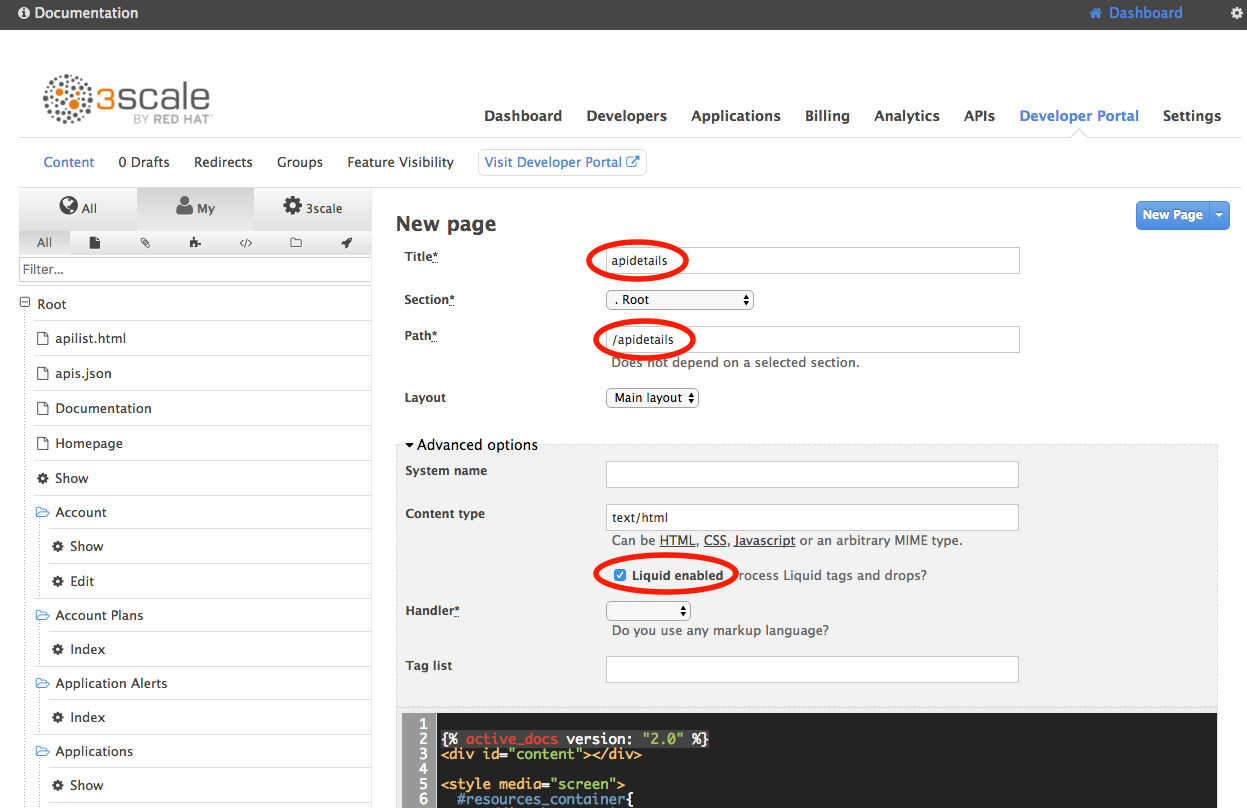
Next apidetails.html. Create a New Page as shown above and then configure it as follows (noting the highlighted fields we've changed), copying the contents of the 3scale-discover-APIs repo apidetails.html file into the text box:
Click Create Page. After it is created, click Publish.
To view your catalog go to https://plugin.3scale.net/apilist. You should be able to search on the keywords and drill in and see the OAI interactive documentation displayed.
Alternatively alter the menu structure. Open the submenu page at the bottom of the list of files on the left when you open your Developer Portal menu in the Admin portal.
Replace the anchor entries:
a class="{% if urls.docs.active? %}active{% endif %}" href="/docs">Documentation
and
a href="/docs">Documentation
with the line:
a class="{% if urls.docs.active? %}active{% endif %}" href="/apilist">API Discovery
This will cause an API Discovery menu item to appear on the top of the screen.

