UVSQ Students Bot
Get to know your subjects, teachers, and more!
ChatBot in a simple Microservices-like architecture
Report Bug
·
Request Feature
You need to download and install :
Before configuring your Messenger app on Facebook Developer, let’s create a bare minimum webhook with Node.js to get started.
I choose ngrok to serves a localhost to a public URL because it is simple and easy to use. This URL will be used as a Messenger webhook endpoint during the development, so you don’t need to deploy to a server until the app is completed. After downloading and installing it, run it with a port number, let’s use 5000 (it should be the same port as our main app is running)
$ ngrok http 5000
When you start ngrok, it will display a public URL of your tunnel in the terminal. We will need the URL later when setting up the Facebook app. (In the screenshot, the URL is https://47ba4dd4.ngrok.io)
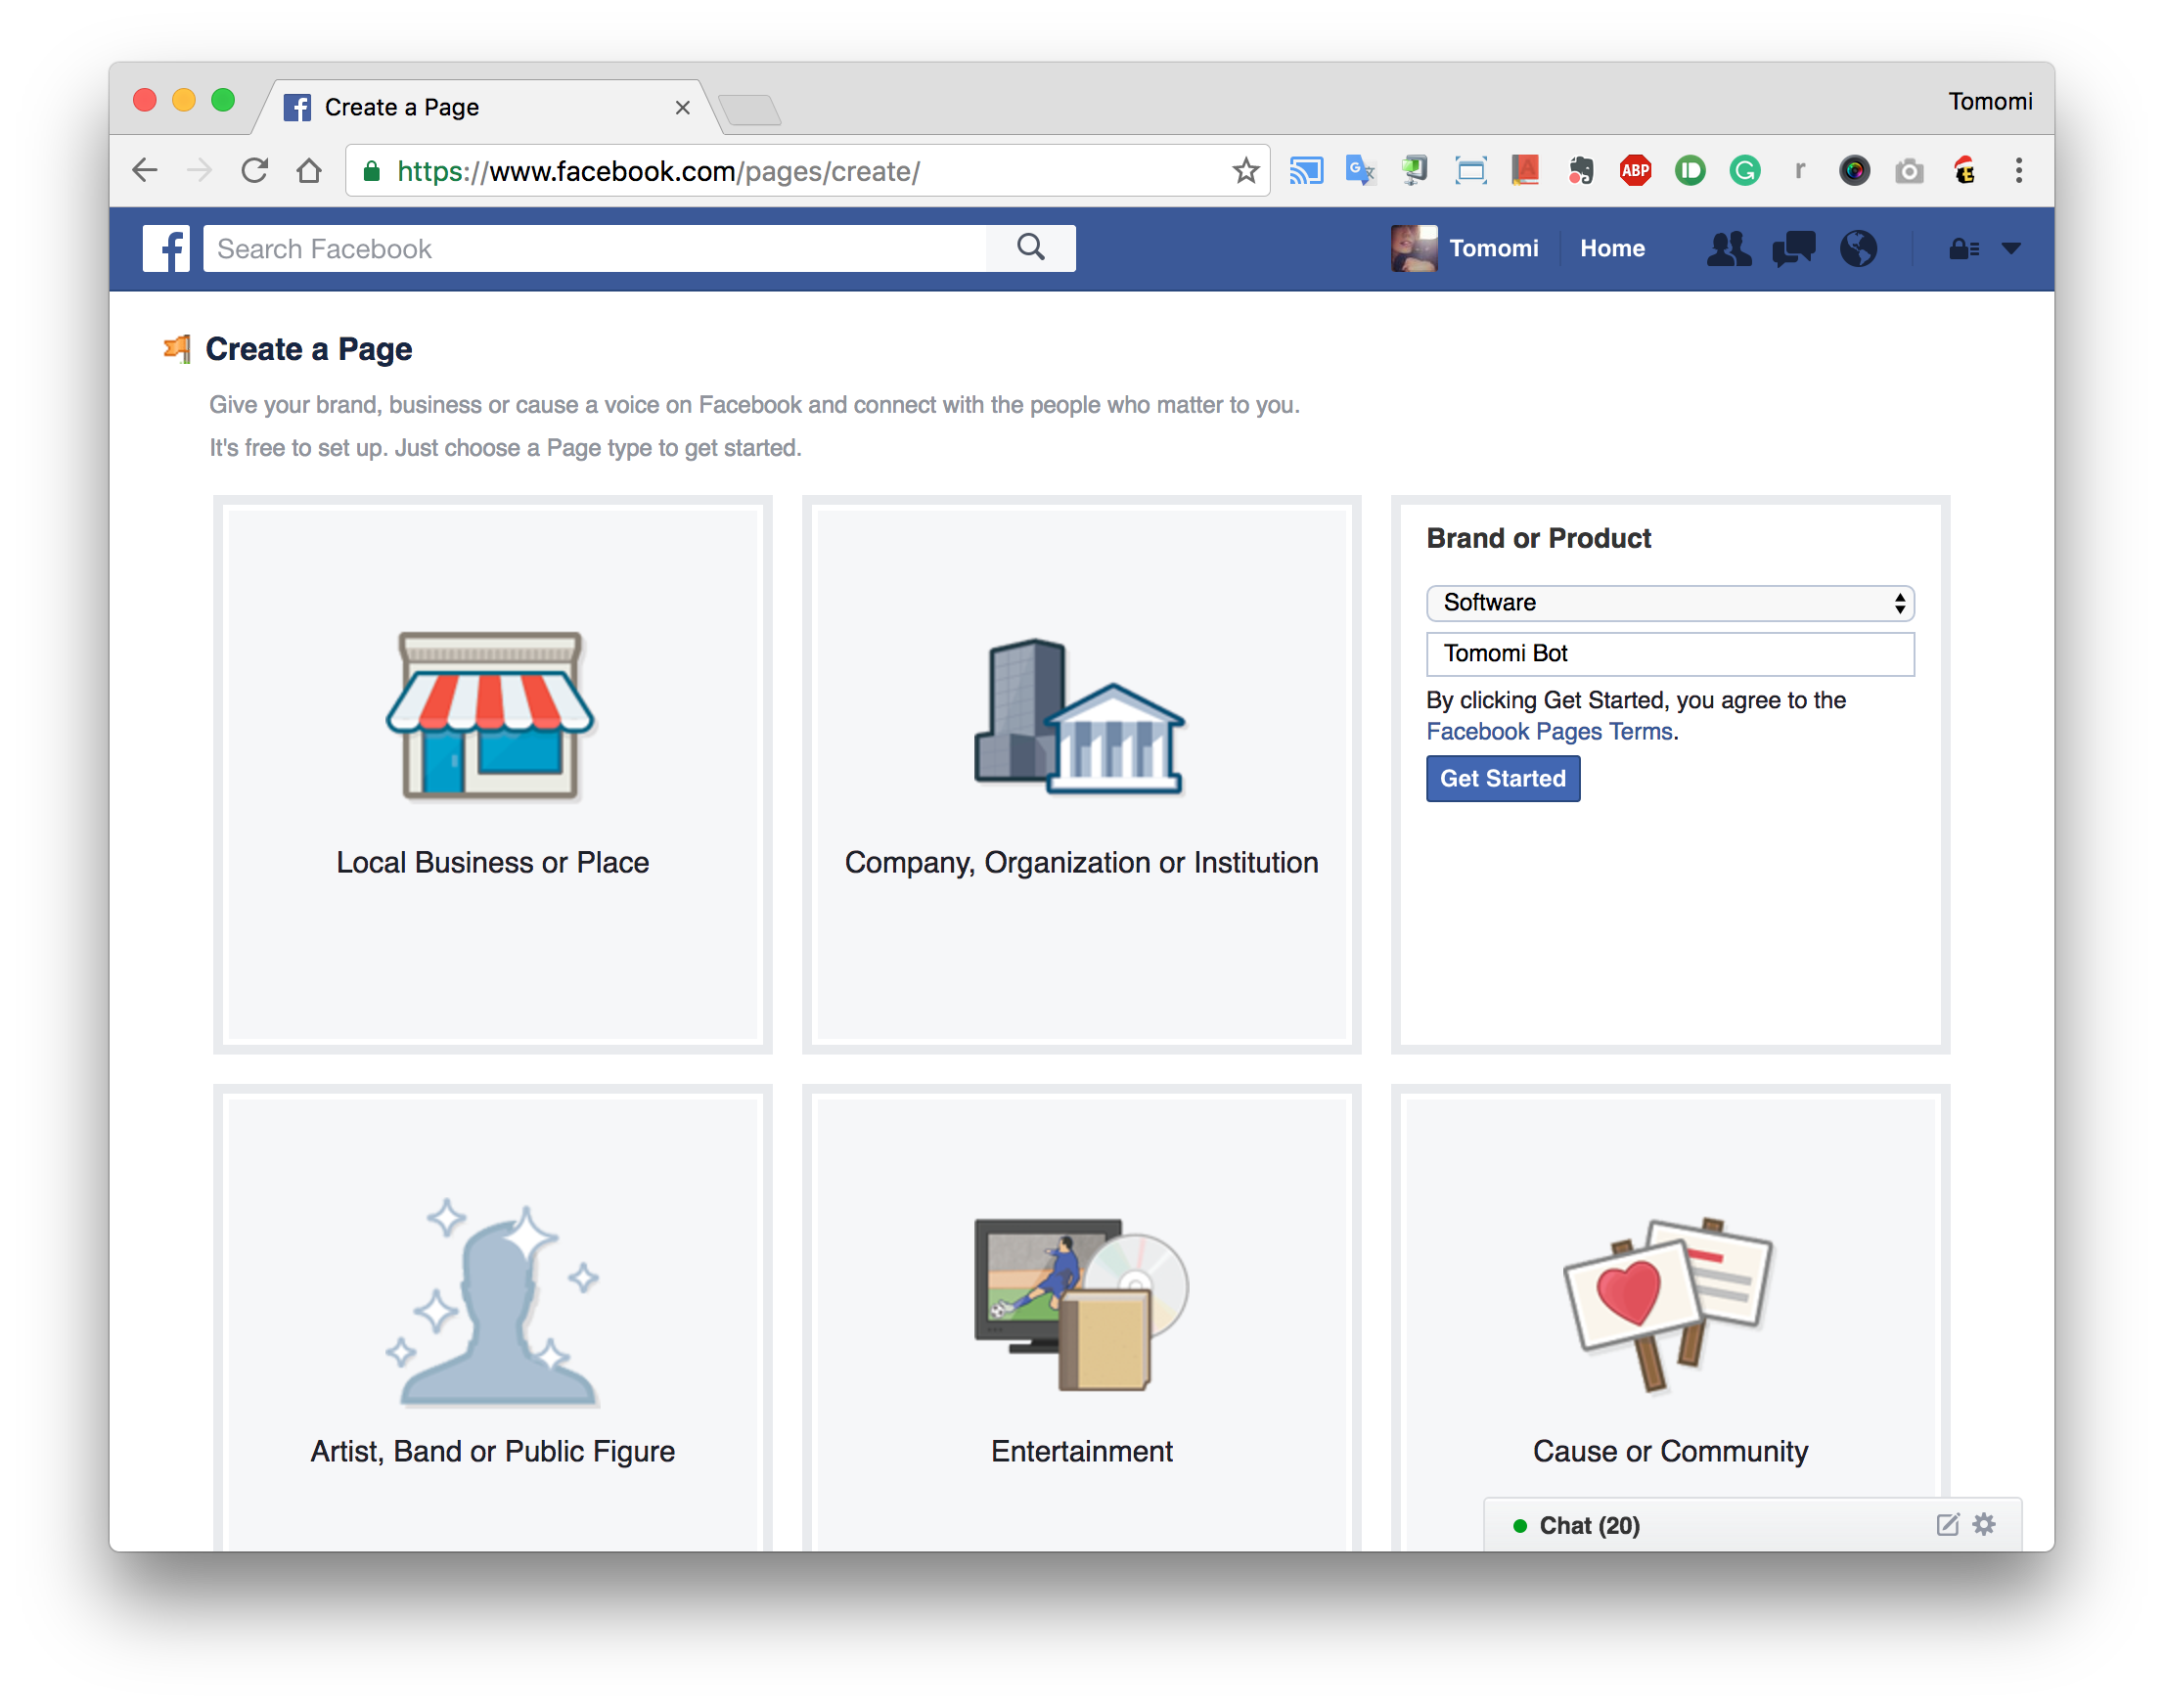
Step1: You need a Facebook Page to set up your chat bot. Create one from facebook.com/pages/create. Choose a category, and select a sub category from the dropdown and fill out the required filed. Then click Get Started.
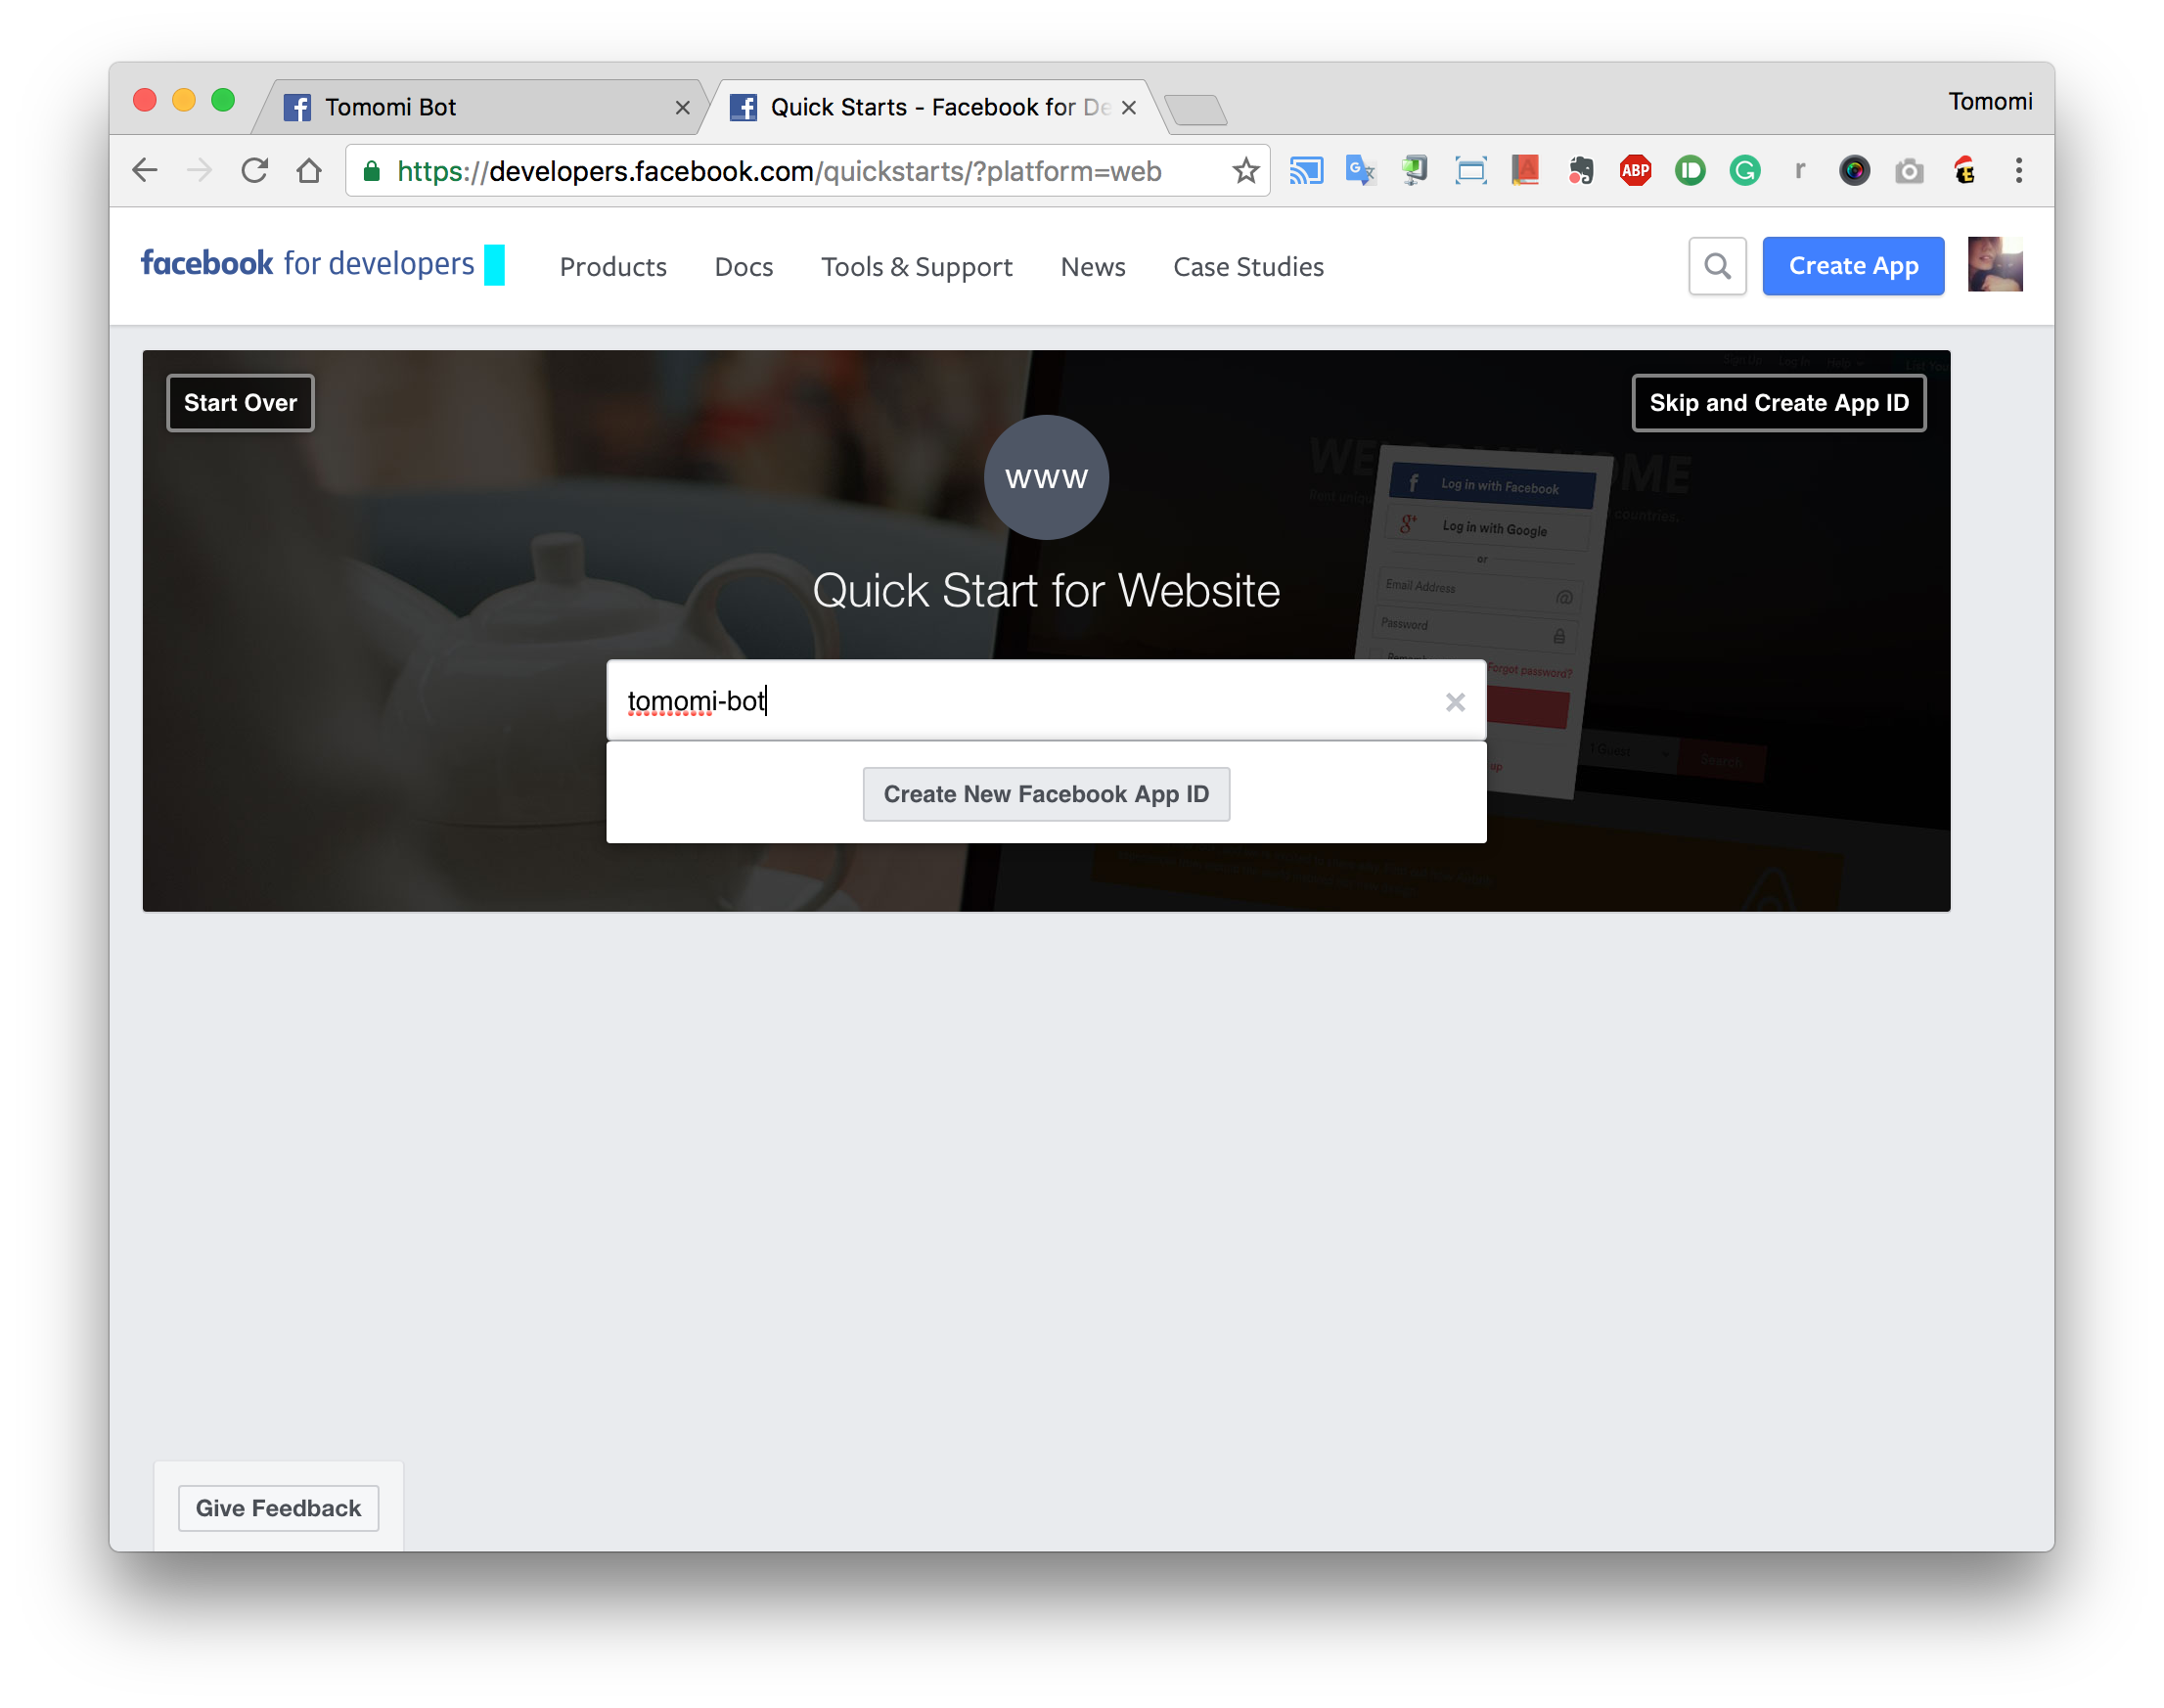
Then create an app at developers.facebook.com/quickstarts. Give it a name and click the button, then fill out the required info.
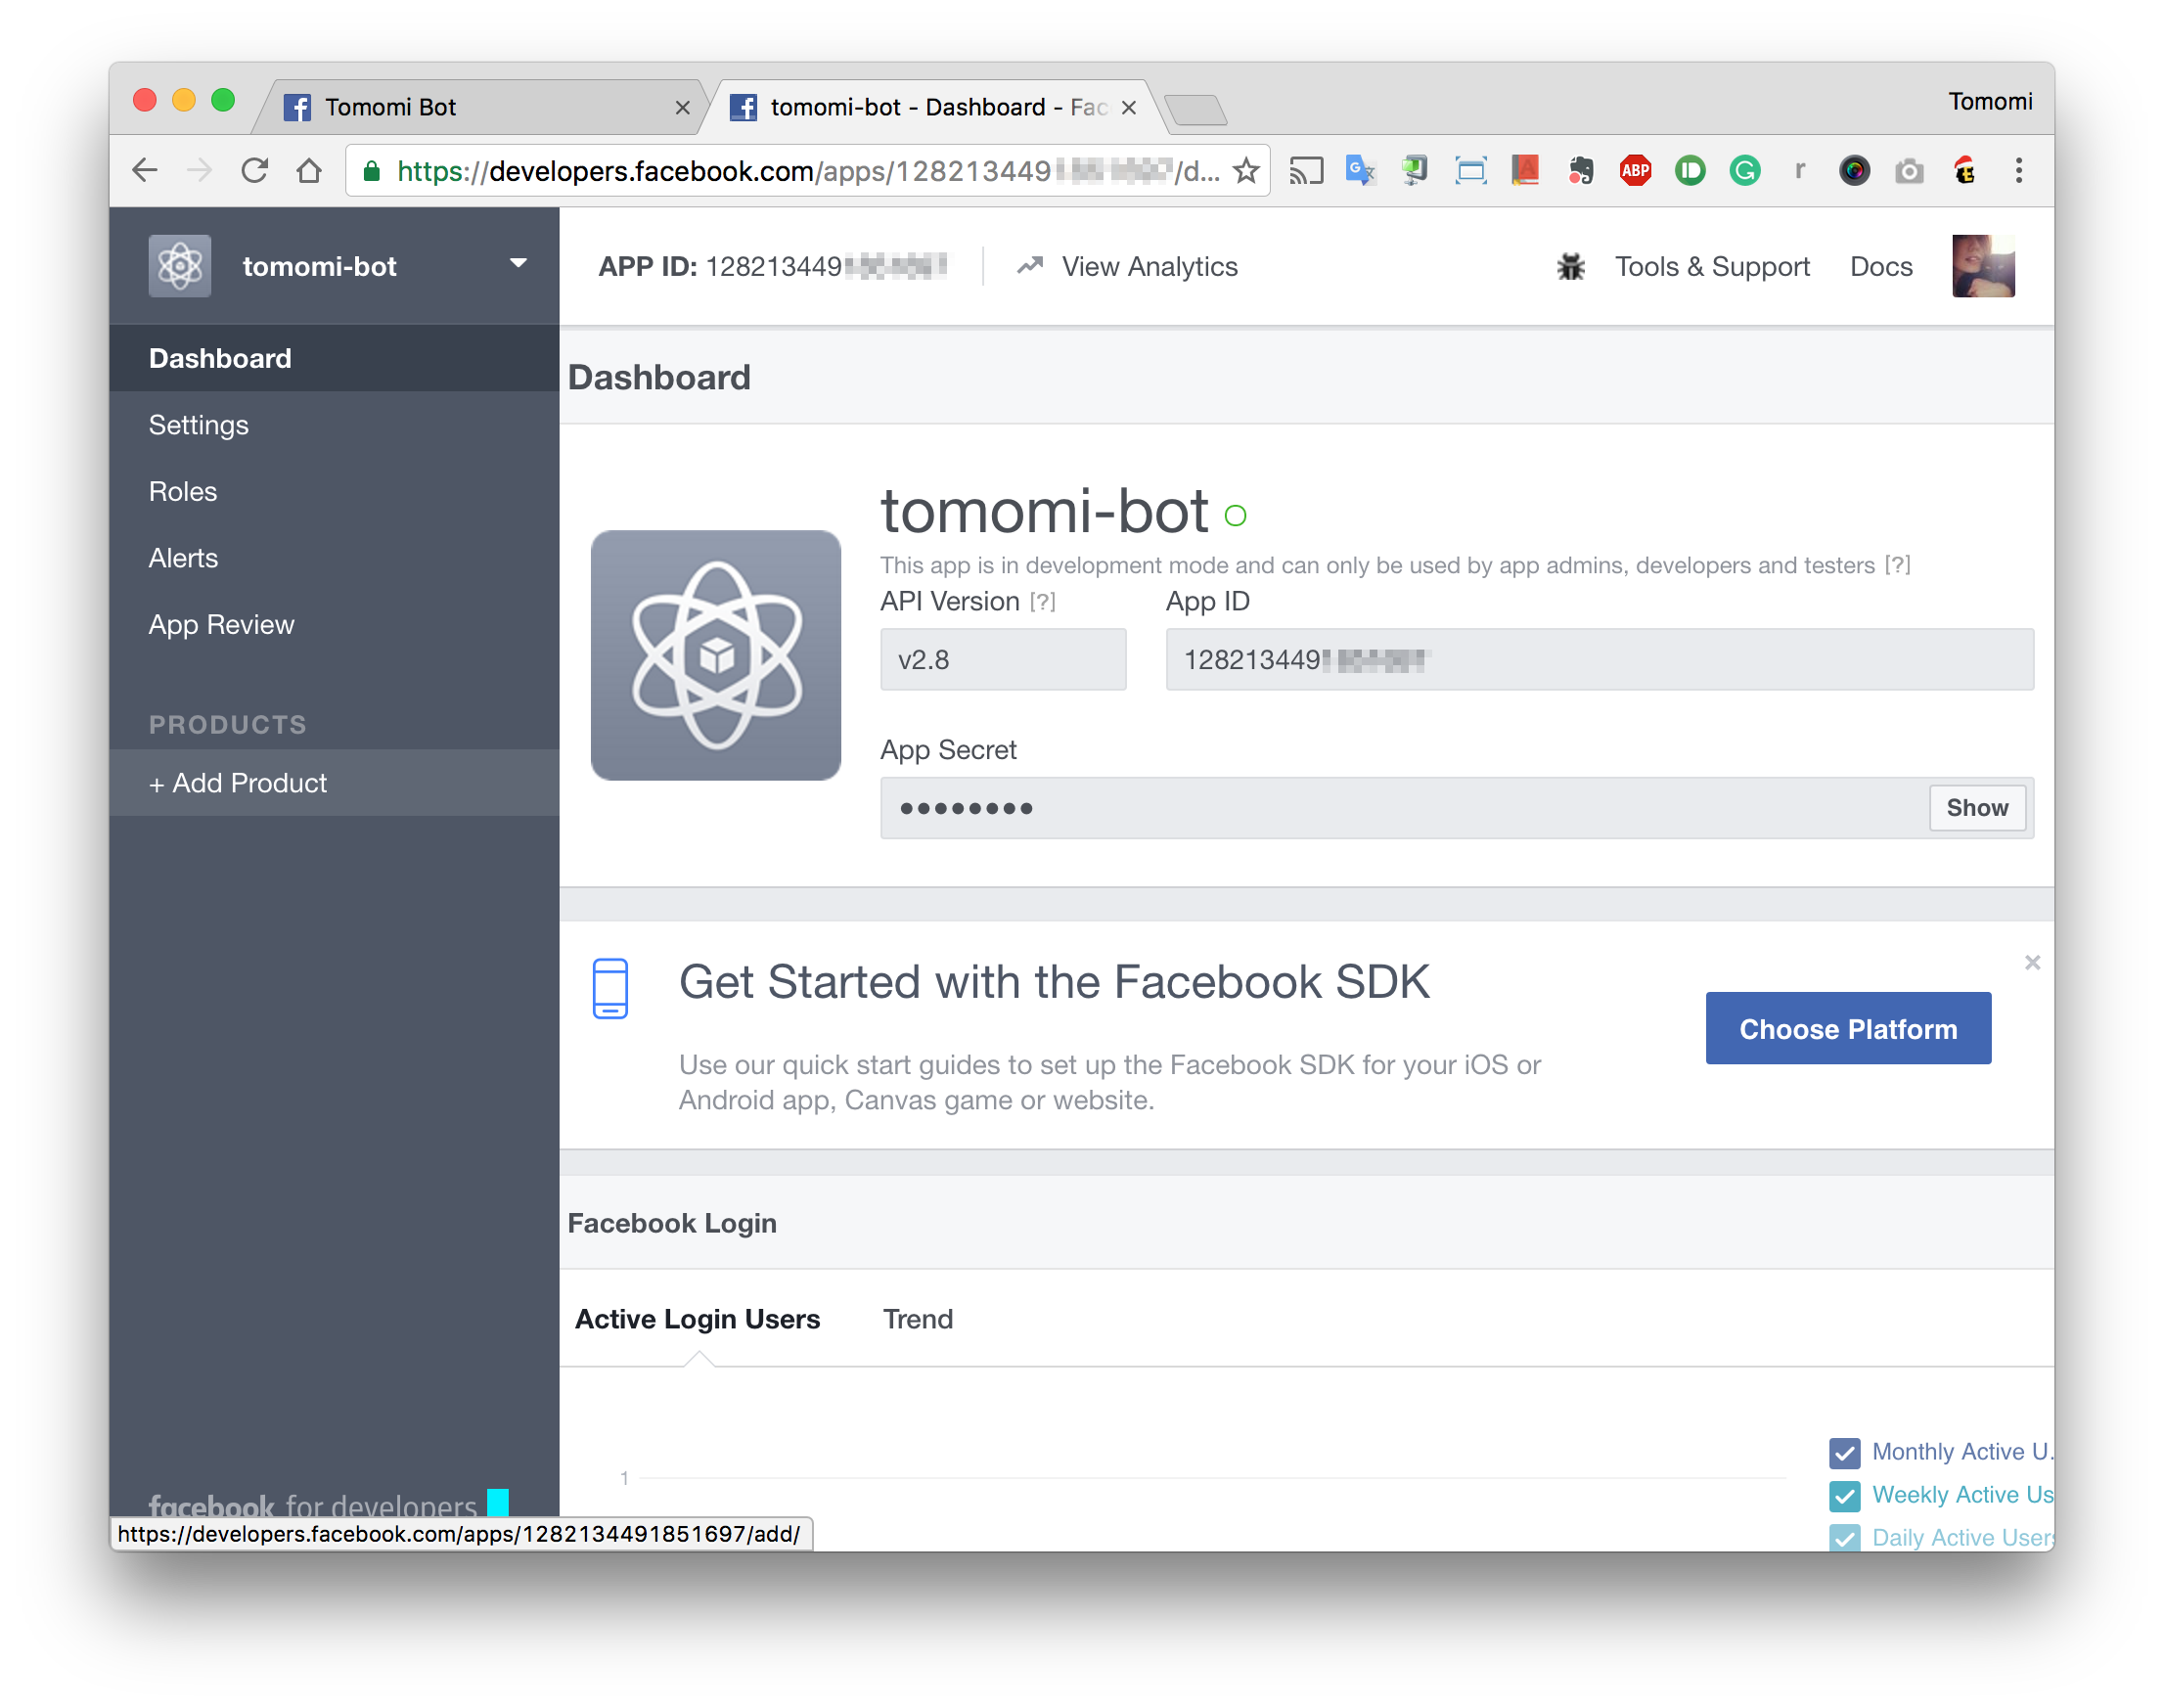
Once your app is created, follow the steps to configure or skip it to your Dashboard.
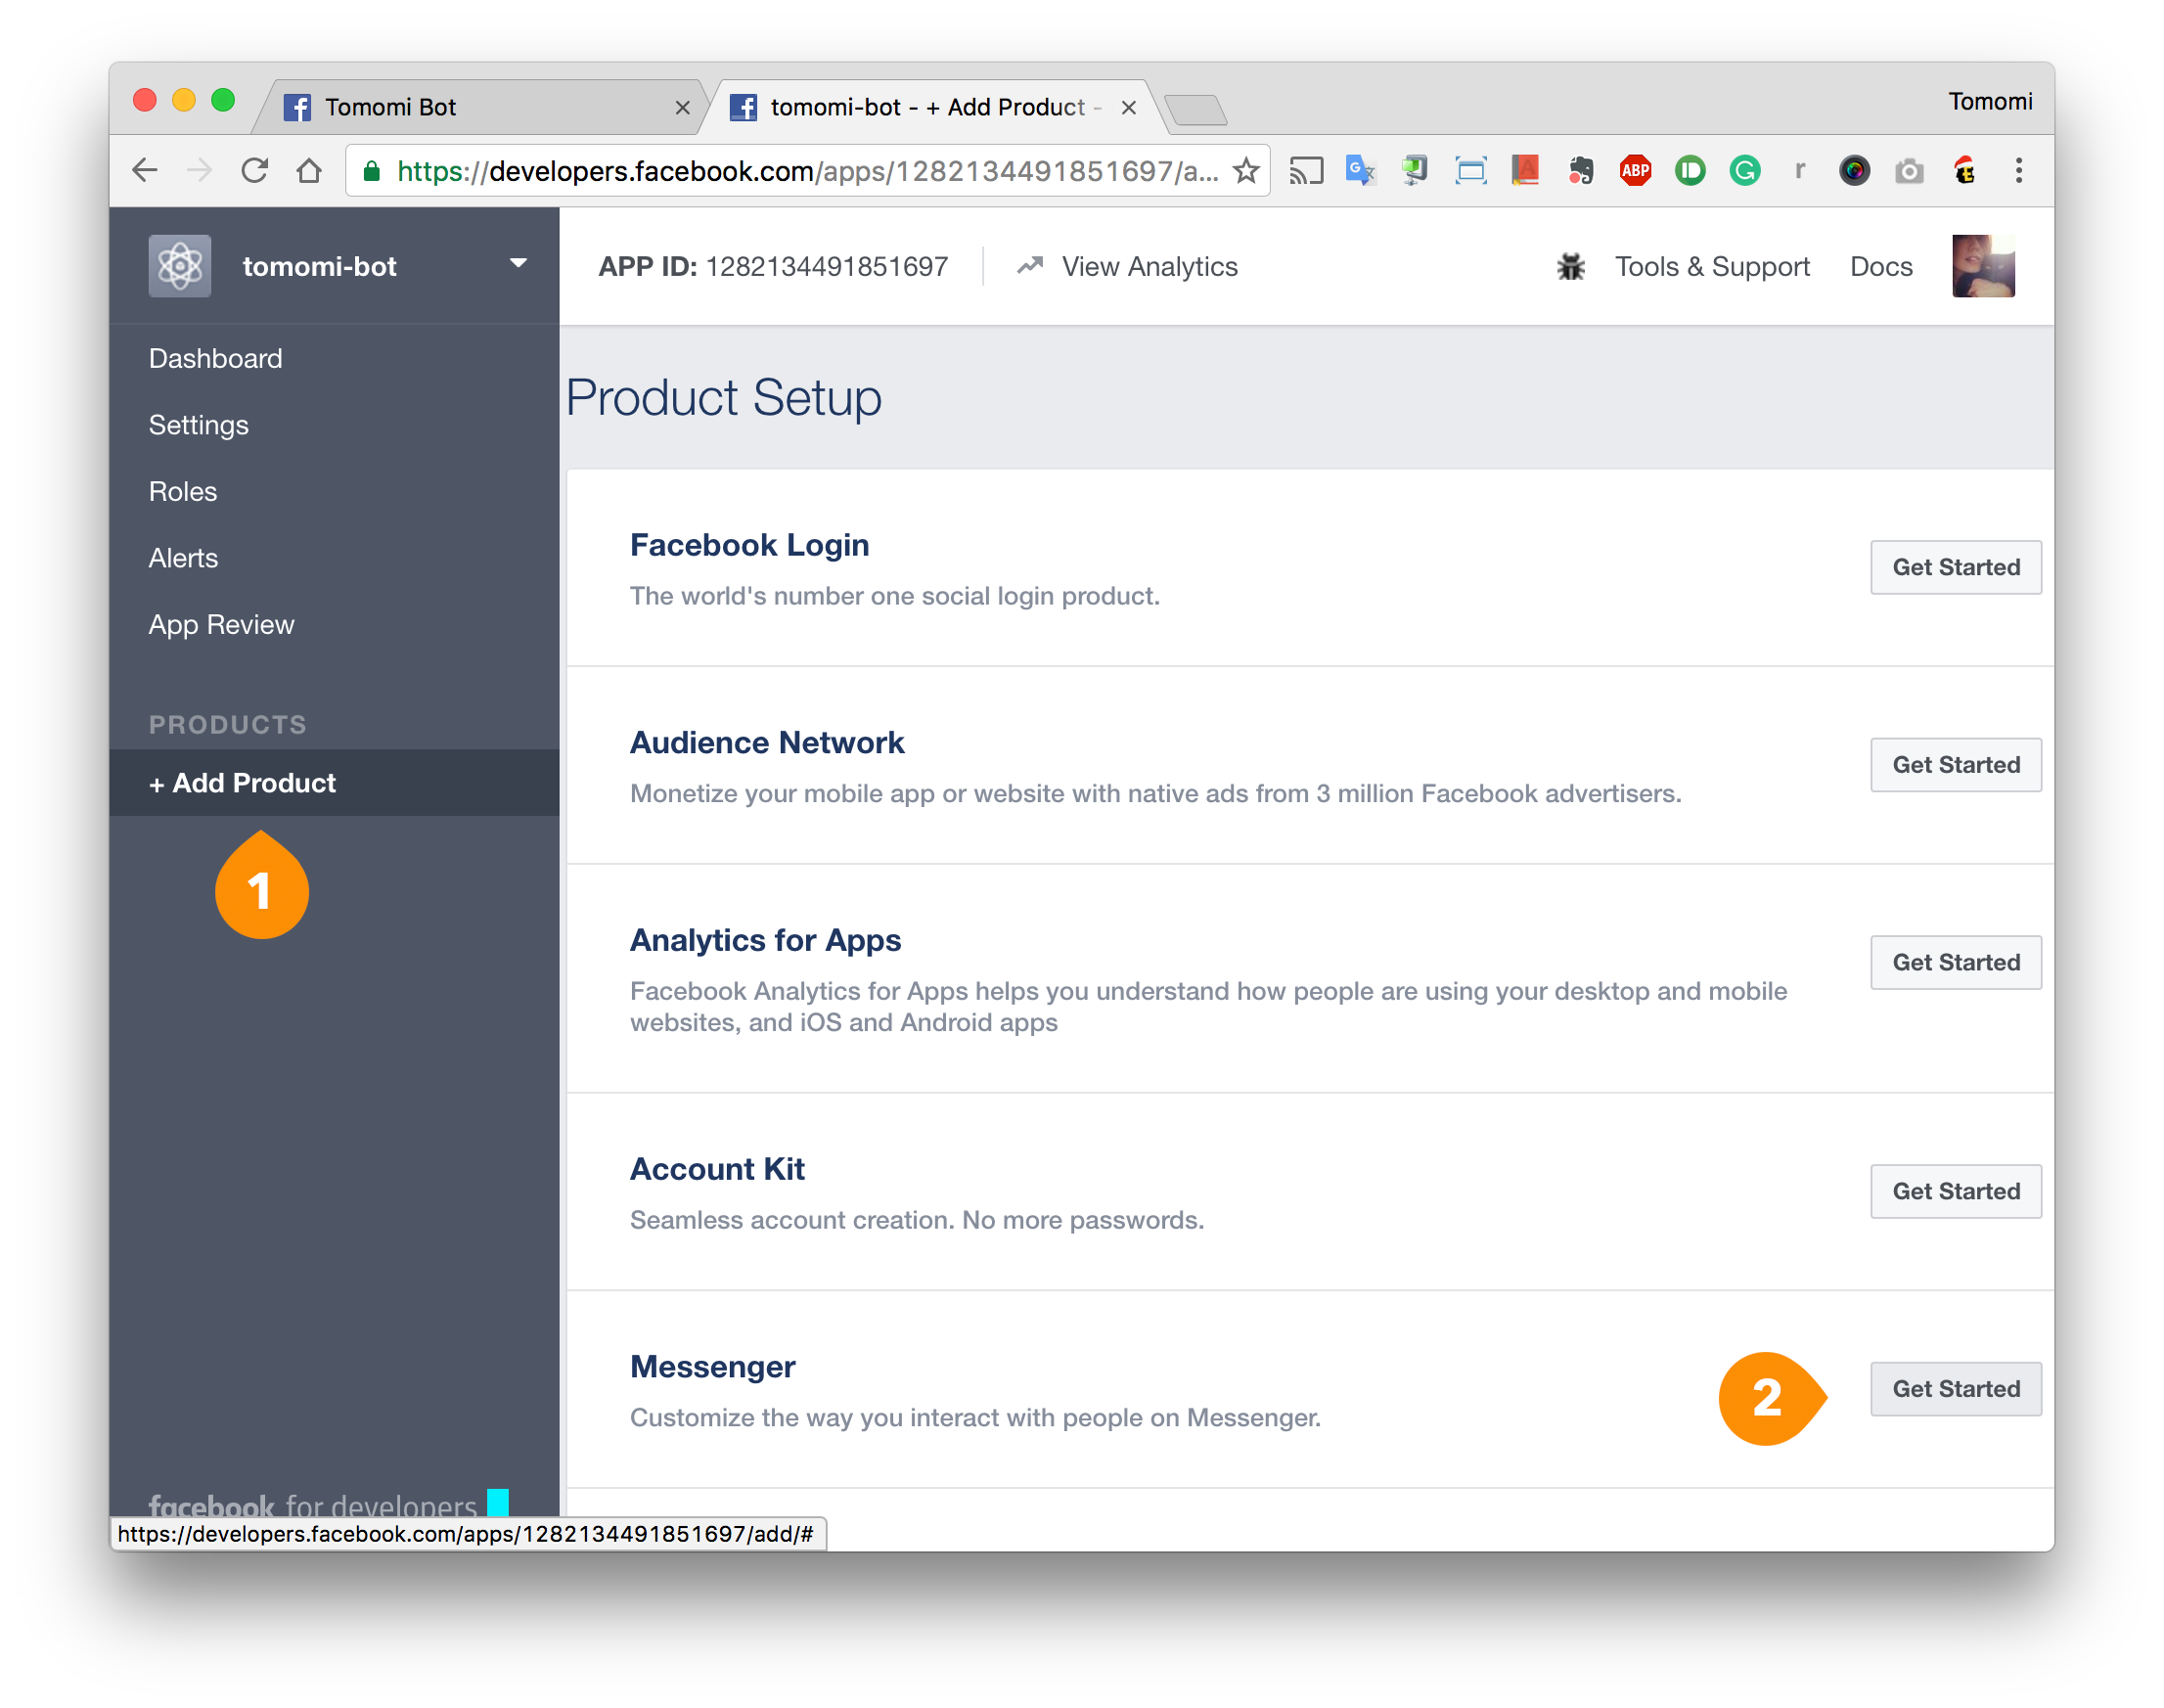
Click Add Product from the left menu, then choose Messenger. Click Get Started.
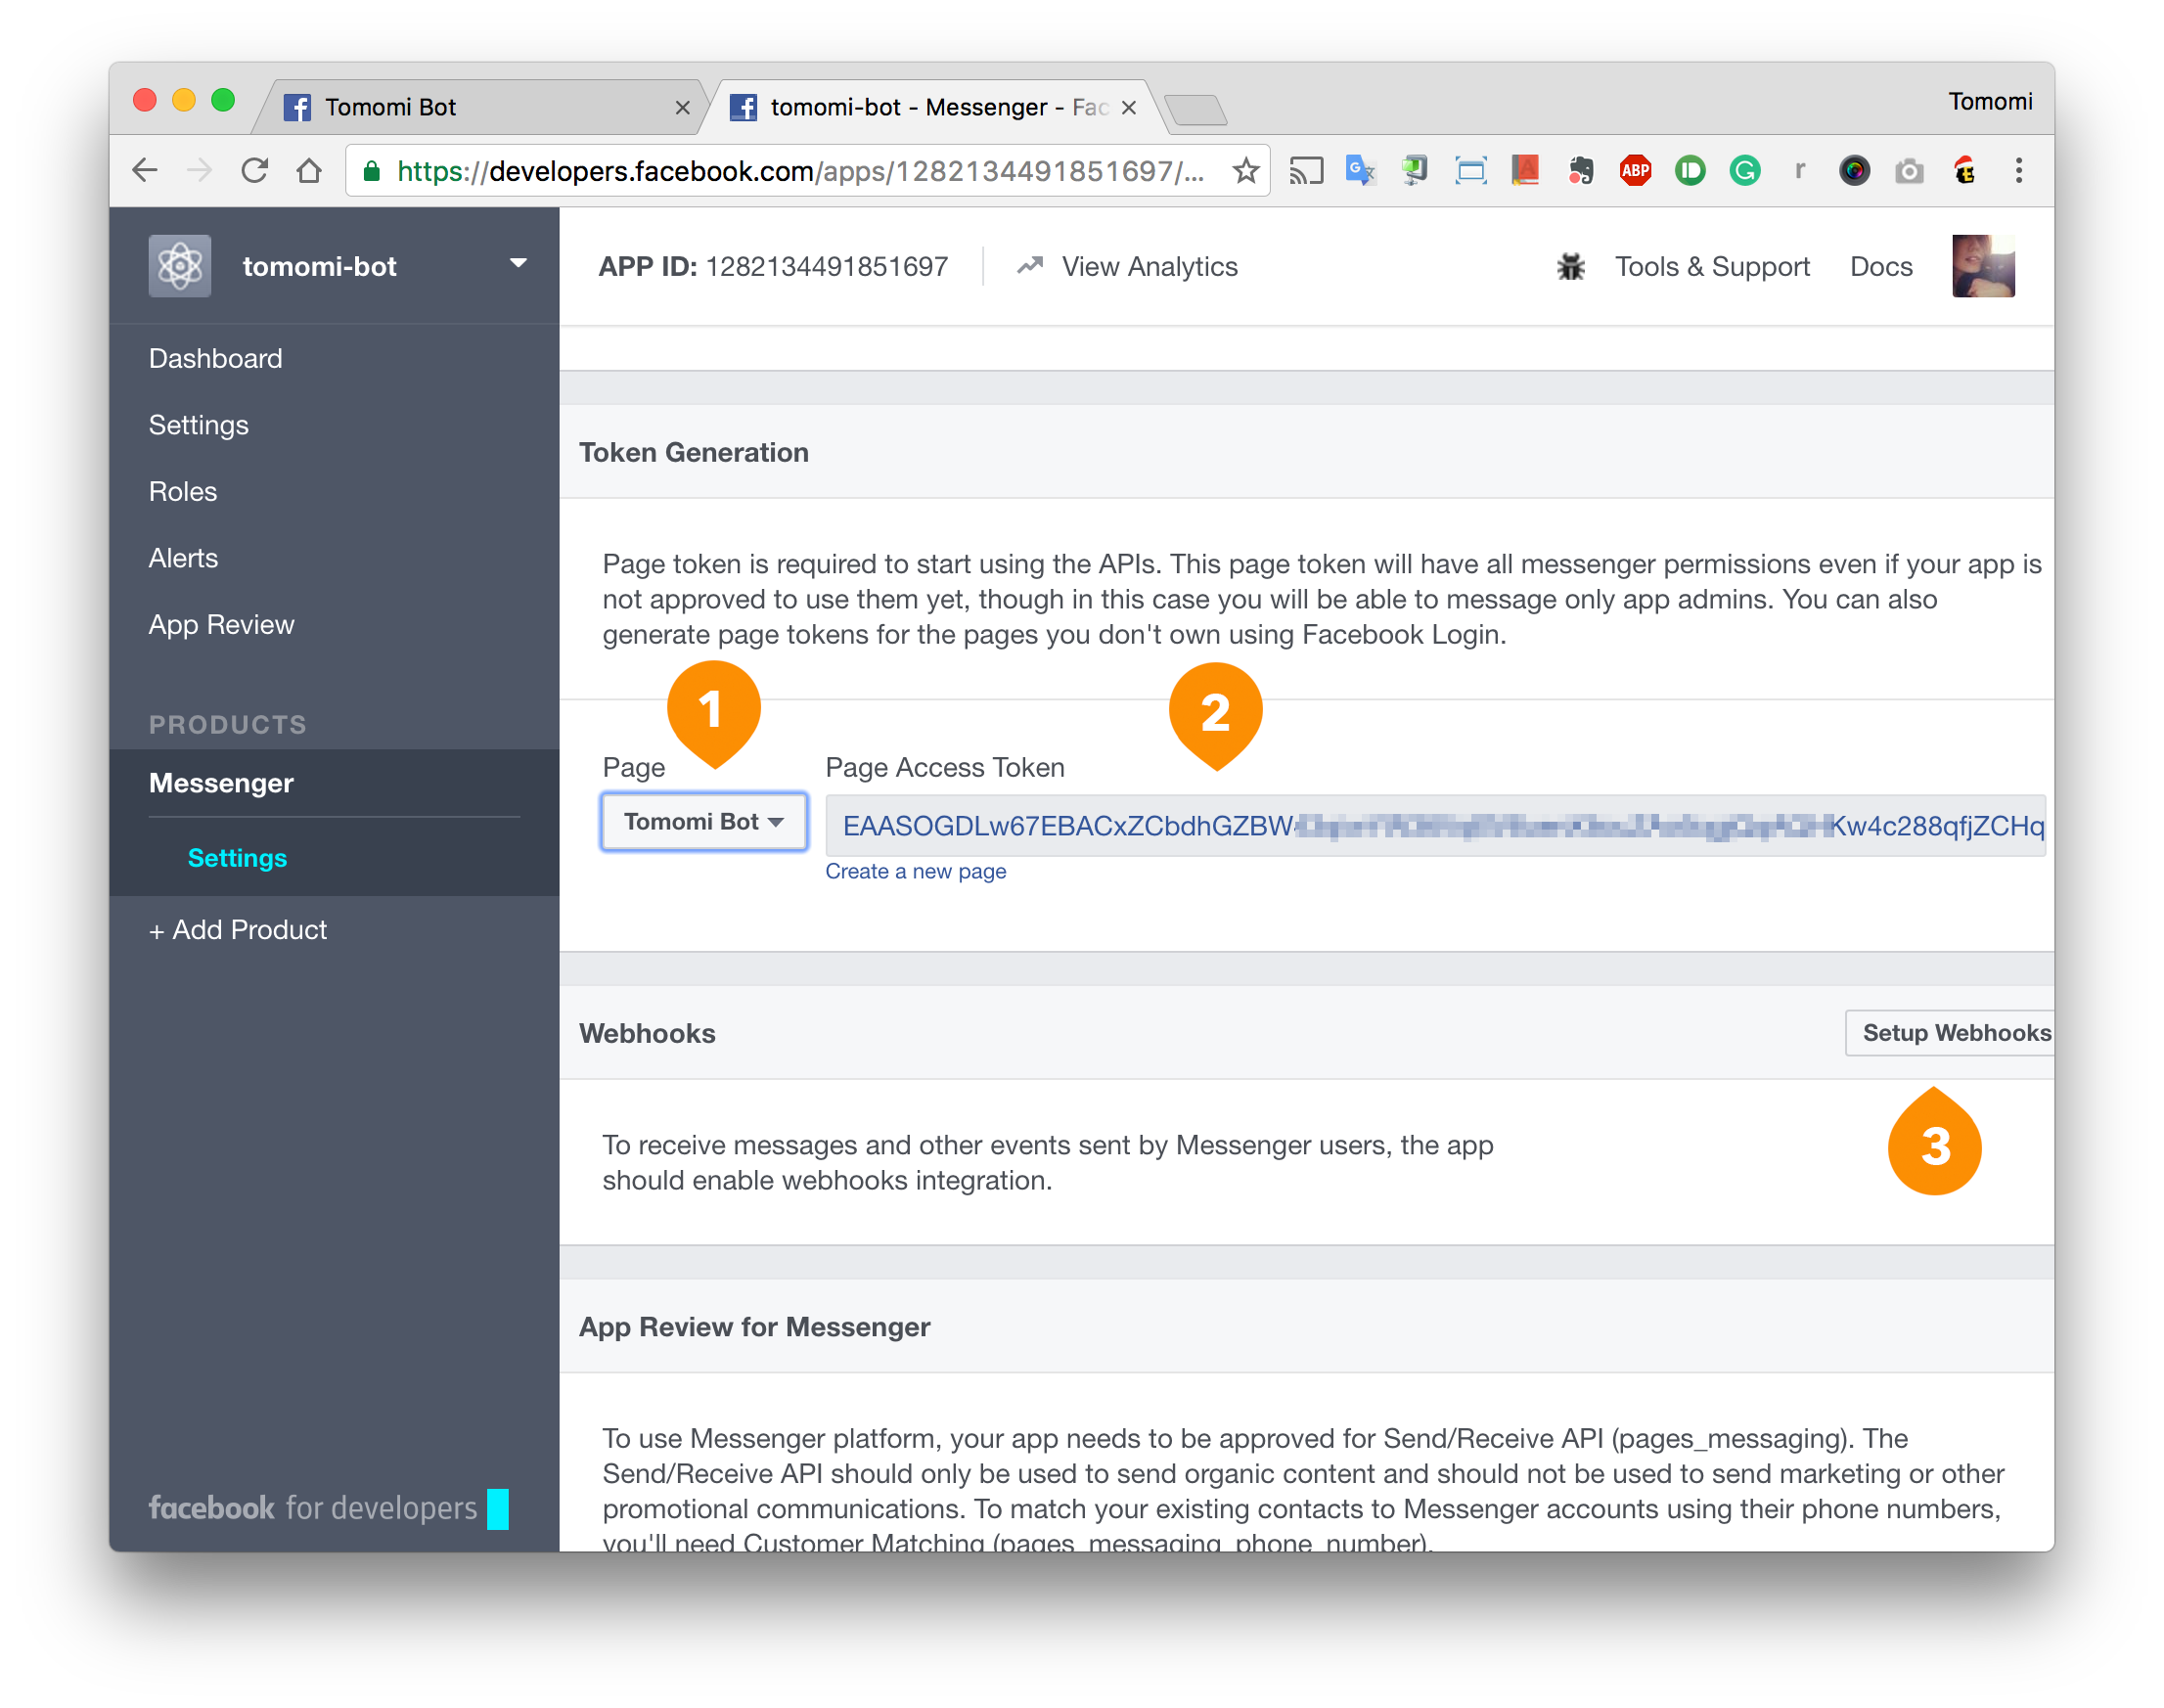
At the Token Generation, (1) choose the page you just created from the dropdown menu, and it will generate a token (2) that you will need to include in the code later (IMPORTANT: save the token in somewhere, you'll need it later).
Then, at the Webhooks, (3) click the Setup Webhooks button:
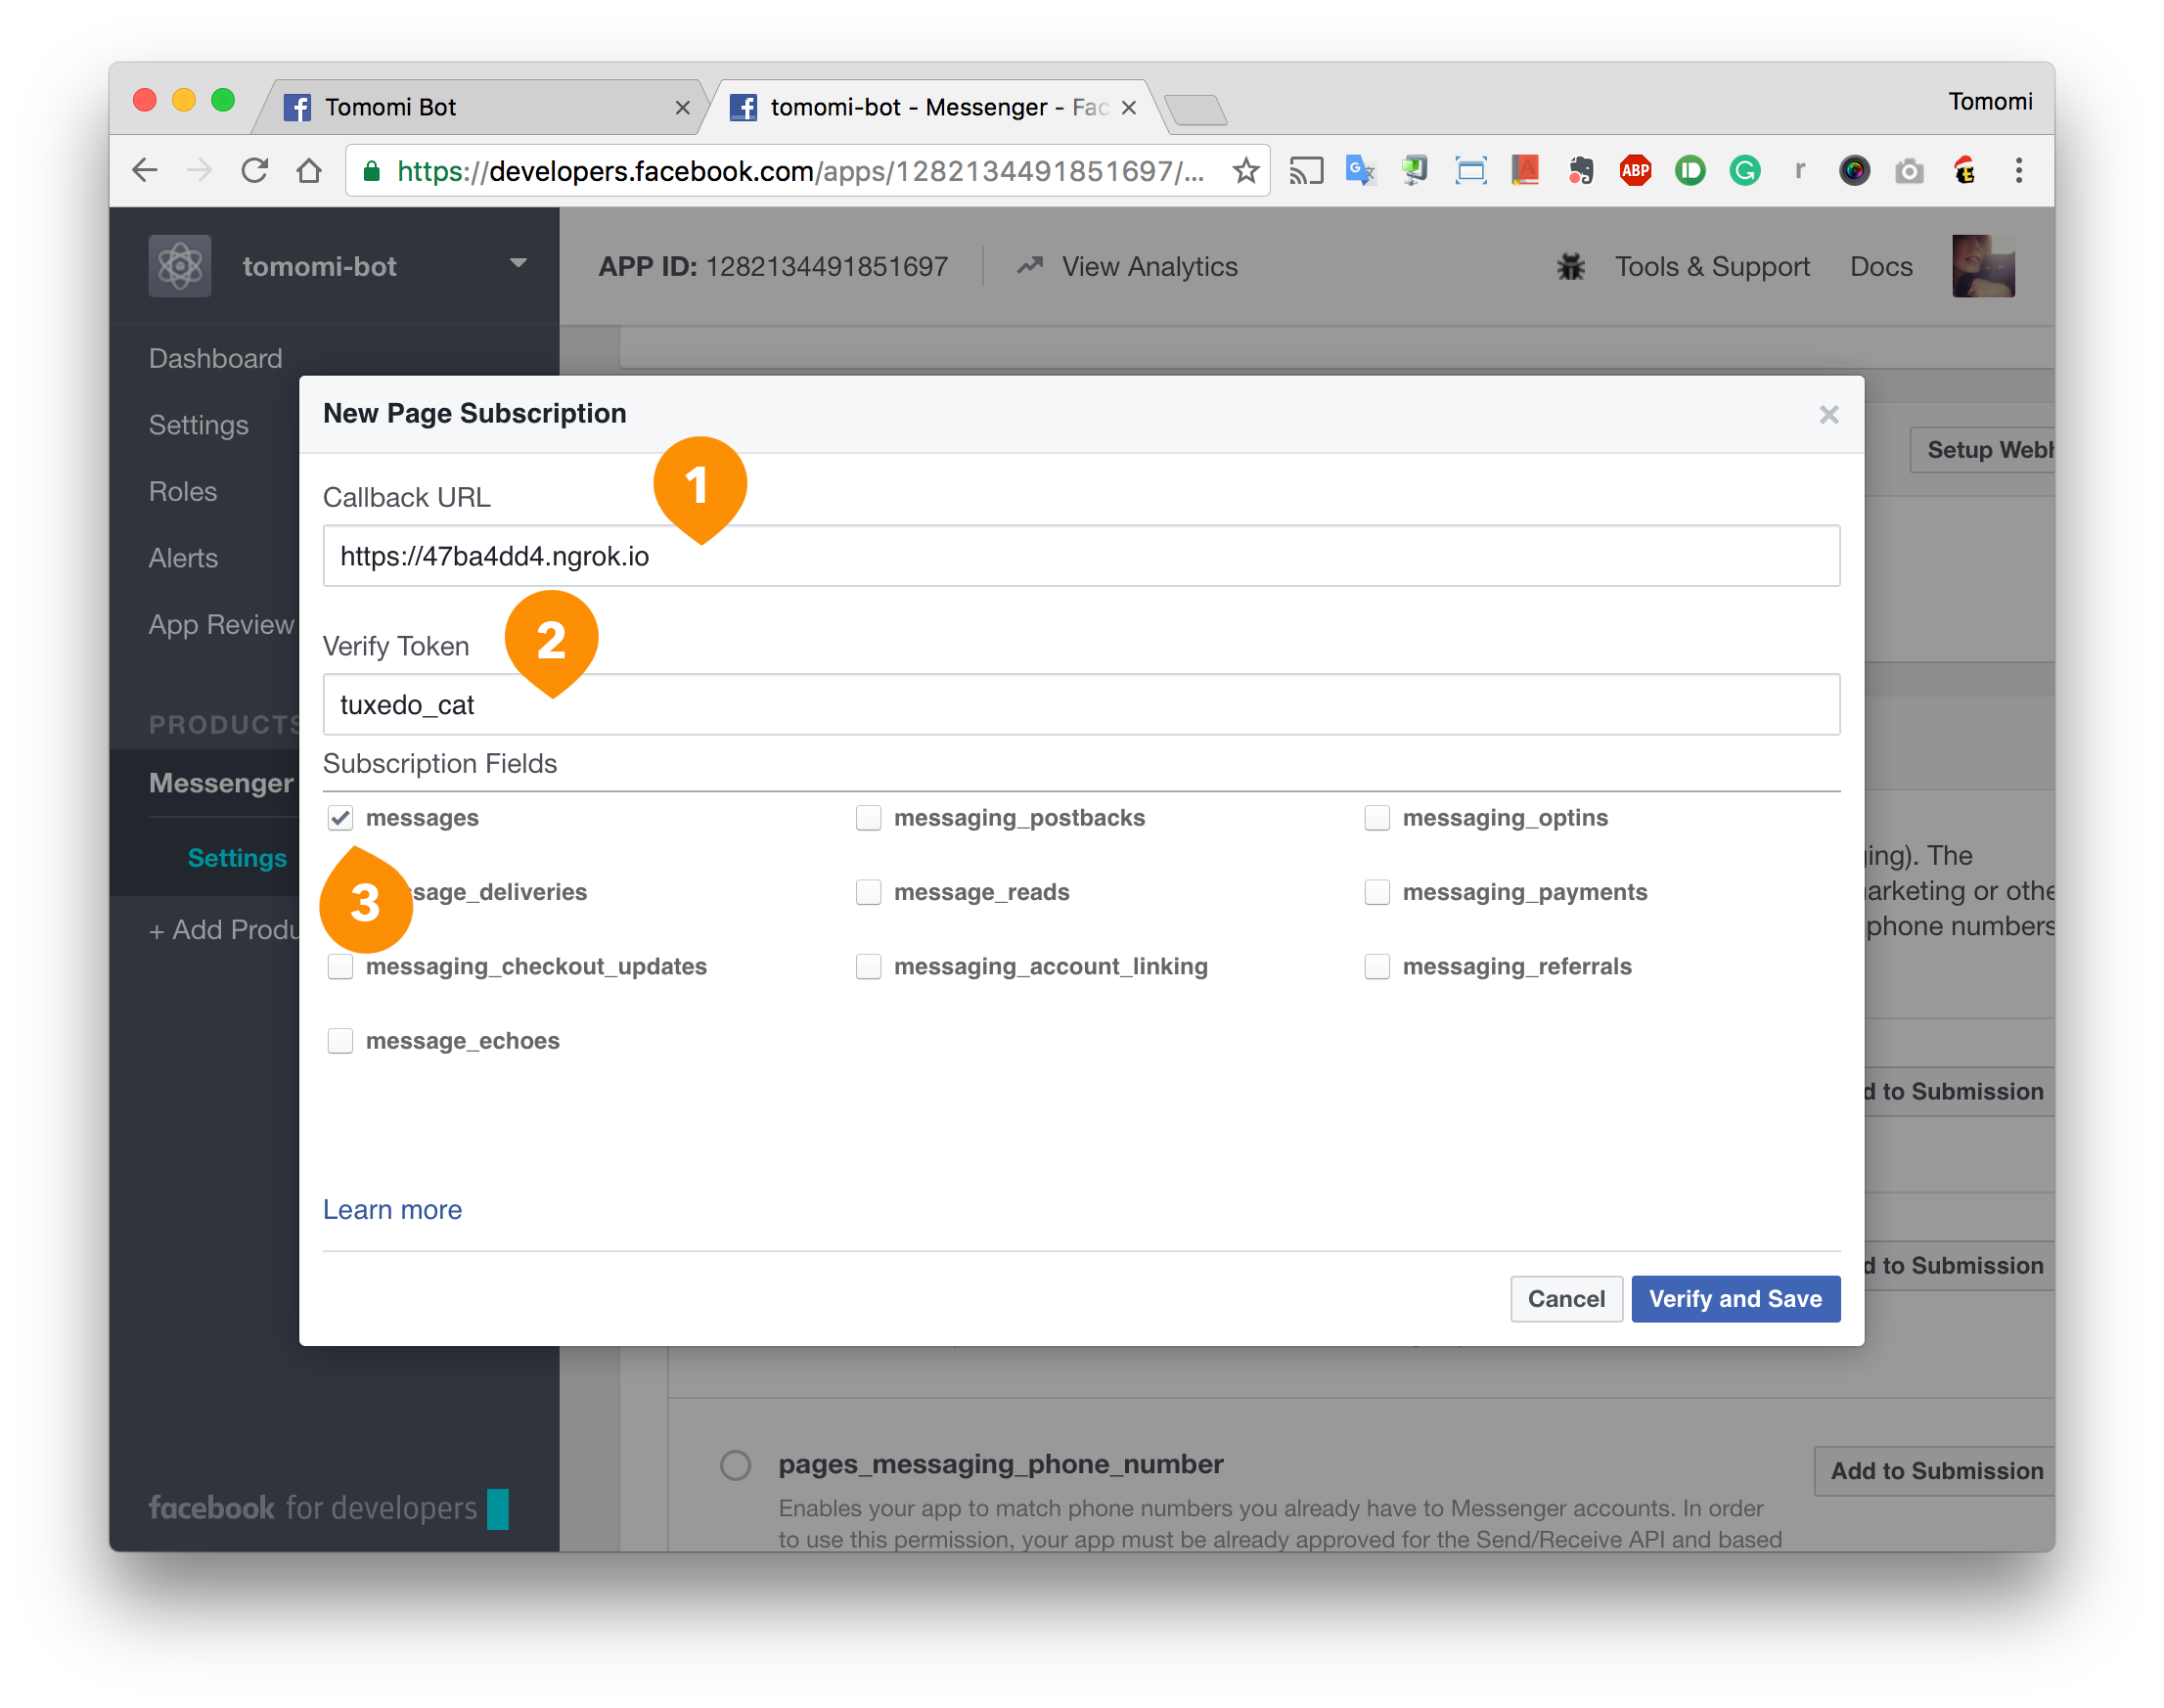
In the dialog, fill out the (1) Callback URL with your ngrok URL, (2) the random string for validation, then (3) check messages.
Click the Verify and Save. If you get a red icon with x at the Callback URL, it means the URL is not validated- so re-run ngrok and reset the webhook url. Otherwise, you are ready to go on.
The project has been built in two versions : API.ai version & ChatFuel version.
API.ai allows developers to integrate your app with the AI system with speech-to-text and natural language processing.
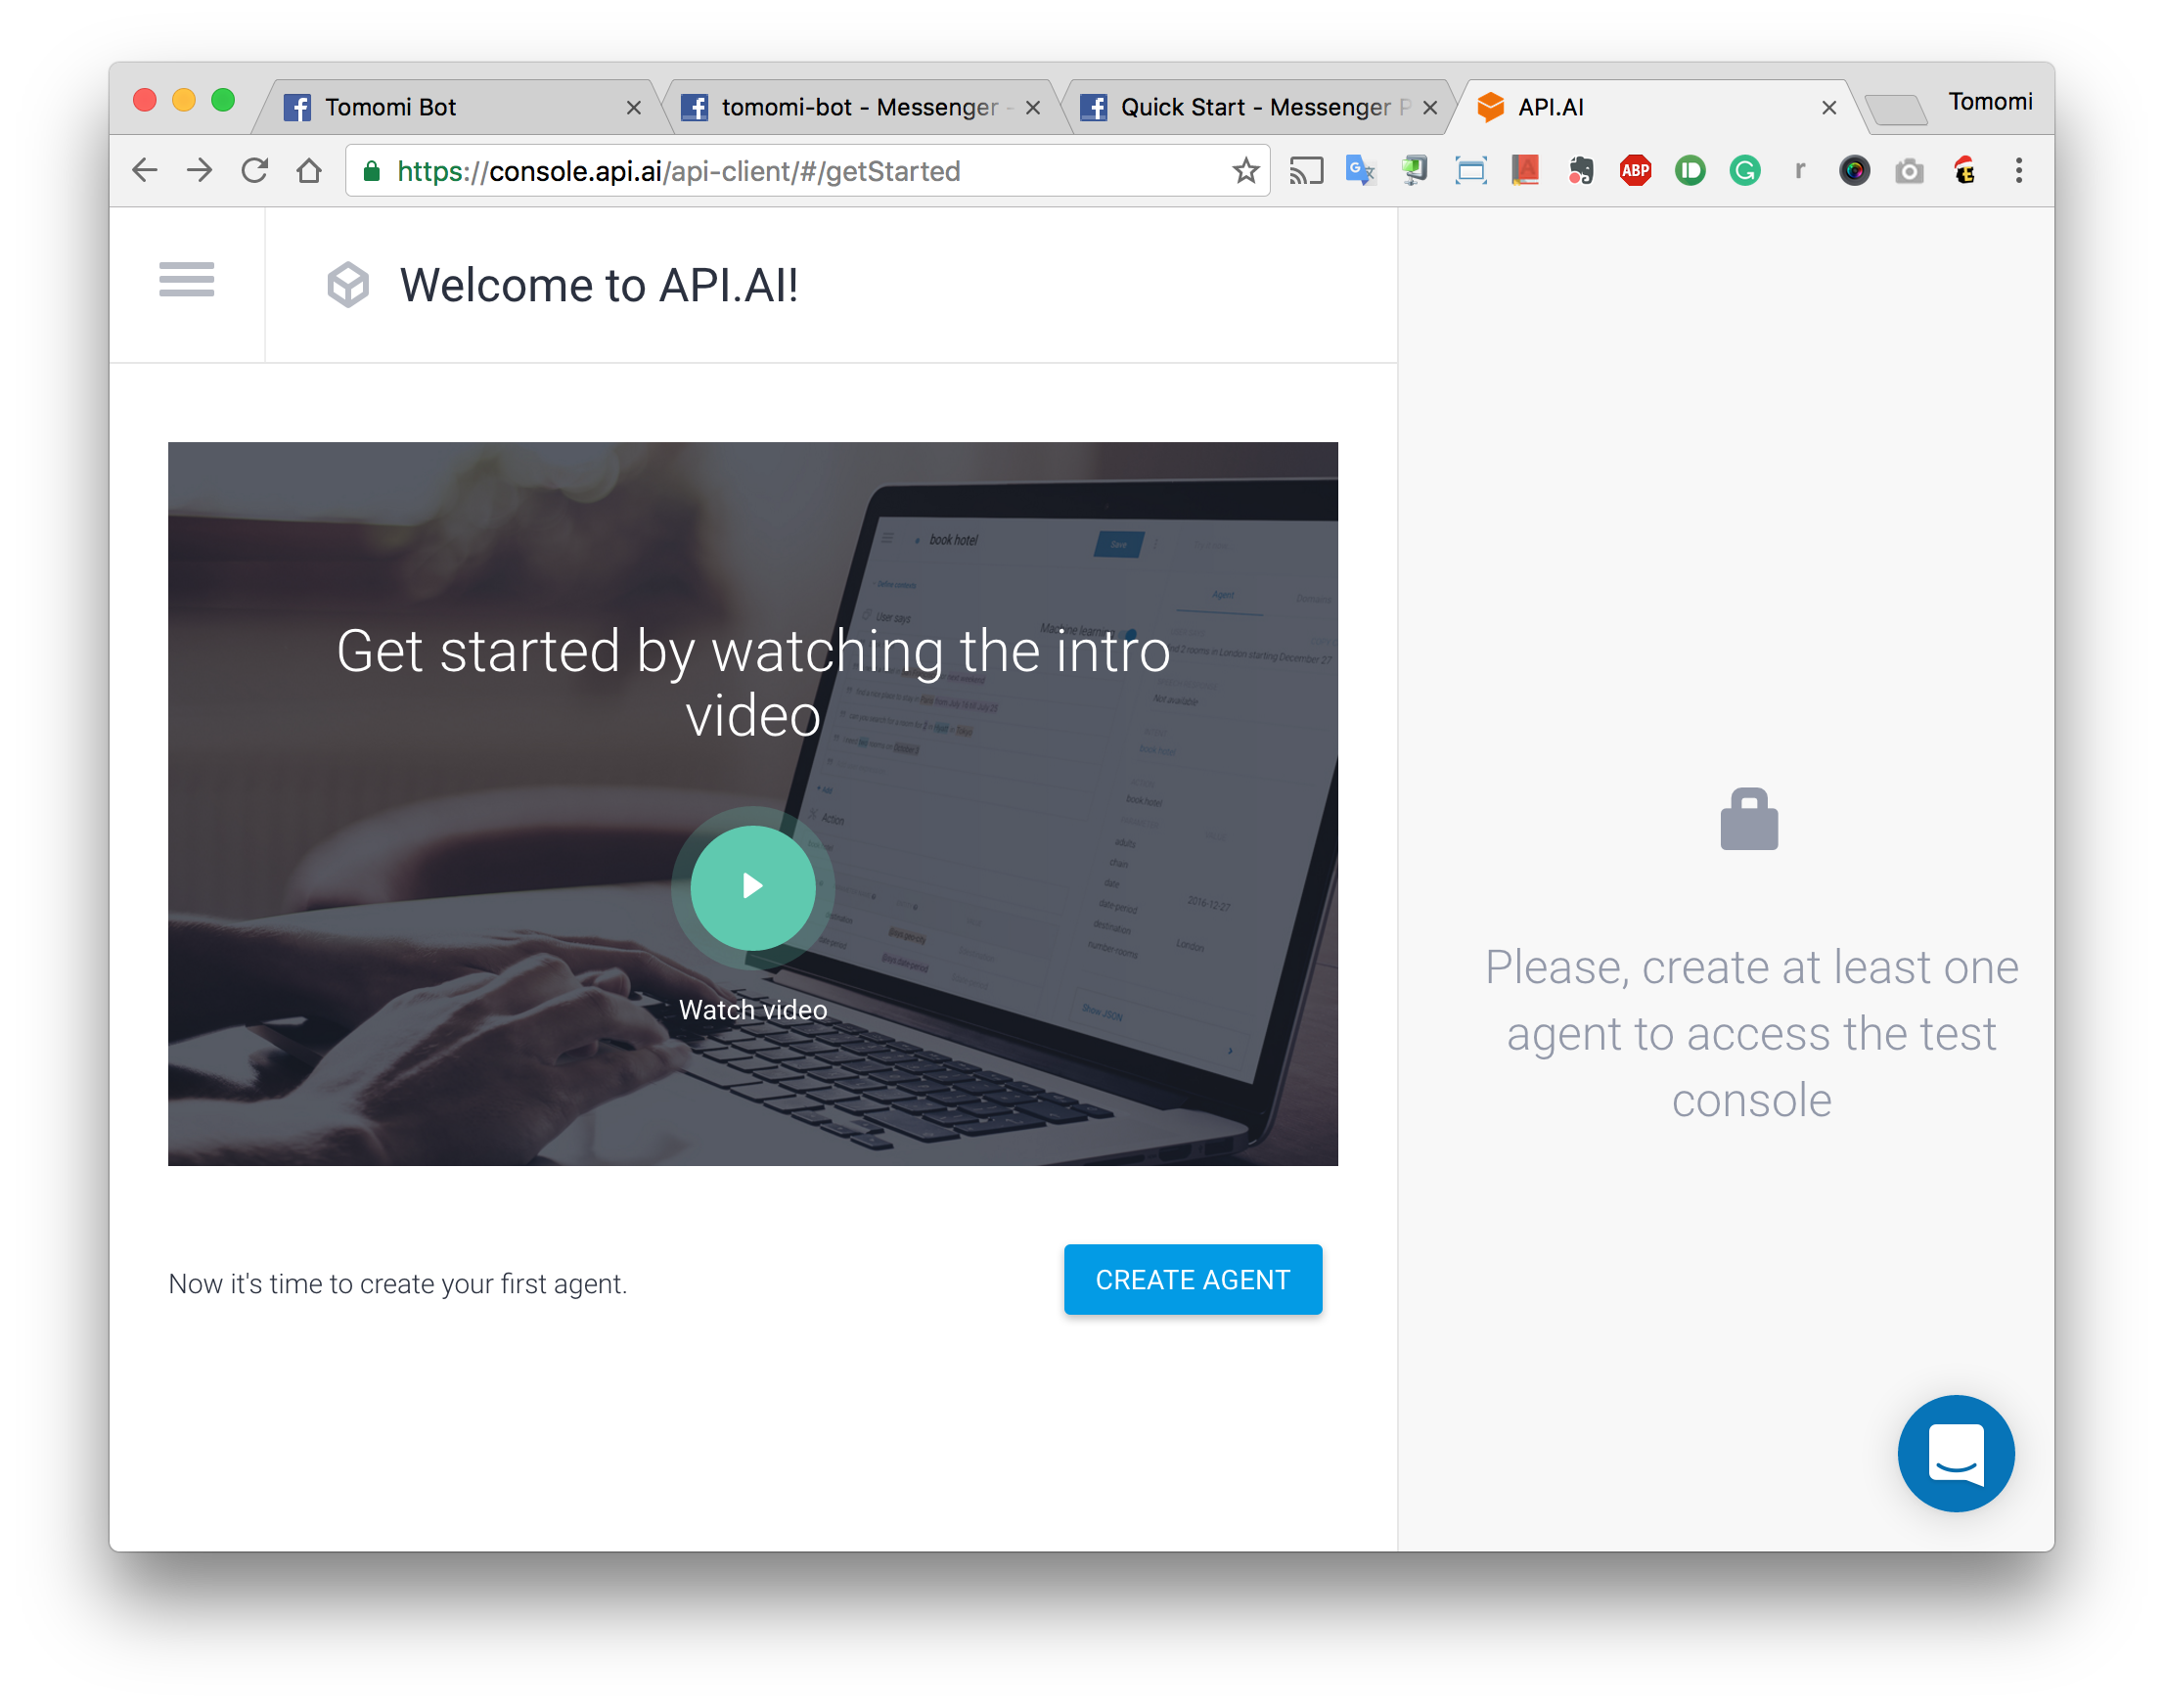
Let’s get started by sigining up.
After doing so, go to the tab "Export & Import" and hit "IMPORT FROM ZIP" button and download the zip configuration.
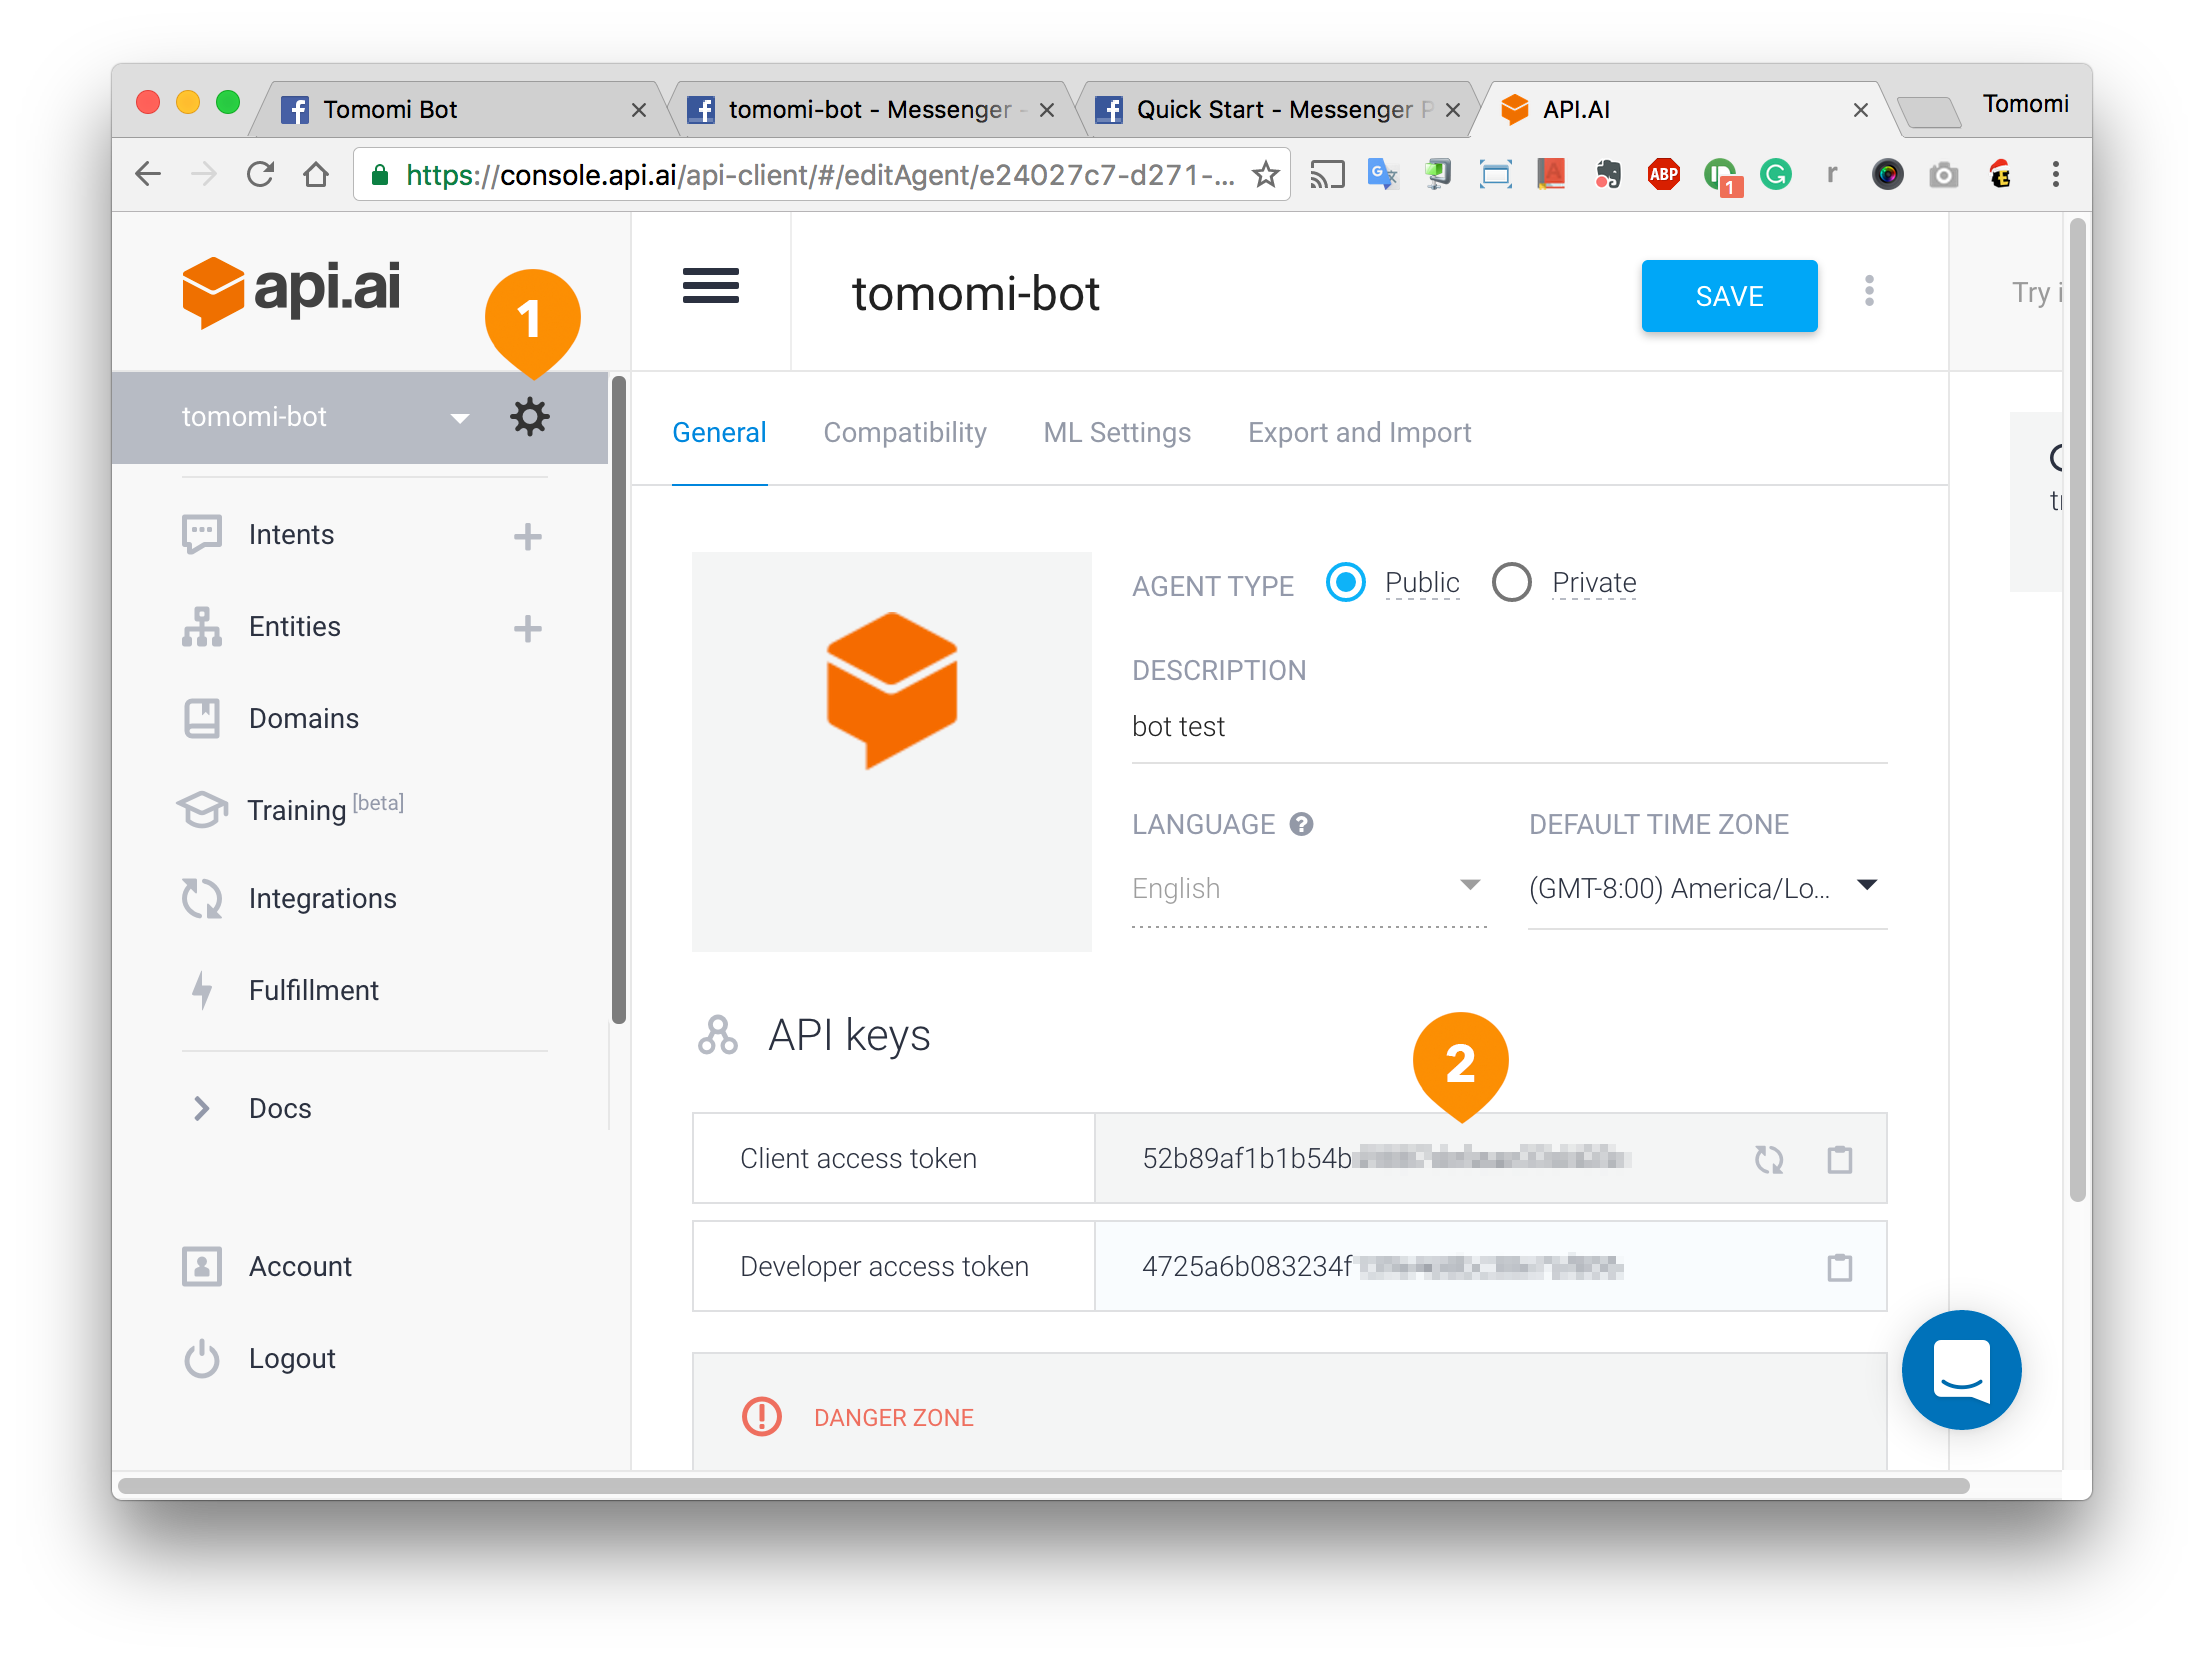
Now, You need your API.ai API key and API secret to use the service with your bot. From the menu, click the “Config” icon to get your API key "Client access token" and copy it.
Go to Main_App (API.AI)/workspace/server/service.js and set the "Client access token" key in the 5th line.
const apiaiApp = apiai('Client access token');
Now, let's set the token key that we saved from the facebook App earlier.
In the same file Main_App (API.AI)/workspace/server/service.js set the access_token at the function send_reply(message){..}
....{
   access_token: ""
    },.....
At this point, all what's left, is to run the microservices one-by-one by typing...
node service.js
Chatfuel is a bot builder for FB. It has a visual development environment, so you can click and add blocks of functionality like “Text Card” to send a text response and other blocks to send images etc.. It's much easier to integrate with facebook bots since it integrats FB apps automatically. To take a look on the project's structure in ChatFuel, first, log in Facebook with the following credentials.
Email : [email protected]
Password : chatfuelchatfuel
Second, open ChatFuel's app and hit "GET STARTED FOR FREE" or "LOG IN" to connect automatically with the running facebook account.
Once you're in, reset the webhook to the one you have generated by ngrok (https://47ba4dd4.ngrok.io in our case).
Edit all the folowing blocs : all_profs profs_plus_ues all_ues look_for_ue_details my_group
NB: wait a couple seconds after resetting to have the changes automatically saved. (until the ✔️ in the right corner appears)
At the end, let's run the microservices...
node service.js
- You need to have a facebook page associated with each version, so you got to have 2 in sum.
- After you clone this repo, go to each directry's root and run
npm installto install all its dependencies. - Run all the microservices's servers listed above for both versions, except Main_App (API.AI) and Main_App (ChatFuel), run one of them according to the version you're testing.
Contributions are what make the open source community such an amazing place to be learn, inspire, and create. Any contributions you make are greatly appreciated.
- Fork the Project
- Create your Feature Branch (
git checkout -b feature/AmazingFeature) - Commit your Changes (
git commit -m 'Add some AmazingFeature') - Push to the Branch (
git push origin feature/AmazingFeature) - Open a Pull Request
- My tutor Stéphane Lopes for his guidence throughout the project.
This project is licensed under the MIT License - see the LICENSE.md file for details


