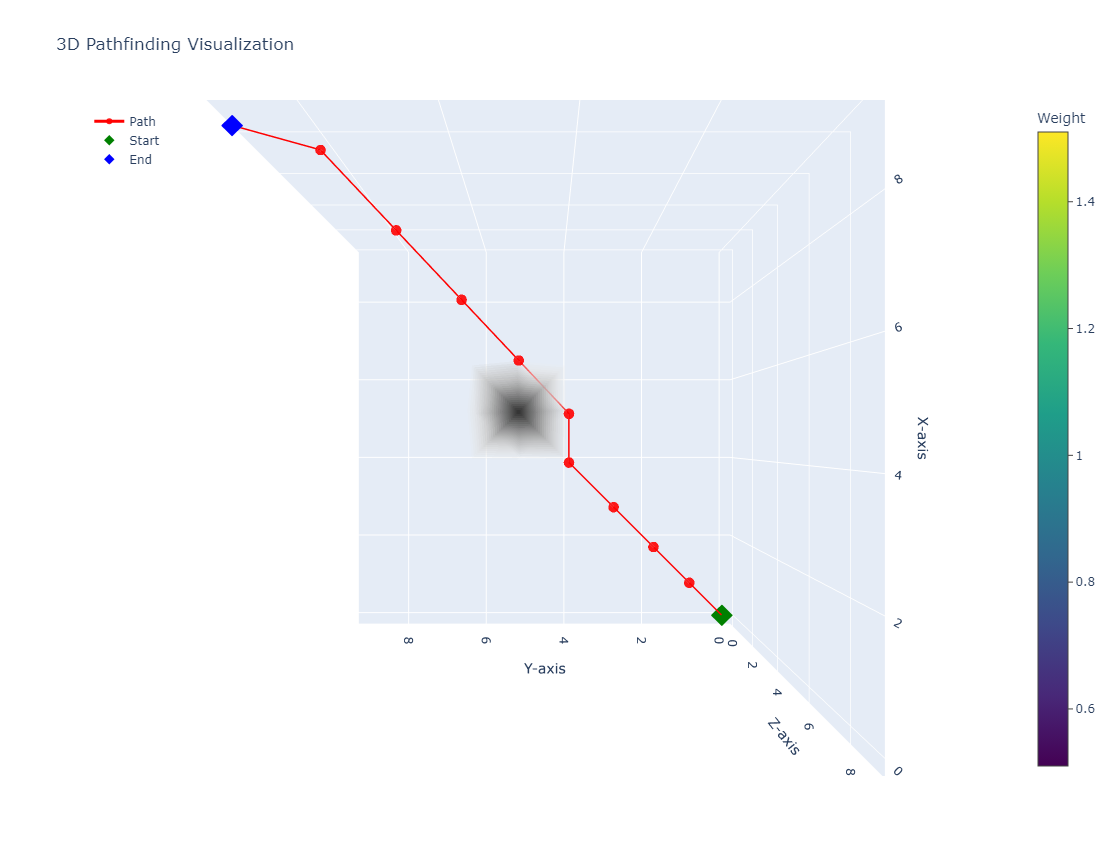
Pathfinding algorithms in 3D for python3 born from the fork of python-pathfinding by @brean.
Pathfinding3D is a comprehensive library designed for 3D pathfinding applications.
Currently there are 8 path-finders bundled in this library, namely:
- A*: Versatile and most widely used algorithm.
- Dijkstra: A* without heuristic.
- Best-First
- Bi-directional A*: Efficient for large graphs with a known goal.
- Breadth First Search (BFS)
- Iterative Deeping A* (IDA*): Memory efficient algorithm for large graphs.
- Minimum Spanning Tree (MSP)
- Theta*: Almost A* with path smoothing.
Dijkstra, A* and Bi-directional A* take the weight of the fields on the map into account. Theta* is a variant of A* but with any angle of movement allowed.
- python >= 3.8
- numpy
To install Pathfinding3D, use pip:
pip install pathfinding3dFor more details, see pathfinding3d on pypi
For a quick start, here's a basic example:
import numpy as np

from pathfinding3d.core.diagonal_movement import DiagonalMovement
from pathfinding3d.core.grid import Grid
from pathfinding3d.finder.a_star import AStarFinder

# Create a 3D numpy array with 0s as obstacles and 1s as walkable paths
matrix = np.ones((10, 10, 10), dtype=np.int8)
# mark the center of the grid as an obstacle
matrix[5, 5, 5] = 0

# Create a grid object from the numpy array
grid = Grid(matrix=matrix)

# Mark the start and end points
start = grid.node(0, 0, 0)
end = grid.node(9, 9, 9)

# Create an instance of the A* finder with diagonal movement allowed
finder = AStarFinder(diagonal_movement=DiagonalMovement.always)
path, runs = finder.find_path(start, end, grid)

# Path will be a list with all the waypoints as nodes
# Convert it to a list of coordinate tuples
path = [p.identifier for p in path]

print("operations:", runs, "path length:", len(path))
print("path:", path)
For usage examples with detailed descriptions take a look at the examples folder or at the documentation.
You can visualize the grid along with the path by calling the visualize method of the Grid class. This method can take path as an optional argument and generate a plotly figure. You can install pathfinding3d with the plotly to use this feature with the following command:
pip install pathfinding3d[vis]The path produced in the previous example can be visualized by adding the following code to the end of the example:
grid.visualize(
  path=path,  # optionally visualize the path
  start=start,
  end=end,
  visualize_weight=True,  # weights above 1 (default) will be visualized
  save_html=True,  # save visualization to html file
  save_to="path_visualization.html",  # specify the path to save the html file
  always_show=True,  # always show the visualization in the browser
)
This will generate a visualization of the grid and the path and save it to the file path_visualization.html and also open it in your default browser.
When rerunning the algorithm, remember to clean the grid first using Grid.cleanup. This will reset the grid to its original state.
grid.cleanup()Please note that this operation can be time-consuming but is usally faster than creating a new grid object.
All pathfinding algorithms in this library inherit from the Finder class. This class provides common functionality that can be overridden by specific pathfinding algorithm implementations.
General Process:
- You call
find_pathon one of your finder implementations. init_findinstantiates theopen_listand resets all values and counters. Theopen_listis a priority queue that keeps track of nodes to be explored.- The main loop starts on the
open_listwhich contains all nodes to be processed next (e.g. all current neighbors that are walkable). You need to implementcheck_neighborsin your finder implementation to fill this list. - For example in A* implementation (
AStarFinder),check_neighborspops the node with the minimum 'f' value from the open list and marks it as closed. It then either returns the path (if the end node is reached) or continues processing neighbors. - If the end node is not reached,
check_neighborscallsfind_neighborsto get all adjacent walkable nodes. For most algorithms, this callsgrid.neighbors. - If none of the neighbors are walkable, the algorithm terminates. Otherwise,
check_neighborscallsprocess_nodeon each neighbor. It calculates the costffor each neighbor node. This involves computingg(the cost from the start node to the current node) andh(the estimated cost from the current node to the end node, calculated byapply_heuristic). - Finally
process_nodeupdates the open list sofind_pathwith new or updated nodes. This allowsfind_pathto continue the process with the next node in the subsequent iteration.
The following diagram illustrates the process:
  graph TD;
      style find_path stroke:#333,stroke-width:2px
      style init_find stroke:#333,stroke-width:2px
      style while_open_list_not_empty stroke:#333,stroke-width:2px
      style check_neighbors stroke:#333,stroke-width:2px
      style pop_node stroke:#333,stroke-width:2px
      style find_neighbors stroke:#333,stroke-width:2px
      style process_node stroke:#333,stroke-width:2px
      style return_empty_list stroke:#333,stroke-width:2px
      style return_path stroke:#333,stroke-width:2px

      find_path["find_path"] --> init_find["init_find\n(re)set global values\nand open list"];
      init_find --> while_open_list_not_empty["while open_list not empty"];
      while_open_list_not_empty --> check_neighbors["check_neighbors\n(for node with min 'f' value)"];
      check_neighbors --> pop_node["pop_node\n(node with min 'f' value)"];
      pop_node --> find_neighbors["find_neighbors\n(get neighbors)"];
      find_neighbors --> process_node["process_node\n(calculate new cost)"];
      process_node --> while_open_list_not_empty;
      while_open_list_not_empty -- "open list empty" --> return_empty_list["return empty list"];
      while_open_list_not_empty -- "path found" --> return_path["return path"];
Run the tests locally using pytest. For detailed instructions, see the test folder:
pytest testWe welcome contributions of all sizes and levels! For bug reports and feature requests, please use the issue tracker to submit bug reports and feature requests. Please Follow the guidelines in CONTRIBUTING.md for submitting merge requests.
Pathfinding3D is distributed under the MIT license.
Find a list of contributors here.


