mbeddr Getting Started
From mbeddr.com:
mbeddr is a set of integrated and extensible languages for embedded software engineering, plus an IDE. It supports implementation, testing, verification and process aspects. It integrates with command-line build tools and integration servers, as well as file-based version control systems.
mbeddr's features:
- Cleaned Up C99
- Reporting and Logging
- Testing
- Physical Units
- State Machines
- Interfaces and Components
- Requirements, Tracing and Docs
- Product Line Variability
- Formal Verification
- Execution and Debugging
- IDE Support
- Decision Tables
- Version Control
mbeddr download page: http://mbeddr.com/download.html
http://mbeddr.com/download.html#RequiredToolsAndVersions
I used these old versions because of compatibility issues.
JetBrains MPS
Version 3.2.3: https://confluence.jetbrains.com/display/MPS/JetBrains+MPS+3.2+Download+Page
mbeddr
Version 1.0 RC1: https://github.com/mbeddr/mbeddr.core/releases/tag/1.0-RC1
Operating system
Ubuntu 15.10: http://releases.ubuntu.com/15.10/
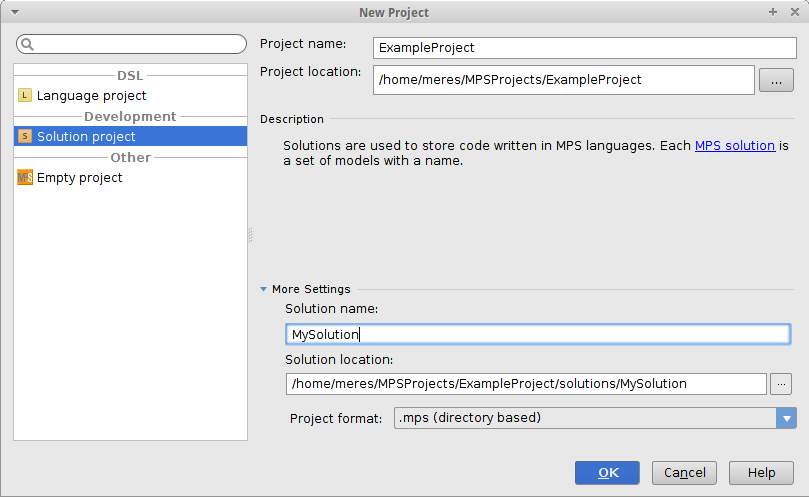
Create a New Project by File → New Project... then select Solution Project and add a name to your project and your solution name too.
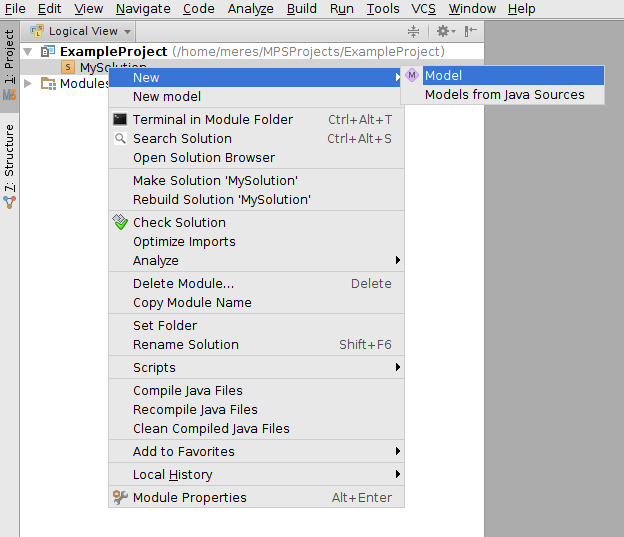
Add a new model to the solution by right clicking on the solution name and choose New → Model.
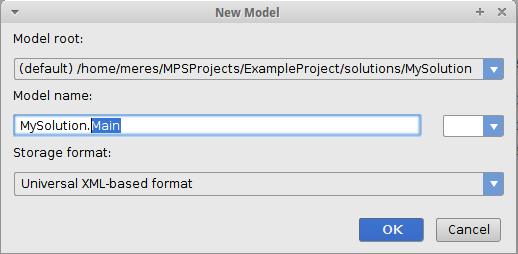
Add a name to your model:
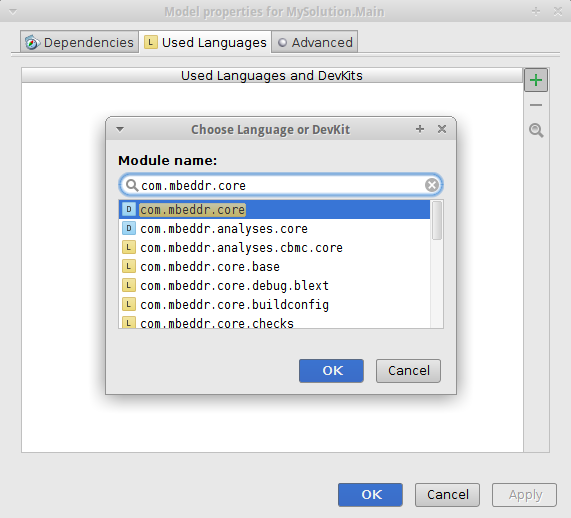
After that on the Used Languages tab add the com.mbeddr.core devkit.
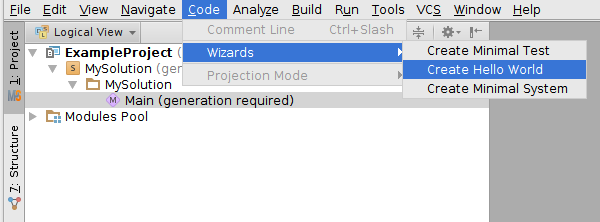
Finally generate a simple Hello World by Code → Wizards → Create Hello World.
In this example I use a simplified darts game and the previous project.
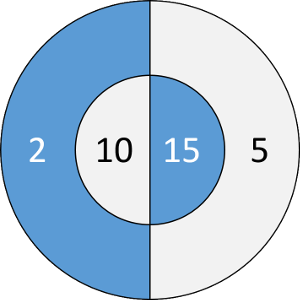
Simplified dartboard for the sample project
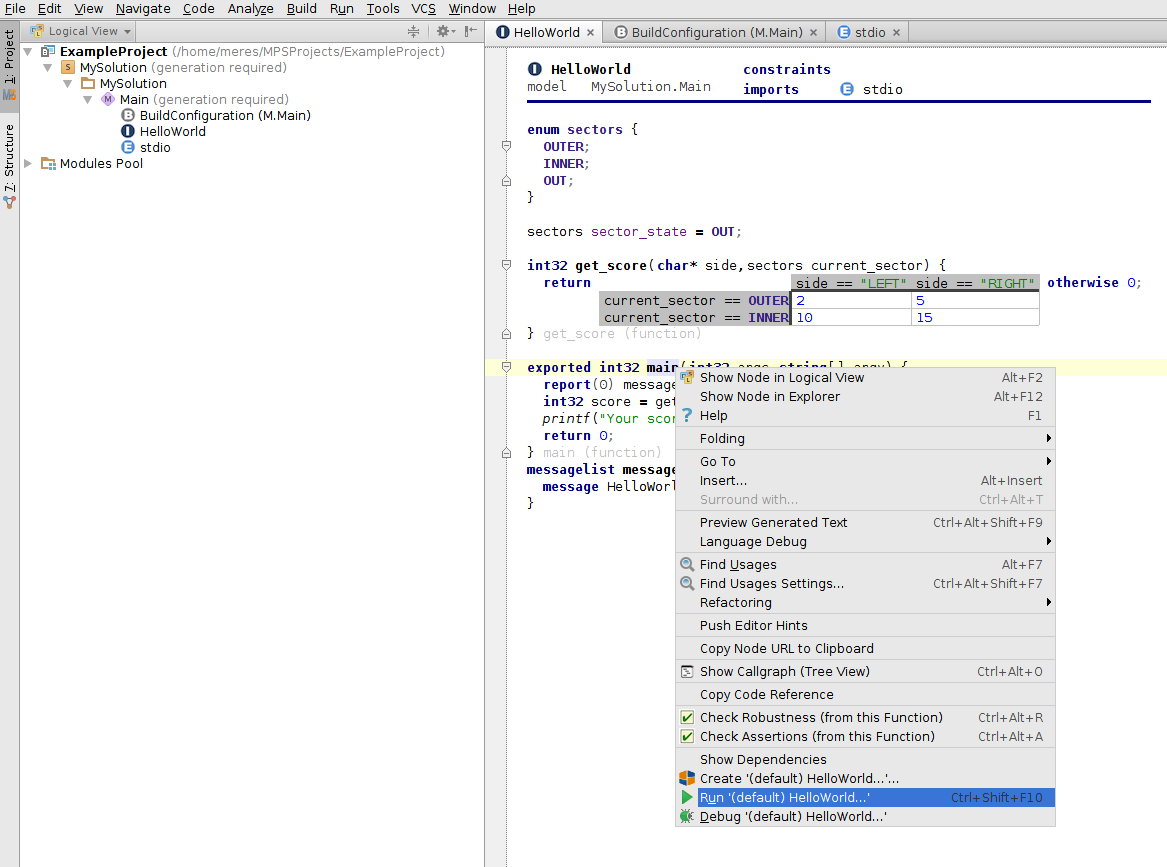
To run the application right click on main and choose Run. See the image below.
The result:
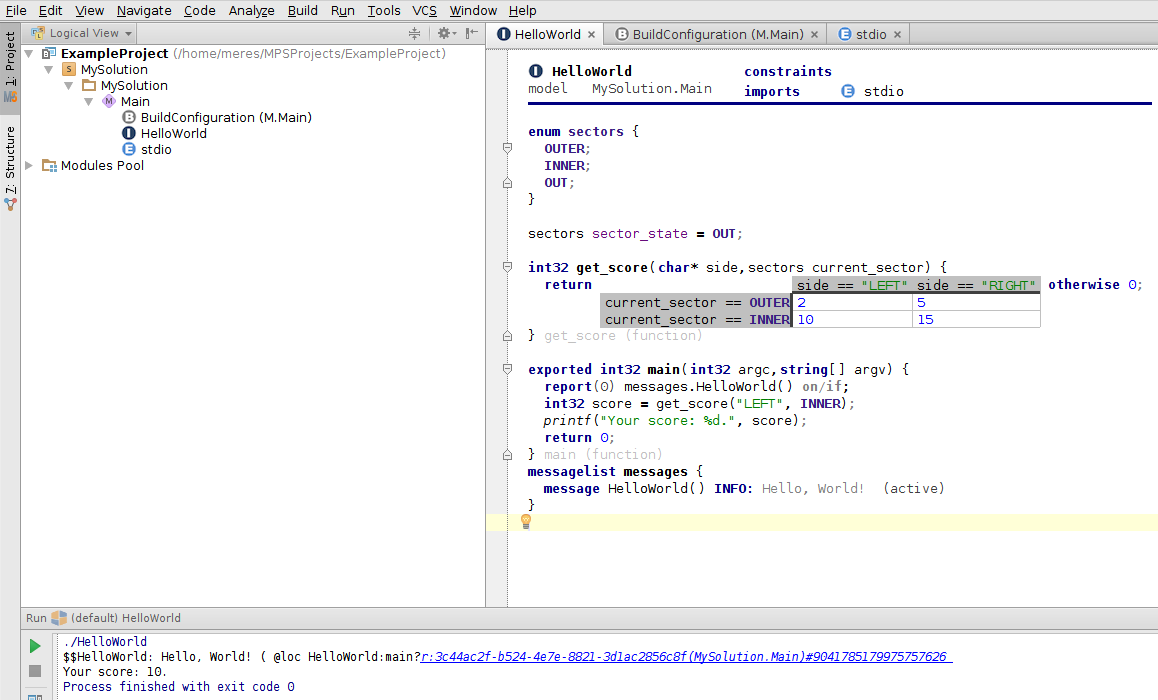
To add a decision table to an Implementation Module simply type dectab in a function. It gives you an empty decision table with two columns and two rows.
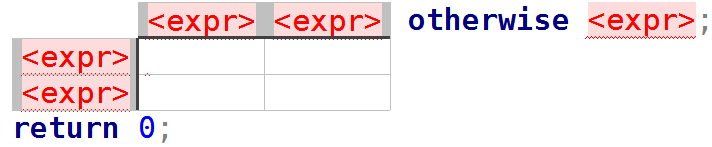
Decision table's return value depends on which column and row expression is true. If none of them is, then it returns with the value defined on the otherwise branch.
This time we'll have a look at a state machine. For this, create a new HelloWorld project using the wizard shown above. In this project we have to use the com.mbeddr.statemachines devkit with the com.mbeddr.core devkit. To add a devkit to an existing solution, rightclick on it in the logical view, and select Model Properties. Then the familiar window will pop up that you saw at the begining of this tutorial. On the Used Languages tab add the com.mbeddr.statemachines devkit.
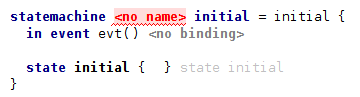
After you have your solution with the devkits selected, type statemachine outside of any function, and the mbeddr creates a skeleton for you:
The diagram of the state machine I created looks like this:
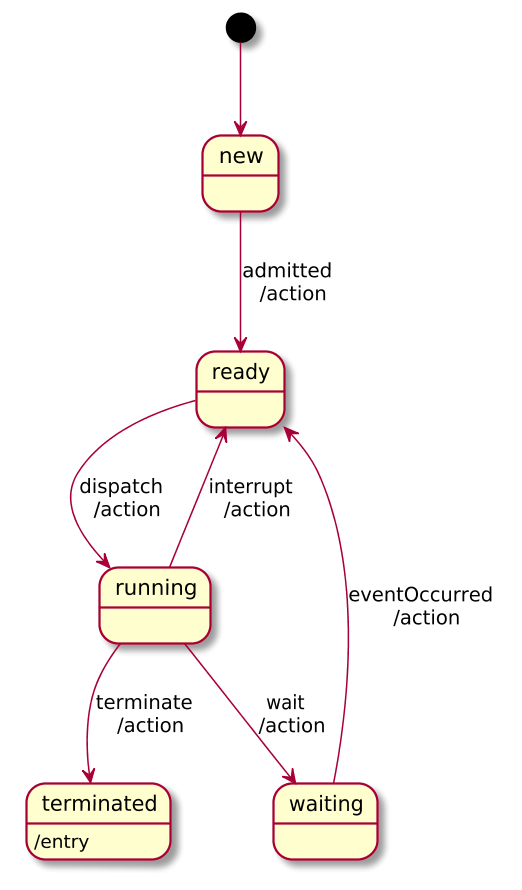
This diagram is created by mbeddr. You can do this with your own state machine by clicking on it's name (selecting it) and after a right click you select Visualize... → statechart.
Here is the code of my state machine:
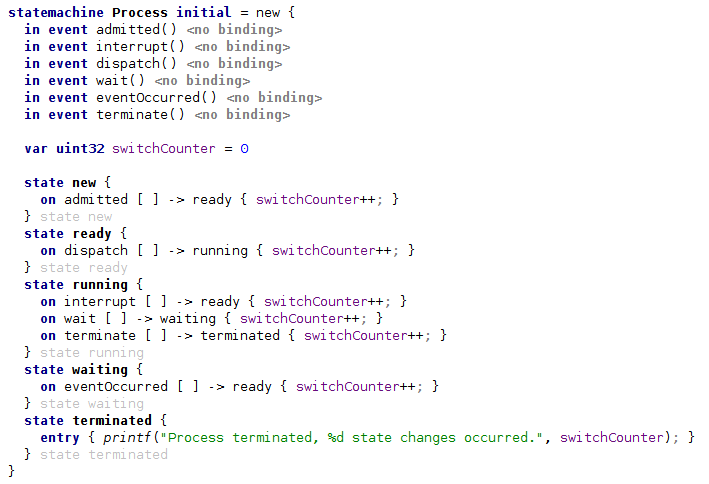
My state machine is called Process, and it's supposed to simulate the life of a process inside an operating system. It is not a complicated state machine. From the second row you can see our events. These are in events since the state machine receives them. We can write out events, so the state machine can trigger them. After the events we can see a local variable - in this case it's a counter that counts the switches between states. The rest of the code is the list of the states, and their behaviour.
Inside a state we can write entry points, exit points, and we can handle the events (the lines starting with on). Inside the square brackets we can write boolean expressions that can use the state machine's local variables, global variables or the variables passed as a parameter for the event. If this expression is true, the state machine changes it's state to the one given after the arrow. The braces after the state are optional, we can write further things inside those like calling a function (like entry points or exit points).
Let's have a look at our main function now:
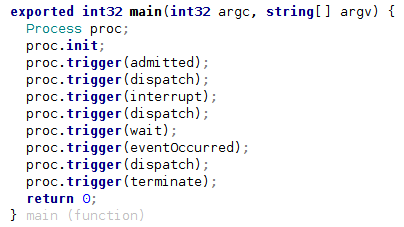
First of all we create an instance of our state machine, and in the second row we initialize it. The other rows just trigger the different events.
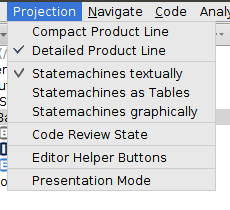
Thanks to the projectional editor, we can view our state machine in different forms. On the top toolbar click Projection, and then you can select if you'd like to see your state machine textually, as table or graphically. While writing this tutorial, I'm using MPS 3.3.4 (currently the 3.3.5 version is available as far as I can tell) and the 71st nightly build of mbeddr (com.mbeddr.allInOne.zip). If you use a different version of mbeddr, you may not find this Projection menu or you may find it as View menu.
Here is my state machine graphically:

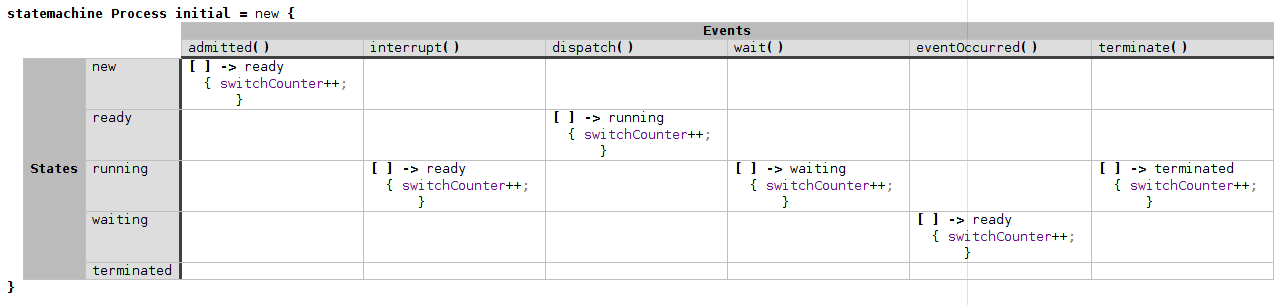
And as a table:
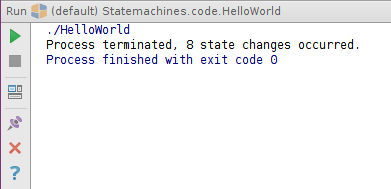
After running the program (rightclick on main and select Run), we get the output we expect:
This tutorial about state machines will probably be extended later on.
Right click on a module name you are working with, then click New → com.mbeddr.core.modules → external.
In this newly created External Module add the referenced artifact to resources. In case of Mosquitto, insert header: <mosquitto.h>.
Finally, add the created external module to imports.
Add the -lmosquitto option to your compiler options under the BuildConfiguration of the solution. Other linked libraries should be added here as well in a similar manner.
mbeddr does not generate the compiler command in the right order, so you need to compile your project by hand in a terminal.