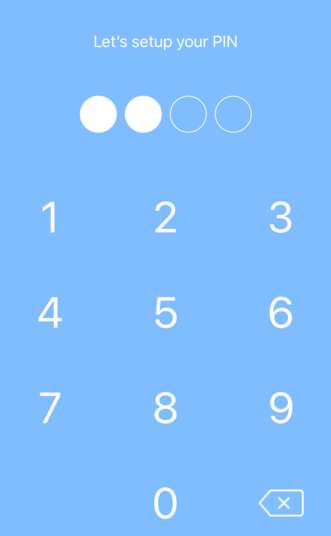
To run the example project, clone the repo, and run pod install from the Example directory first.
- iOS version 13 or above
- SwiftUI
EasyPin is available through CocoaPods. To install it, simply add the following line to your Podfile:
pod 'EasyPin'You can find Demo App from the git repository in Example directory.
You can create customizable Pin view and its keypad by following the mentioned steps: Make sure to add EasyPin in Podfile & install it
import EasyPin in your code file
import EasyPininitialize variables which will hold your actual pin and its limit pinLimit represents the total count of pin dots
@State var pinCode = ""
let pinLimit = 4
Now you can simply make Pin view using the following code
PinCodeWidget.shared.addPinCode(limit: pinLimit, text: pinCode, fillColor: Color.blue,
borderColor: Color.white, height: 40, width: 40, cornerRadius: 20)To make the keypad first make a object of PinCodeWidget
let keypad = PinCodeWidget(keyHeight: 56, keyBgColor: .clear,
keyTextColor: .white, keyFont: .system(size: 48))
now use the keypad object and draw the keypad. Here we are onUpdate method with pinCode which allow us to perform some action when user will press some key
keypad.drawKeypad(pinCode: $pinCode.onUpdate {
    pinCodeUpdated()
}, backSpaceImg: Image("clear"), limit: pinLimit)
In pinCodeUpdated() function you can write what you want. For example, moving to next screen
Fahad Shafiq, [email protected]
EasyPin is available under the MIT license. See the LICENSE file for more info.


