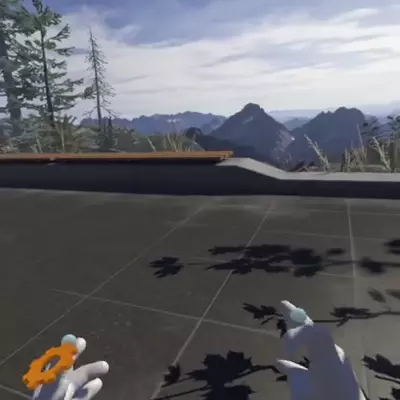
Aardvark is a framework for building augmented reality "gadgets" that run on top of virtual reality experiences. Gadgets are constructed using a bunch of custom React components (from the @aardvarkxr/aardvark-react package) and run in the Aardvark application. Gadgets use these components to show interactive models, 2D UI, or other stuff that will draw on top of any VR applications you run. You can attach these gadgets to your hands and bring them with you in your favorite VR apps.
Aardvark is more or less a prototype at the moment. The interfaces are still in flux, many necessary features are missing, and the user interface still needs a lot of work. We're putting this out there now to gather as much feedback from people as possible and let users and developers shape the future direction of the project. Join the slack and tell us what you think. Or file an issue or pull request if you find something that could be better. We want to hear from you.
Aardvark is not far enough along for you to use it in any kind of production project. Expect future releases to break compatibility with existing gadgets.
Here's a short list of things that we'd like to add or work on in no particular order:
- Multiple panels in each gadget, probably through popups
- Panels for desktop applications #38
- Animation to smooth out transitions and just generally make things nicer
- Switch to using a more capable rendering engine #11
- Figure out better ways of not conflicting with the input of the host games
- Provide better ways to let users find and use gadgets
- Networked gadget scene graphs, including panels
- Knowledge of where the user is in the VR experiences themselves so gadgets can be responsive to that
If you want to help out with any of these, please reach out.
There are a few of us working on it. Look at the commits to see a list of active participants.
Most of us work at companies that are involved in the VR space. Aardvark is not associated with any of those companies.
If you just want to make gadgets, your best bet is to use a released build. Just download the latest release, unzip it, and run avrenderer.exe. You may need to start SteamVR before you start avrenderer.exe.
You can find more documentation on how to build gadgets here.
If you need to do any development work from the source, you can also build from the source.
Aardvark is made up of "gadgets". These are 3D objects that do something useful (or are maybe just decorative.) You can install any number of gadgets in the Aardvark browser and then use them in any SteamVR application.
The main thing you can do with a gadget is touch it with the controller and pull the trigger to grab it. For example, here we are grabbing the gadget control panel:
You can see that the controls expand to show more information when they're grabbed. Exactly what is shown in each state will vary from gadget to gadget, but this is pretty common. While holding a gadget, it may also support various operations with the A and B buttons, or by squeezing the grip. Exactly what those buttons do will also vary from gadget to gadget.
It also returns to the place where it was picked up whenever the trigger is released. If you want to move a gadget from one place to another, you can press the trackpad (on Knuckles. Press up on the thumbstick on Oculus Touch.) This will untether the gadget from its starting point. Dropping most untethered gadgets in the world will throw them away.
Using these basic controls, you can create any of the gadgets in the menu.
This test panel gadget shrinks in size when it is close to something it can attach to. It also supports the fine kind of interaction: clicking. Any panel that supports clicking will show a line highlighting the click location when a hand gets close to it.
At the moment, all the button presses you make in Aardvark will also be passed to the underlying application. That is still a work in progress.
All of this has been tested on Windows 10 with VS2019. Other platforms (including other versions of Windows) and other compilers are left as an exercise to the reader.)
Follow these steps:
- Open a command prompt to your cloned repro directory. I'll call that d:\aardvark below, but it can be wherever you like.
- Build web code
- cd d:\aardvark\websrc
- npm install
- npm run build
- Unzip CEF libs (These are over the 100MB Github file size limit when unzipped)
- unzip d:\aardvark\src\thirdparty\cef_binary_78\Debug\libcef.gz
- unzip d:\aardvark\src\thirdparty\cef_binary_78\Debug\cef_sandbox.gz
- unzip d:\aardvark\src\thirdparty\cef_binary_78\Release\libcef.gz
- Build aardvark C++ code
- cd d:\aardvark\src
- mkdir build
- cd build
- cmake -G "Visual Studio 16 2019" -A x64 ..
- VS 2017 will probably still work too: cmake -G "Visual Studio 15 2017 Win64" ..
- Open Aardvark.sln
- Build in debug
- Make symlinks from the Aardvark build to the data directory
- Open an administrator command prompt
- cd to d:\aardvark\src
- makelinks.bat build
- Run it!
- Open a command prompt in d:\aardvark\data and run "node server\server_bundle.js"
- Pick "avrenderer" as the startup project in visual studio
- Start Debugging from the Debug menu

