Sebelum praktek alangkah baiknya mengenal terlebih dahulu jenis-jenis layout serta fungsi dan kegunaannya. Sebab layut berfungsi untuk menentukan struktur antarmuka pengguna aplikasi, seperti dalam aktivitas. Semua elemen dalam layout dibuat menggunakan hierarki objek View dan ViewGroub.
View Biasanya menggambarkan sesuatu yang pengguna bisa melihat dan berinteraksi dengannya. Sedangkan ViewGroup adalah container tidak terlihat yang menentukan struktur layout untuk View dan objek ViewGroup lainnya, seperti yang ditampilkan gambar di bawah.
- Linear Layout
Linear Layout adalah layout yang menyejajarkan semua child view-nya dalam satu arah, secara vertikal atau horizontal. Anda bisa menetapkan arah layout dengan atribut
contoh :
<?xml version="1.0" encoding="utf-8"?>
<LinearLayout xmlns:android="http://schemas.android.com/apk/res/android"
    android:layout_width="match_parent"
    android:layout_height="match_parent"
    android:paddingLeft="16dp"
    android:paddingRight="16dp"
    android:orientation="vertical" >
    <EditText
        android:layout_width="match_parent"
        android:layout_height="wrap_content"
        android:hint="@string/to" />
    <EditText
        android:layout_width="match_parent"
        android:layout_height="wrap_content"
        android:hint="@string/subject" />
    <EditText
        android:layout_width="match_parent"
        android:layout_height="0dp"
        android:layout_weight="1"
        android:gravity="top"
        android:hint="@string/message" />
    <Button
        android:layout_width="100dp"
        android:layout_height="wrap_content"
        android:layout_gravity="right"
        android:text="@string/send" />
</LinearLayout>
Berikut hasilnya :
2. Relative Layout
Relative Layout adalah layout yang penataan nya ini adalah penataan yang menempatkan widget-widget didalamnya seperti layer, sehingga sebuah widget dapat berada di atas/di bawah widget lainnya atau dengan kata lain Relative merupakan layout yang penataannya lebih bebas (Relative) sehingga bisa di tata di mana saja.
contoh :
<?xml version="1.0" encoding="utf-8"?>
<RelativeLayout xmlns:android="http://schemas.android.com/apk/res/android"
    android:layout_width="match_parent"
    android:layout_height="match_parent"
    android:paddingLeft="16dp"
    android:paddingRight="16dp" >
    <EditText
        android:id="@+id/name"
        android:layout_width="match_parent"
        android:layout_height="wrap_content"
        android:hint="@string/reminder" />
    <Spinner
        android:id="@+id/dates"
        android:layout_width="0dp"
        android:layout_height="wrap_content"
        android:layout_below="@id/name"
        android:layout_alignParentLeft="true"
        android:layout_toLeftOf="@+id/times" />
    <Spinner
        android:id="@id/times"
        android:layout_width="96dp"
        android:layout_height="wrap_content"
        android:layout_below="@id/name"
        android:layout_alignParentRight="true" />
    <Button
        android:layout_width="96dp"
        android:layout_height="wrap_content"
        android:layout_below="@id/times"
        android:layout_alignParentRight="true"
        android:text="@string/done" />
</RelativeLayout>
Berikut adalah hasilnya :
- Constrains Layout
Sebenarnya Constraint Layout mirip dengan Relative Layout, karena letak View bergantung pada View lain dalam satu Layout ataupun dengan Parent Layoutnya. Contohnya di Relative Layout kita bisa meletakkan sebuah View di atas, bawah, atau samping View lain. Kita juga dapat mengatur posisinya berdasarkan Parent Layout menggunakan tag seperti centerVertical, alignParentBottom, dll. Akan tetapi, Constraint Layout jauh lebih fleksibel dan lebih mudah digunakan di Layout Editor.
Contoh :
<?xml version="1.0" encoding="utf-8"?>
<android.support.constraint.ConstraintLayout
        xmlns:android="http://schemas.android.com/apk/res/android"
        xmlns:tools="http://schemas.android.com/tools"
        xmlns:app="http://schemas.android.com/apk/res-auto"
        android:layout_width="match_parent"
        android:layout_height="match_parent"
        android:background="@drawable/bggradient"
        tools:context=".MainActivity">


    <android.support.v7.widget.CardView
            android:layout_width="300dp"
            android:layout_height="50dp"
            app:layout_constraintEnd_toEndOf="parent"
            app:layout_constraintStart_toStartOf="parent"
            app:layout_constraintBottom_toBottomOf="parent"
            app:cardCornerRadius="15dp"
            app:cardElevation="20dp"
            android:id="@+id/cardView"
            app:cardBackgroundColor="@color/colorAccent"
            android:layout_marginBottom="50dp">
        <android.support.constraint.ConstraintLayout
                android:layout_width="match_parent"
                android:layout_height="match_parent">

            <TextView
                    android:text="Login"
                    android:layout_width="wrap_content"
                    android:layout_height="wrap_content"
                    app:layout_constraintTop_toTopOf="parent"
                    app:layout_constraintStart_toStartOf="parent"
                    android:layout_marginTop="16dp"
                    app:layout_constraintEnd_toEndOf="parent"
                    android:id="@+id/textView"
                    android:layout_marginBottom="8dp"
                    app:layout_constraintBottom_toBottomOf="parent"
                    app:fontFamily="sans-serif"
                    android:textColor="@android:color/background_light"
                    android:textSize="24sp"
                    app:layout_constraintVertical_bias="1.0"/>
        </android.support.constraint.ConstraintLayout>
    </android.support.v7.widget.CardView>
    <android.support.v7.widget.CardView
            android:layout_width="320dp"
            android:layout_height="400dp"
            app:layout_constraintStart_toStartOf="parent"
            app:layout_constraintEnd_toEndOf="parent"
            app:layout_constraintTop_toTopOf="parent"
            android:layout_marginTop="8dp"
            android:layout_marginBottom="8dp"
            app:layout_constraintBottom_toTopOf="@+id/cardView"
            app:cardCornerRadius="15dp"
            app:cardElevation="20dp"
            app:layout_constraintVertical_bias="0.781"
            android:id="@+id/cardView2">
        <android.support.constraint.ConstraintLayout
                android:layout_width="match_parent"
                android:layout_height="match_parent">

            <ImageView
                    android:layout_width="150dp"
                    android:layout_height="150dp"
                    app:srcCompat="@drawable/logo"
                    app:layout_constraintStart_toStartOf="parent"
                    app:layout_constraintEnd_toEndOf="parent"
                    android:id="@+id/imageView"
                    android:layout_marginTop="36dp"
                    app:layout_constraintTop_toTopOf="parent"
                    android:layout_marginBottom="8dp"
                    app:layout_constraintBottom_toBottomOf="parent"
                    app:layout_constraintVertical_bias="0.0"/>
            <android.support.design.widget.TextInputLayout
                    android:layout_width="300dp"
                    android:layout_height="wrap_content"
                    app:layout_constraintStart_toStartOf="parent"
                    app:layout_constraintEnd_toEndOf="parent"
                    android:id="@+id/textInputLayout2"
                    app:layout_constraintTop_toBottomOf="@+id/imageView"
                    android:layout_marginTop="50dp"
                    style="@style/Widget.MaterialComponents.TextInputLayout.OutlinedBox"
                    app:passwordToggleTint="@color/colorAccent">

                <android.support.design.widget.TextInputEditText
                        android:layout_width="match_parent"
                        android:layout_height="wrap_content"
                        android:hint="Email"
                        android:inputType="textEmailAddress"/>
            </android.support.design.widget.TextInputLayout>
            <android.support.design.widget.TextInputLayout
                    android:layout_width="300dp"
                    android:layout_height="wrap_content"
                    app:layout_constraintEnd_toEndOf="parent"
                    android:layout_marginBottom="16dp"
                    app:layout_constraintStart_toStartOf="parent"
                    app:layout_constraintBottom_toBottomOf="parent" android:id="@+id/textInputLayout3"
                    android:layout_marginTop="8dp"
                    app:layout_constraintTop_toBottomOf="@+id/textInputLayout2"
                    style="@style/Widget.MaterialComponents.TextInputLayout.OutlinedBox"
                    app:passwordToggleTint="@color/colorAccent">

                <android.support.design.widget.TextInputEditText
                        android:layout_width="match_parent"
                        android:layout_height="wrap_content"
                        android:hint="Password"
                        android:inputType="textPassword"/>
            </android.support.design.widget.TextInputLayout>
        </android.support.constraint.ConstraintLayout>
    </android.support.v7.widget.CardView>
</android.support.constraint.ConstraintLayout>
Berikut adalah hasilnya :
Membuat Project baru
- Start a new Android Studio project.
- File > New > New Project dari menu utama.
- Create New Project
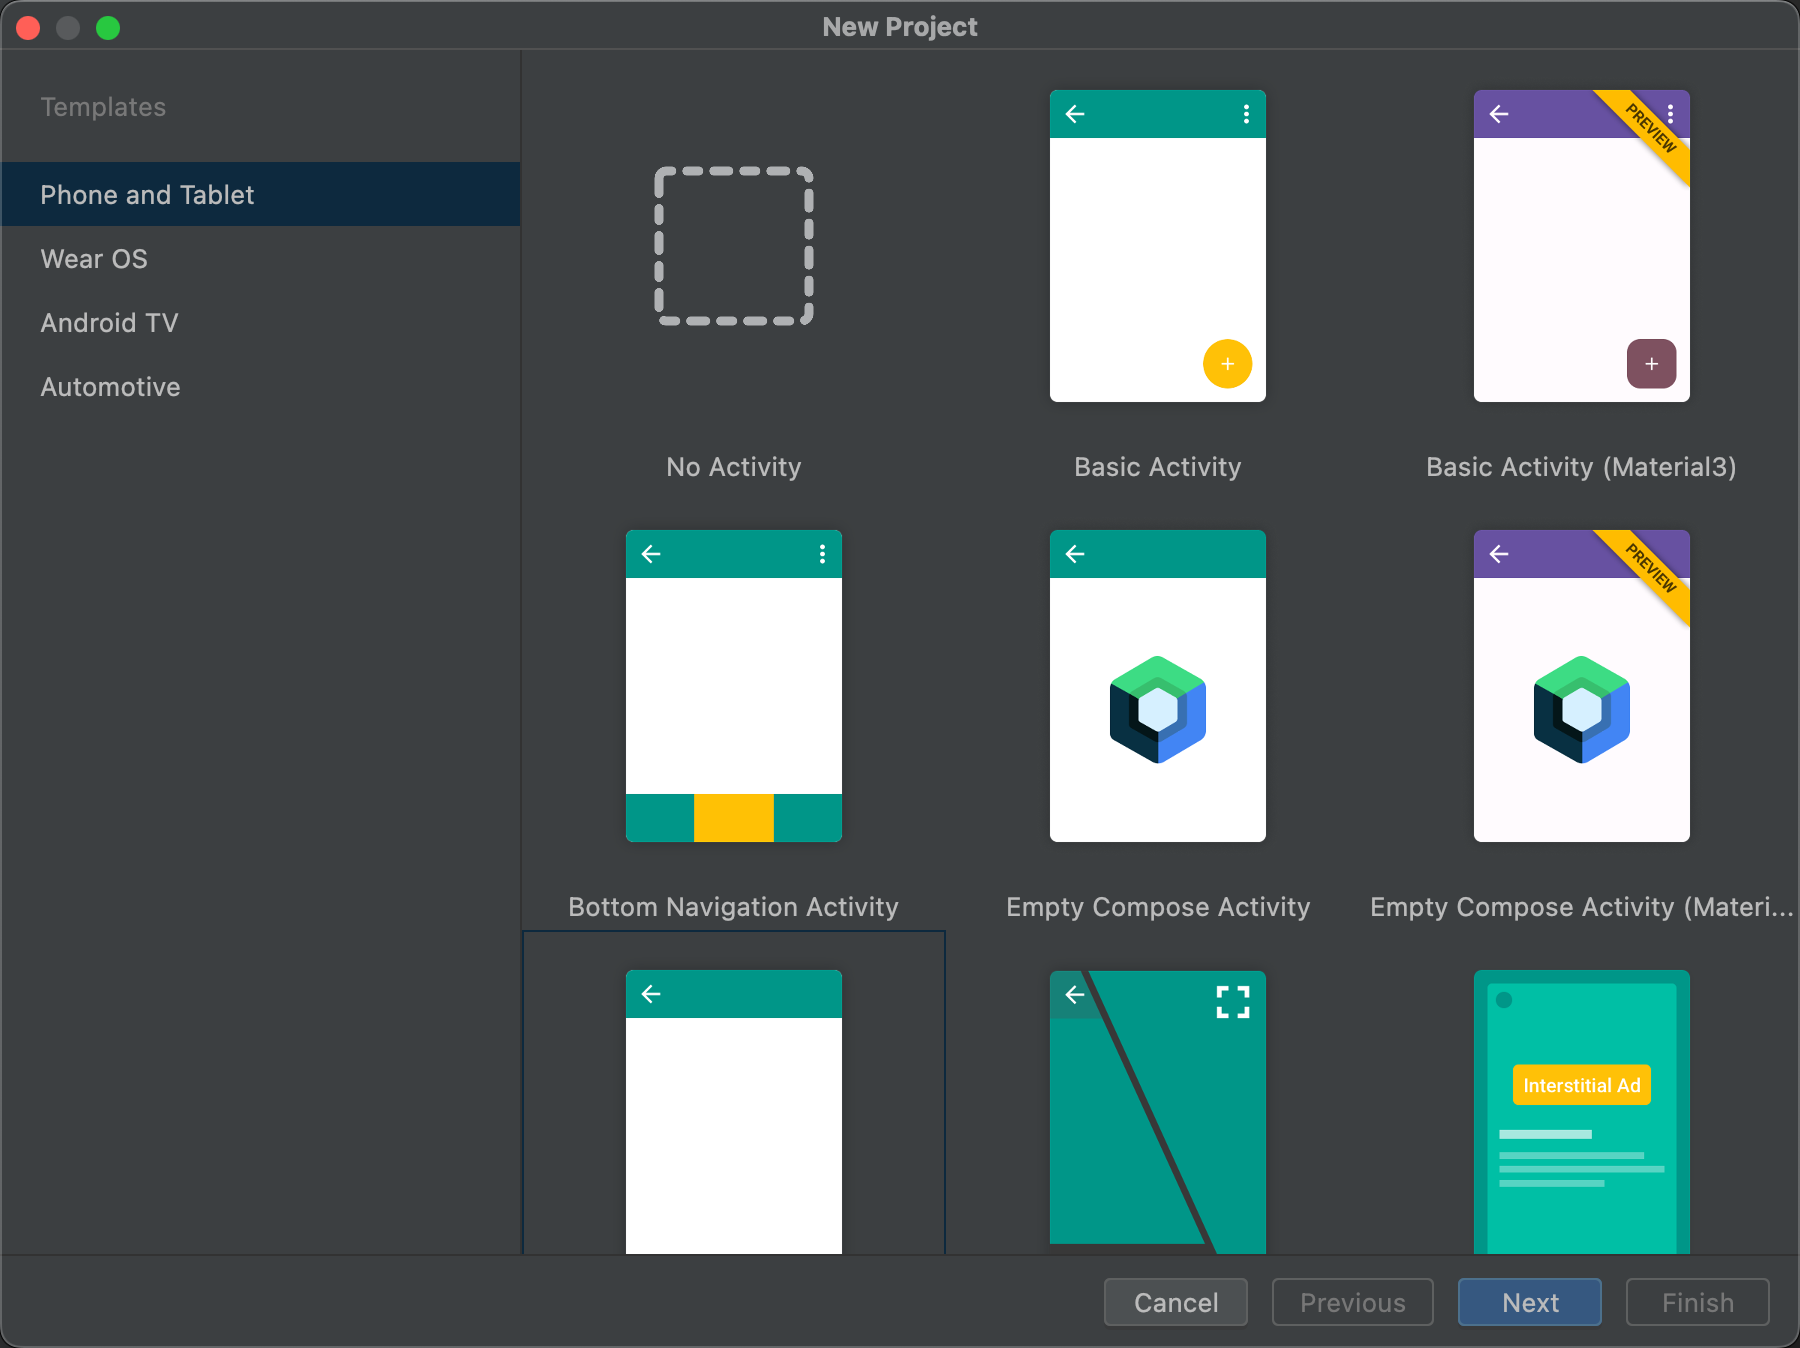
- Choose your project
- Pilih Empety Activity
- Setelah memilih, klik Next.
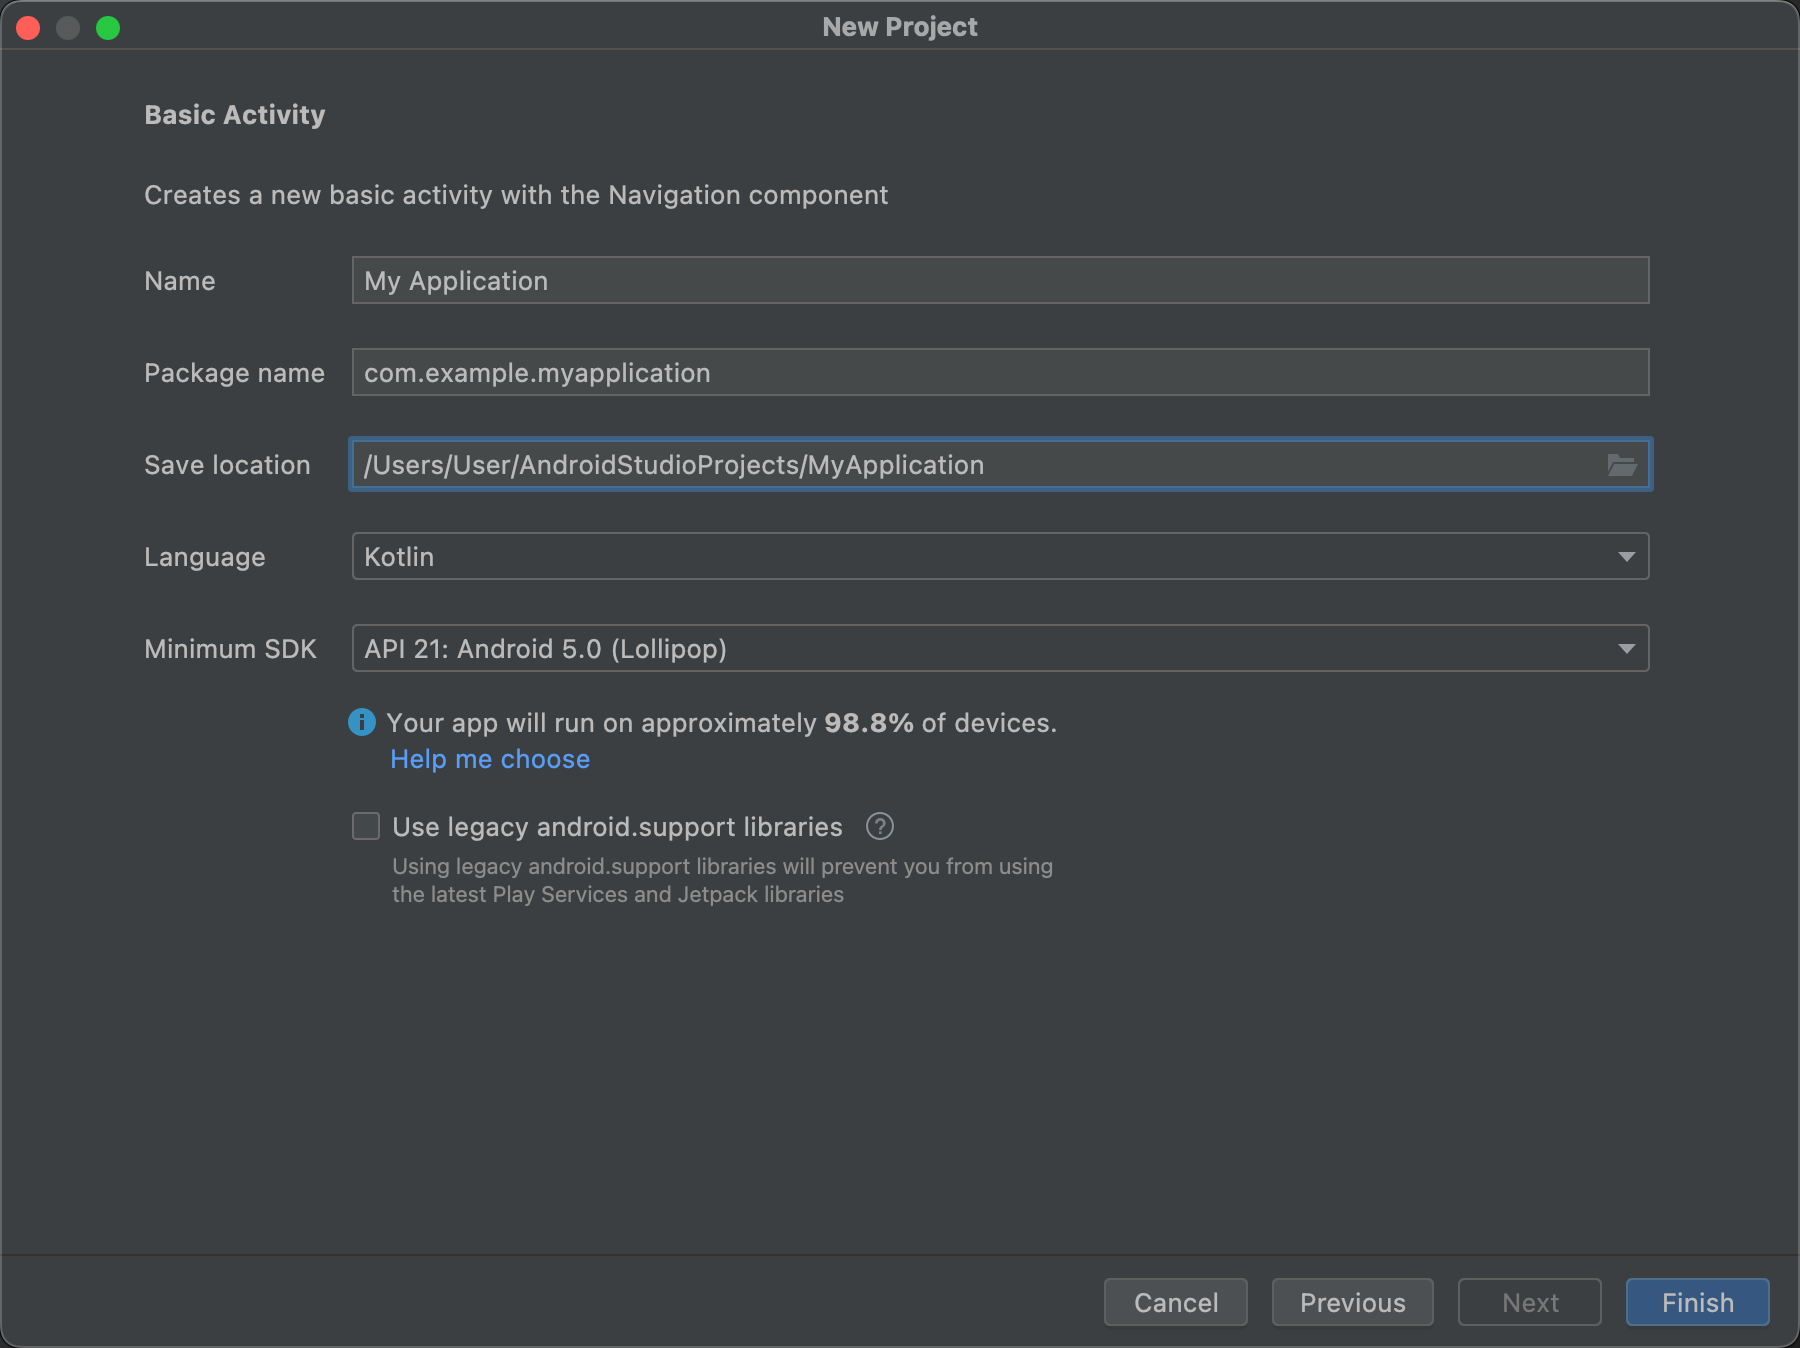
- Langkah selanjutnya adalah mengonfigurasi beberapa setelan dan membuat project baru
- Kasih nama projectnya, dan lokasi penyimpanannya. Lalu dibagian Language pilih Kotlin, lalu klik > Finish
- Setelah selesai slesai tampil spt ini
- Masuk ke res > Layout > actvity_main.xml
- Lalu masukkan kode berikut di activity_main.xml
<?xml version="1.0" encoding="utf-8"?>
<LinearLayout
    xmlns:android="http://schemas.android.com/apk/res/android"
    xmlns:app="http://schemas.android.com/apk/res-auto"
    xmlns:tools="http://schemas.android.com/tools"
    android:layout_width="match_parent"
    android:layout_height="match_parent"
    android:orientation="vertical"
    android:background="@drawable/logoatas"
    android:padding="15dp"
    >

    <LinearLayout
        android:layout_width="match_parent"
        android:layout_height="wrap_content"
        android:orientation="vertical"
        >

        <ImageView
            android:id="@+id/logo"
            android:layout_width="150dp"
            android:layout_height="150dp"
            android:src="@drawable/mobil2"
            android:transitionName="logo_image"/>
        <TextView
            android:layout_width="wrap_content"
            android:layout_height="wrap_content"
            android:text="Hello There, Welcome Back"
            android:textSize="35sp"
            android:transitionName="logo_text"
            android:fontFamily="monospace"
            />
        <TextView
            android:layout_width="wrap_content"
            android:layout_height="wrap_content"
            android:text="Sign in to continue"
            android:textSize="20sp"
            android:layout_marginTop="10dp"
            android:fontFamily="sans-serif-medium"/>

        <RelativeLayout
            android:layout_width="match_parent"
            android:layout_height="wrap_content"
            >
            <com.google.android.material.textfield.TextInputLayout
                android:id="@+id/inputLay"
                android:layout_width="match_parent"
                android:layout_height="wrap_content"
                android:hint="Username"
                android:layout_marginTop="20dp"
                >

                <com.google.android.material.textfield.TextInputEditText
                    android:layout_width="match_parent"
                    android:layout_height="wrap_content"
                    android:id="@+id/edUsername"
                    android:paddingLeft="10dp"
                    android:backgroundTint="#F44336"/>

            </com.google.android.material.textfield.TextInputLayout>

            <com.google.android.material.textfield.TextInputLayout
                android:id="@+id/inputlay2"
                android:layout_below="@id/inputLay"
                android:layout_width="match_parent"
                android:layout_height="wrap_content"
                app:passwordToggleEnabled="true"
                android:hint="Password">

                <com.google.android.material.textfield.TextInputEditText
                    android:layout_width="match_parent"
                    android:layout_height="wrap_content"
                    android:id="@+id/edPassword"
                    android:inputType="textPassword"
                    android:paddingLeft="10dp"
                    android:backgroundTint="#F44336"/>

            </com.google.android.material.textfield.TextInputLayout>


        </RelativeLayout>


    </LinearLayout>
    <TextView
        android:layout_width="wrap_content"
        android:layout_height="wrap_content"
        android:layout_gravity="right"
        android:text="Forgot Password ?"
        android:textSize="20sp"
        android:textStyle="bold"
        android:fontFamily="sans-serif-medium"
        android:layout_marginTop="8dp"/>
    <Button
        android:id="@+id/btnLogin"
        android:layout_width="match_parent"
        android:layout_height="wrap_content"
        android:layout_marginTop="18dp"
        android:background="#2C2727"
        android:text="GO"
        android:textColor="#fff"/>
    <TextView
        android:layout_width="wrap_content"
        android:layout_height="wrap_content"
        android:text="New Users Sign Up"
        android:layout_gravity="center_horizontal"
        android:layout_marginTop="10dp"
        android:textSize="20sp"
        android:textStyle="bold"/>

</LinearLayout>
Maka akan seperti berikut tampilannya :


