Elevator Annotator is an Information Science master thesis project which takes place in both Vrije University Amsterdam and Netherlands Institute for Sound and Vision.
The idea is to find out and analyze if physical crowdsourcing works for annotating a set of audio files. The dataset is compiled from a set of public domain songs from Europeana's collection.
What makes physical crowdsourcing different from the normal crodwourcing is that instead of waiting users to do the task, physical crowdsourcing approaches the users and ask them to do the tasks. The concerns then goes on whether the users are willing to do the task, correctiveness and validity of the task will then be analyzed further along with the results.
Elevator Annotator combines the approach with pervasive computing source as a device/platform is built to do the experimental task on a Raspberry Pi combined with a set of sensor and audio I/Os.
These instructions will work as a guide to help building a copy of the project up and running for development and testing purpose. The project may be re-used and further developed for other purpose.
Please ensure both hardware and software prerequisites are met with the corresponding versions.
Here is the list needed for building prototype, please note that there are 2 version of prototypes for experiment purpose. The difference is in the input, see note on the list below.
- 1 x Raspberry Pi 3 Model B with min. 4Gb micro SD card (running on Raspbian Jessie)
- 1 x PIR Motion Sensor
- 1 x Mini USB Microphone (needed for audio version)
- 2 x Push momentary button (needed for button version)
- 2 x 3" Speaker 4 Ohm 3 Watt
- 3.5mm (1/8") Stereo Audio Plug Terminal Block
- Stereo 2.1W Class D Audio Amplifier - TPA2012
- 1 x Powerbank with 2A output (used 20000mAH for experiments)
And here is a list of additional features and tools for experimental purposes.
- 1 x Standard LCD 16x2
- 1 x Raspberry Pi Camera Board v2 8MP
- 1 x Adjustable Pi Camera Mount
- 1 x Power adapter 12V with 12A output
- 1 x Solderless breadboard
- A set of jumper wires (male to male, female to female, female to male)
- Soldering set + soldering wire (for assembly)
- USB keyboard + USB mouse + LCD + HDMI to VGA cable (for development)
Here is a list of software and library needed for development purpose along with each versions (version used to run the experiment, please note that older or newer versions may or may not work).
- Raspbian Jessie 4.4 (with Pixel)
- Python 2.7.13
- PocketSphinx 5prealalpha
- python-vlc 1.1.2
- pyttsx 1.1
- PyAudio 0.2.11
- SpeechRecognition 3.6.5
- mutagen 1.37
- gpiozero 1.3.2
- RPi.GPIO 0.6.3
- picamera
- Adafruit_CharLCD
- Python libraries: time, os, random, datetime, sys
Here is the list of public domain audio files taken from Europeana's collection, provided with each individual links to the collection.
| Song Titles | Alias/Filename |
|---|---|
| Oktāvu etīde | song1.mp3 |
| Tautas polka | song2.mp3 |
| Dienā jaukā - noskūpstīju Annu laukā | song3.mp3 |
| Florentine | song4.mp3 |
| Mana dzimtene | song5.mp3 |
| Meitenes sirsniņa | song6.mp3 |
| Kādēļ tik ilgi vilcinies tu? | song7.mp3 |
| Dziedu tev | song8.mp3 |
| Serenade iz operas | song9.mp3 |
| Serenade | song10.mp3 |
This section will provide explanation on installing and developing the project for both the hardware and software.
Here is a list of steps needed to assembly the prototype.
- Solder the headers onto the LCD 16x2 if needed.
- Solder both positive and negative side on the two speaker with jumper wires.
- Solder the headers and speaker terminals onto the amplifier and connect the terminals with both positive and negative ends of the speakers (see more detailed instruction on Adafruit's page on assembling the amplifier).
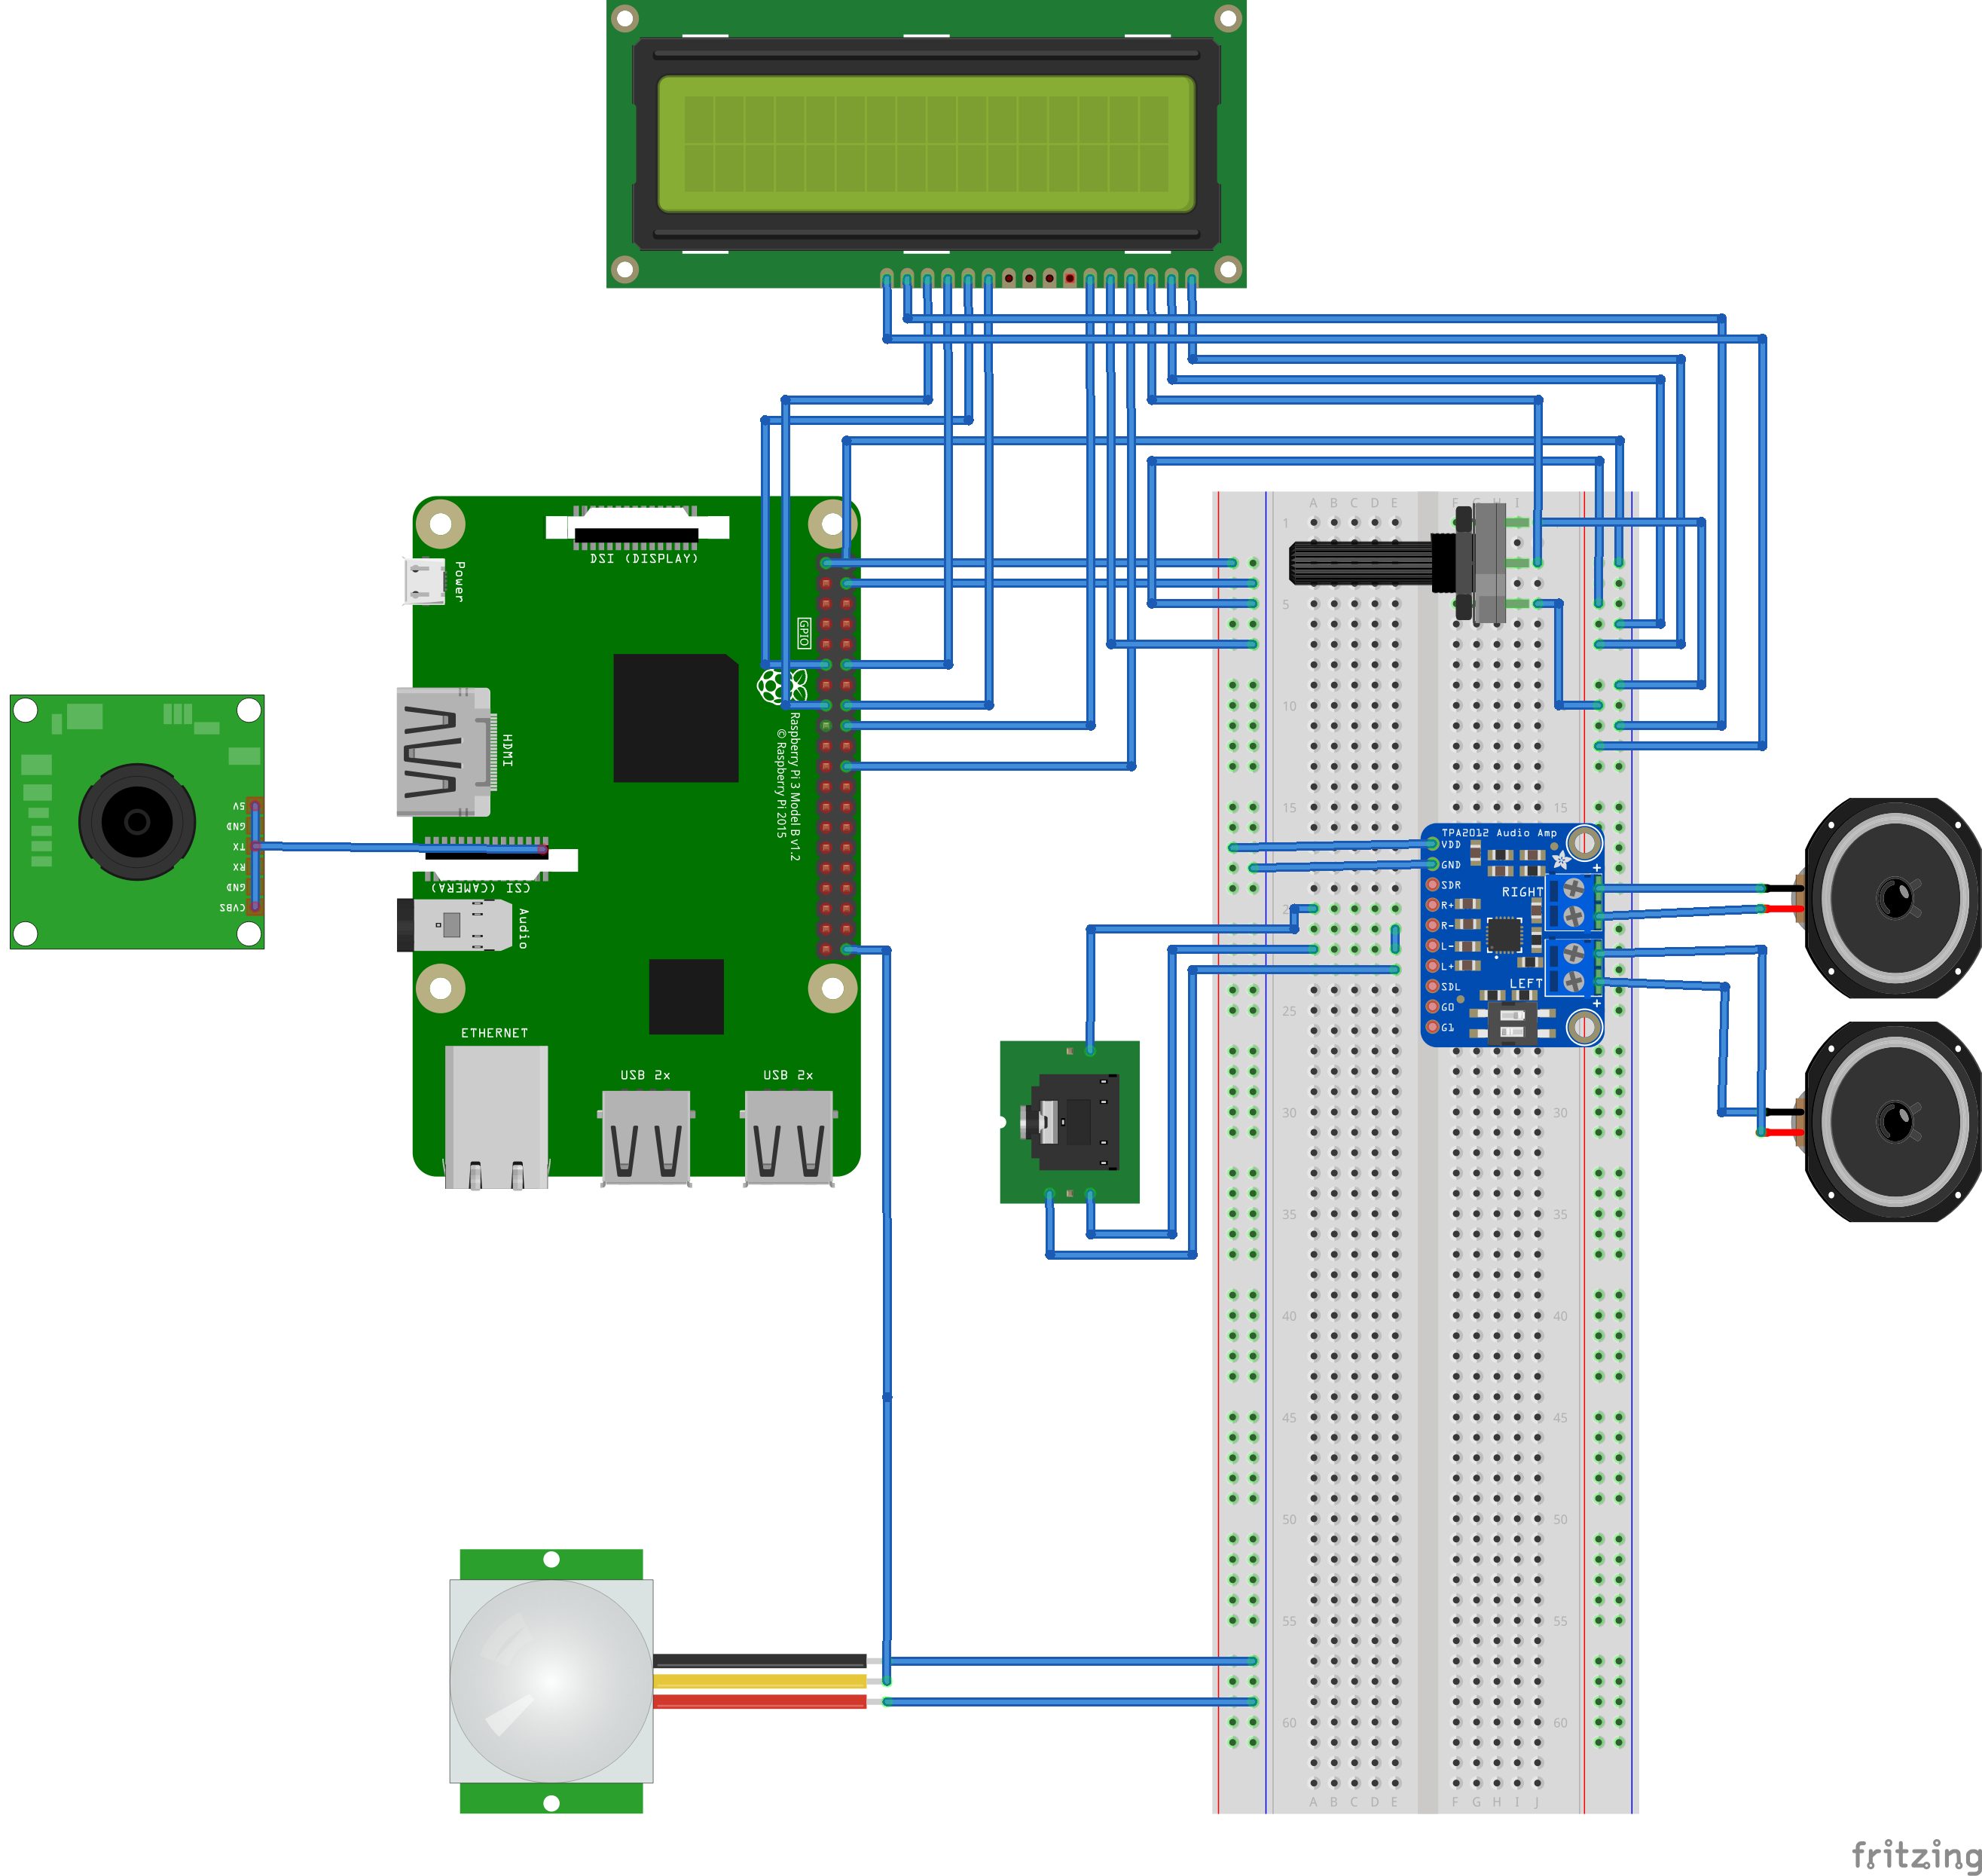
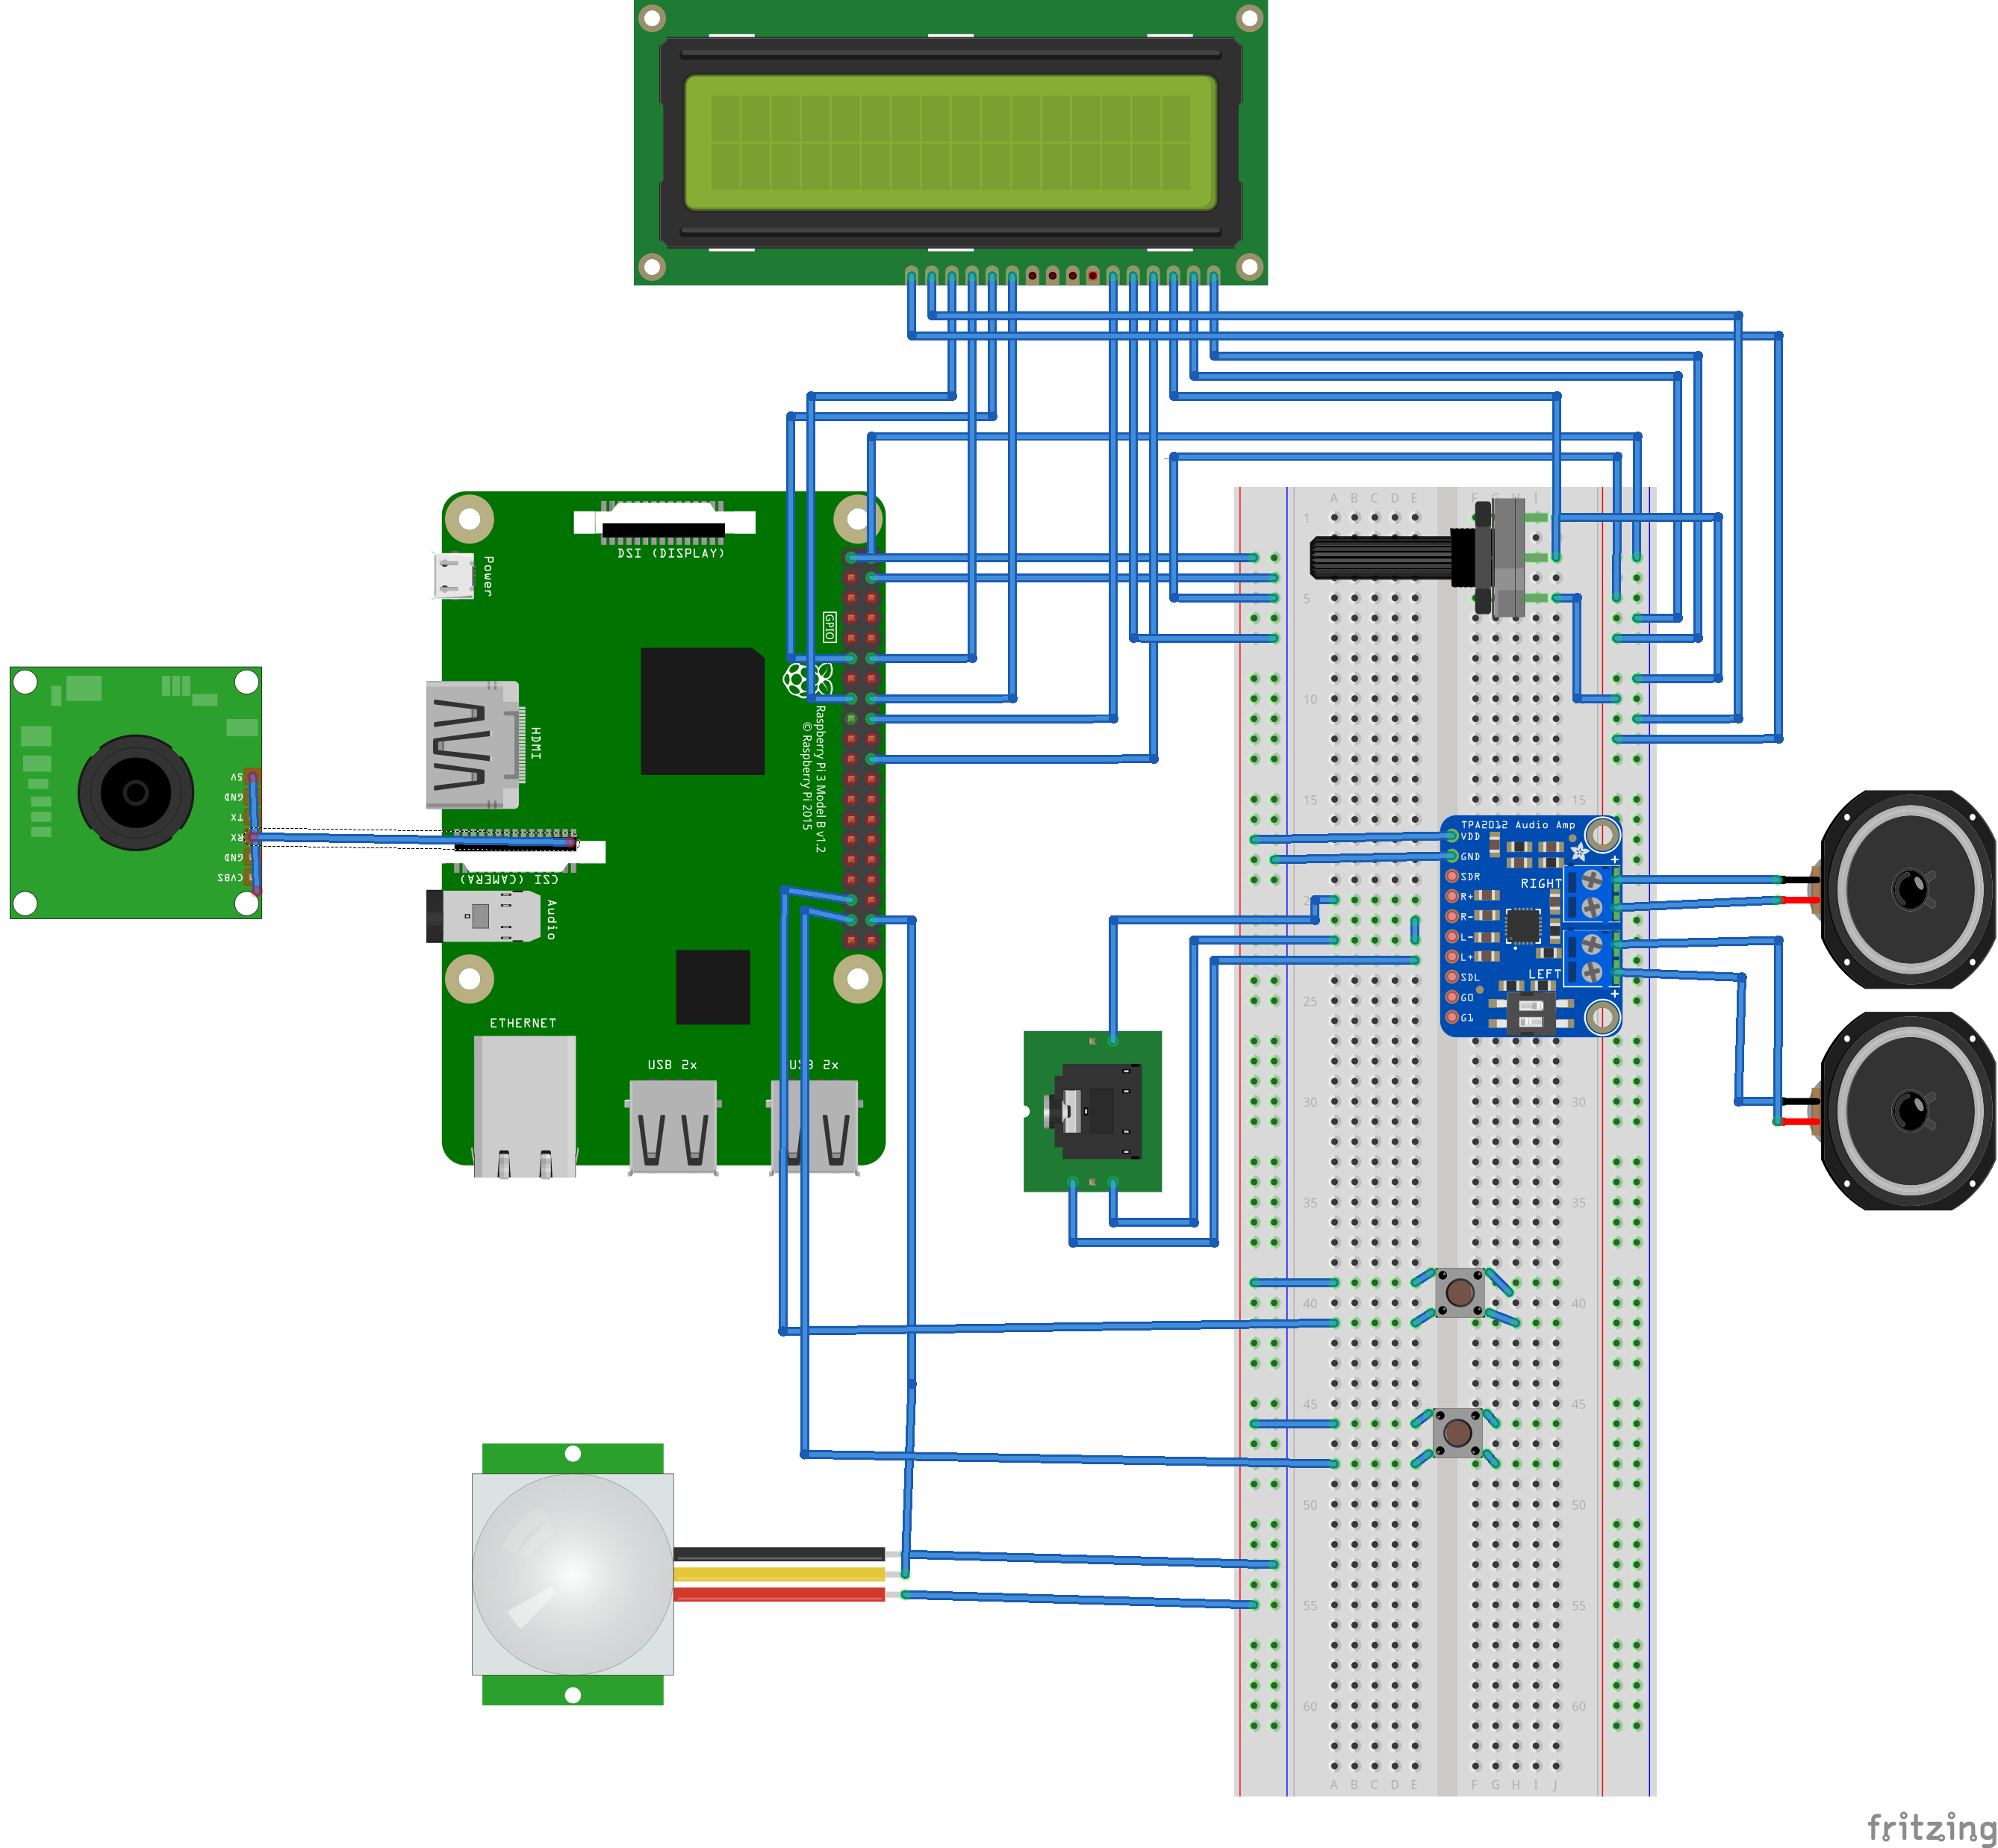
- Connect other components to the Raspberry Pi ports and GPIO pins following these fritzing sketch as guides for both versions.
- Connect the mini USB microphone to one of the USB ports.
- Connect the audio plug terminal to the audio jack of the Raspberry pi as output for the speakers.
- For both versions, connect HDMI to VGA cable to LCD for display, USB keyboard and mouse for input, and power supply, for development phase connect the plugged in power adapter to the micro USB ports and replace with powerbank.
Here is a list of steps needed for preparing and developing the software parts.
- Ensure that Raspbian Jessie with Pixel is loaded and booted correctly on a working micro SD card.
- Ensure that latest software and distribution is installed on the machine:
$ sudo apt-get update
$ sudo apt-get upgrade- Install the required softwares and libraries:
$ sudo apt-get install [software/library_names]- For prototype with audio as inputs, please ensure that the right sound card for the mini USB micrpohone is used.
- First check the right index of the soundcard:
$ cat /proc/asound/cards- Create a configuration file to set which soundcard used for input and playback.
$ nano /hom/pi/.asoundrc
pcm.!default {
	type hw
	card 0
}
ctl.!default {
	type hw
	card 0
}- Typically
bcm2835is used as defaults for the speakers and the other USB sound cardC-Mediais used for recording. - Since the amplifier supports auto-gain, there is no need for additional setting, the speakers should work right after it is plugged into the audio jack and will use the
bcm2835for the soundcard. Therefore, to adjust the volume it can be done with this command:
$ alsamixer- If the LCD 16x2 is used then the
Adafruit_CharLCDlibrary directory need to be placed under the same directory.
This section will explain on how to deploy the software and prototype into actions and how the flow for both versions to work in rightful manners.
- The working codes for both version are
elevatorannotator_audio.pyandelevatorannotator_button.py. - In order to run the Raspberry Pi headless for the experiment, a crontab task should be created to work, in this case, each time after the Pi reboots and a listener file to dump error logs should also be created to monitor the script. Here is the example for the audio script which can be modified by pointing it to
elevatorannotator_button.py:
$ crontab -e
@reboot python /home/pi/Documents/ElevatorAnnotator/elevatorannotator_audio.py
@reboot /usr/bin/python /home/pi/Documents/ElevatorAnnotator/elevatorannotator_audio.py > /tmp/listener.log 2>&1Here is the workflow for the audio as inputs version:
- The prototype is put on standby mode and the motion sensor will wait to detect.
- When a motion is detected, a song file is randomly selected and played over the speakers, only a fragment of several seconds of it.
- User is prompted with brief explanation over the experiment.
- User is asked if he/she is willing to participate for maximum of 3 times, before it registers that the user doesn't want to participate. The user is expected to answer by saying a
yesor anowhich the speech recognizer will try to comprehend. At this stage, each repetition and its answer, whether it isfalsewhen there is no valid answer or the input is unrecognizable ortruewhen the it is recognizable and the user is agreed, will be recorded. - If user is agreed then the same audio will be played over the speakers and the user then asked from a set of instrument questions of
piano,trumpetorviolin, whether he/she hears either one of those. Depending on the question, the user is then prompted to answer by saying ayesor anoanswer for maximum of 3 times. The same rules apply for the speech recognition and record registration. - When the user finishes or terminates by answer at any point and when no valid answers then the user is prompted with a goodbye message and the process exits.
- The prototype then put on standby mode again and waits for motion.
And here is the workflow for the button as inputs version:
- The prototype is put on standby mode and the motion sensor will wait to detect.
- When a motion is detected, a song file is randomly selected and played over the speakers, only a fragment of several seconds of it.
- User is prompted with brief explanation over the experiment.
- User is asked if he/she is willing to participate for maximum of 3 times, before it registers that the user doesn't want to participate. The user is expected to answer by pressing a
yesor anobutton. At this stage, each repetition and its answer, whether it isfalsewhen there is no valid answer and the timeout is triggered ortruewhen the user is agreed, will be recorded. - If user is agreed then the same audio will be played over the speakers and the user then asked from a set of instrument questions of
piano,trumpetorviolin, whether he/she hears either one of those. Depending on the question, the user is then prompted to answer by pressing ayesor anobutton for maximum of 3 times. The same rules apply for the buttons and record registration. - When the user finishes or terminates by answer at any point and when no valid answers then the user is prompted with a goodbye message and the process exits.
- The prototype then put on standby mode again and waits for motion.
Here is the structure and example of the registered annotation:
- A: timestamp - yyyymmdd-hh:mm:ss format
- B: number of participation answer attempts - max: 3
- C: participation answer - Yes/No
- D: list of participation answer attempts - length: 3 - False/True
- E: selected song file - sound1-10
- F: positions of the played fragment in percentage - 0.25/0.50/0.75
- G: type of instrument to be annotated - trumpet/violin/piano
- H: number of instrument answer attempts - max: 3
- I: instrument answer - Yes/No
- J: list of instrument answer attempts - length: 3 - False/True
- K: length of the annotation - in seconds
Example:
A                       B       C       D       E       F       G       H       I       J       K
20170517-11:53:47	1	YES	T	sound9	0.25	trumpet	2	YES	FT	38.0137310028
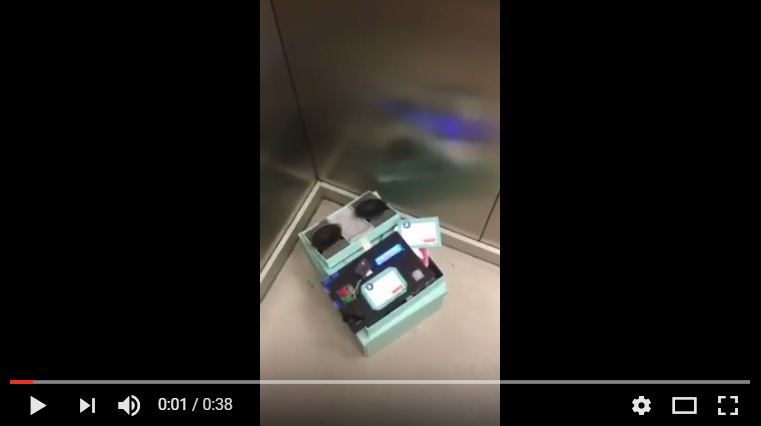
A video for demo purposes of how the setup looked like for the experiment can be seen on Youtube through the embedded link below:
This project is a written and developed by Anggarda Prameswari as a master student in Information Science of Vrije University Amsterdam with the help and guidance of both supervisors:
- Victor de Boer from Vrije University Amsterdam
- Themistoklis Karavellas from Netherlands Institute for Sound and Vision
- Victor de Boer and Themistoklis Karavellas
- Vrije University Amsterdam
- Netherlands Institute for Sound and Vision
- Europeana
- Maarten Brinkerink
- PiAUISuite's Github Repository
- Adafruit's learning hub.
This project is under the GNU General Public License v3.0 - see the LICENSE.md file for more details.


