-
Notifications
You must be signed in to change notification settings - Fork 3
Development environment
Instructions how to set up your development environment to develop and compile the firmware to your bGeigieCast!
The repository has been set up so it works with the Arduino IDE, as well as the PlatformIO IDE.
Clone the git repository, use the development branch for further development.
PlatformIO is an open-source ecosystem for IoT development. Cross- platform IDE and unified debugger. Remote unit testing and firmware updates
There are two ways to install PlatformIO: together with an IDE or through the command line.
For users that are less familiar with the command line or work on a Windows device, PlatformIO build their IDE on top of GitHub's Atom and Microsoft's Visual Studio Code – both free, open-source, and MIT licensed editors.
Download from the PlatformIO IDE Download Page
note: the PlatformIO IDEs also installs platformio command-line tools
For those that prefer to work in the command line, you can install PlatformIO with python through the package manager pip.
- Requires python and pip installed
Open your terminal and execute the following command:
pip install platformio
The PlatformIO IDE has all commands builtin as easy to use features, but even with the IDE you can use the commandline to execute any command
For development it is also possible to use the Arduino IDE. The code base is structured that it works with both Arduino IDE and PlatoformIO.
Install the Arduino IDE (If you already have it, you can skip this step)
- Download the latest version of the Arduino IDE from their website.
- Follow the install instructions from the download
- Windows: Run the installer
- Linux: Unzip the archive and run
sudo ./install.shfrom the directory
Add the ESP32 boards to the Board Manager
- Open the Arduino IDE and go to "File > Preferences"
- In the input field
Additional Board Manager URLs:enter the following URL and press OKhttps://dl.espressif.com/dl/package_esp32_index.json
- Go to "Tool > Boards > Boards Manager"
- In the search input, type "esp32" and
ESP32 by Espressif Systemsshould show up. Press install
After installing, ESP32 Dev Module should show up in the Boards menu. Select that one for
bGeigieCast development.
To compile the firmware, go to "Tools > Partition table" and select Minimal SPIFFS
To open the project in Arduino IDE, select "File > Open" and open the bgeigiecast.ino from the pulled repo.
Easiest is to use M5burner program. See link and use "cast" instead of "zen" and use "M5stamp S3" instead of "Core" to get the right firmware.
To upload new firmware, you can either use Over-The-Air updates (see user manual) or use an XBee adapter board.
To upload the firmware Over The Air, the hardware requires an existing version of the bGeigieCast to access the upload and update page.
To upload new firmware, see the user manual (update firmware).
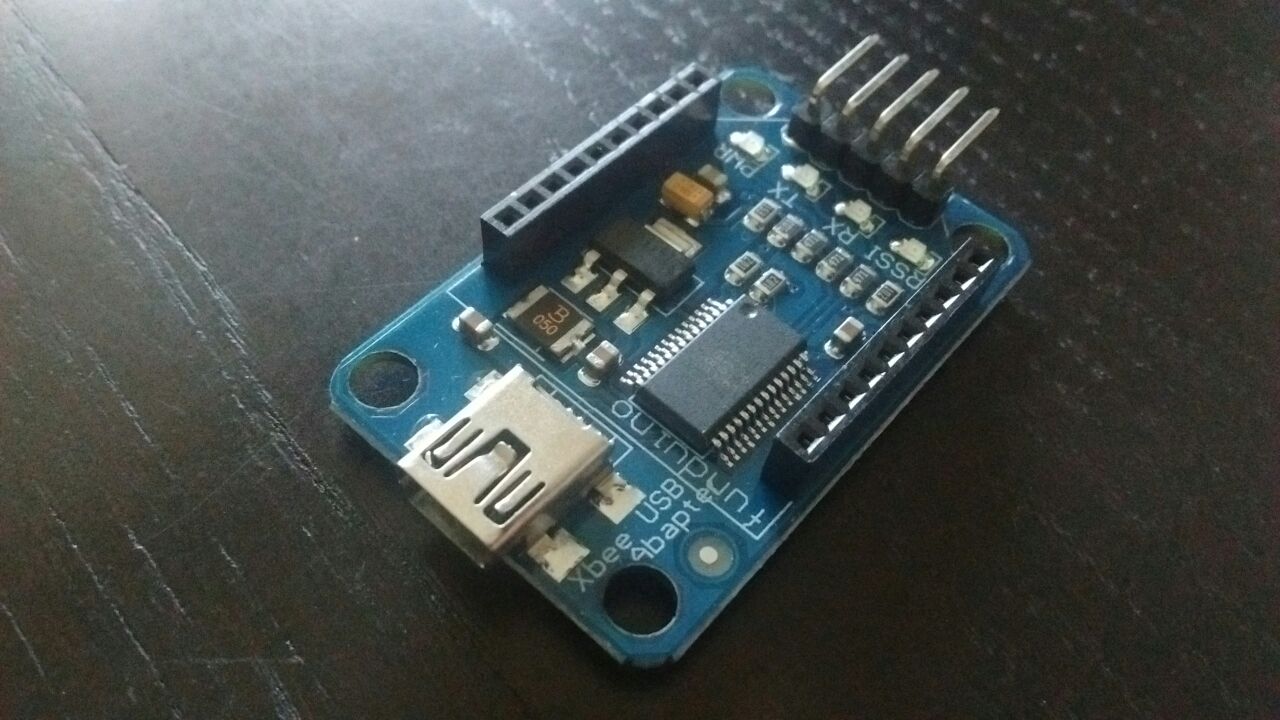
Uploading new firmware can also be done using an XBee adapter like the one in the image below. This will allow you to connect the bGeigieCast to your pc through USB and upload new firmware with Arduino or PlatformIO

(Image: XBee FTDI adapter board)
Using the PlatformIO IDE you can run the "upload" command.
Using command-line interface:
pio run --target upload --environment bGeigieCast
Press the upload button in the Arduino IDE
Install VSCodium Download or install VSCode Download
Add PlatformIO extension URL
- Add a new project to the VSCode or VSCodium.
- Get the code from Git and add the folder where you extracted the files to the workspace by right-clicking into the explorer sidebar.
- Save the workspace.
Use Icons of PlatFormIO or the PlatFormIO CLI commands to test/upload the firmware.