-
Notifications
You must be signed in to change notification settings - Fork 10
Getting Started
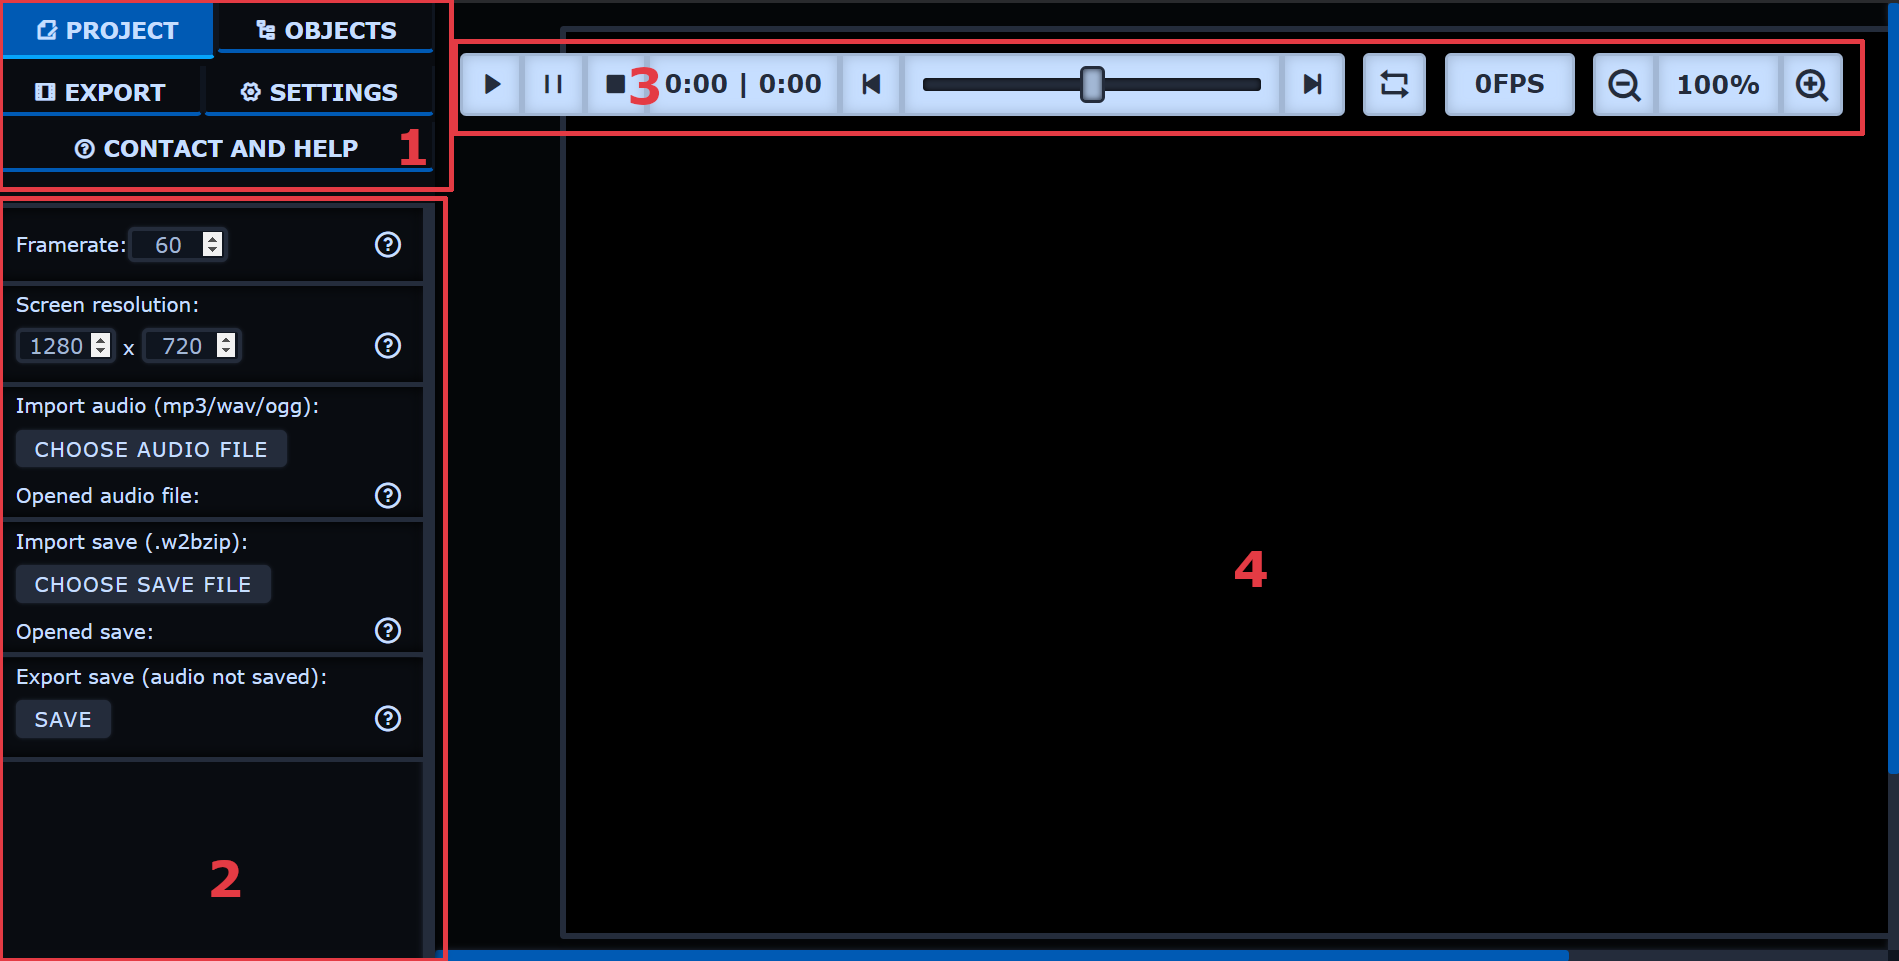
When you open Wav2Bar, this is what you see:

You can navigate through the tabs by clicking on its labels.
- The project tab is where you manage project settings such as the frame rate, resolution, audio track, etc.
- The objects tab is where you add content to the project.
- The export tab is were you export the project into a video file.
- The settings tab is where you manage the app settings. Don't forget to add FFmpeg and FFprobe paths in this section, or video export won't work!
- The contact and help tab gives additional information on the project.
The control panel is where most of the interactions happens. It displays the content of the selected tab.
The top section is where you can play and stop the preview (given that you imported an audio file), control the zoom, enable looping, etc.
The black container represents the frame of the video. Your objects appear here as they will be rendered in the video.
Note: There may be small differences between the preview and the rendered video in terms of visualizer and particles animation due to the preview frame rate.
Objects represents the content of your project. To create an object, go to the objects tab, give a name to your object, choose what kind of object you want, and finally create it. This is the list of currently available objects:
A background object always cover the entire frame. You usually want it to have the lowest layer number to be behind everything. It can be a color, a gradient, or an image.
An image object is a rectangular container. It is similar to the background object but comes with additional controls. You can give it a background color, a gradient background or an image background. You can also shape the corners. That means you can also make rectangles or ellipses using this object!
A particle flow object is a container in which particles move in a determined way. Their speed depends of the volume, so the louder the audio is, the faster the particles move.
A text object is simply a text container. You can choose between displaying casual text or showing elapsed time on the audio track.
Timer objects display elapsed time in a visual way. You can get all kind of results by playing with the settings of this object.
Finally and most importantly, the visualizer objects lets you display the audio spectrum in various ways. The displayed size depends of the width and height of its container, as well as the radius for circular visualizers.
You can get in-app help on every setting by hovering the circled question marks. The help will then be displayed in a small floating container!
Don't hesitate to experiment with the available options on each and every object, you can sometimes come with interesting results! Have fun!