-
Notifications
You must be signed in to change notification settings - Fork 1
Managing Collations
- The Global Idea
- The VCEditor Collation Workspace
- Making a Selection
- Adding and Deleting Quires and Subquires
- Adding and Deleting Leaves
- Conjoins
- Generating Folio or Page Numbers
- Editing Attributes
- Sewing and Tacketing
- Tabulating Leaf Attributes
- Filtering
VCEditor models the collation structure of a manuscript by decomposing it into the following entities:
- Group: Any ordered set of leaves and/or subgroups bound in a cohesive unit. This can represent quires, chapters, sections, etc.
- Leaf: One single sheet of writing material extending outwards from the bound spine, with a recto side (upper) and a verso side (lower). Note that the VisColl Data Model treats a bifolium as two leaves associated with each other via a special "conjoined to" relationship.
- Side: One side of a leaf. Can be recto (upper) or verso (lower).
- Term: A reusable tag with a title and description that can be applied to any number of groups, leaves and/or sides. Terms are organized into taxonomies. Taxonomies and terms can be configured in the TAXONOMIES tag on the left.
Once a collation is built, VCEditor can export it in several formats: JSON, VisColl XML, a full diagram in PNG, SVG (individual files for each quire), a text file with collation formulas [although this isn't working at the moment], or HTML for presenting on a website.
The VCEditor collation workspace features three visualization modes.
This mode allows you to build your collation on a visual map.
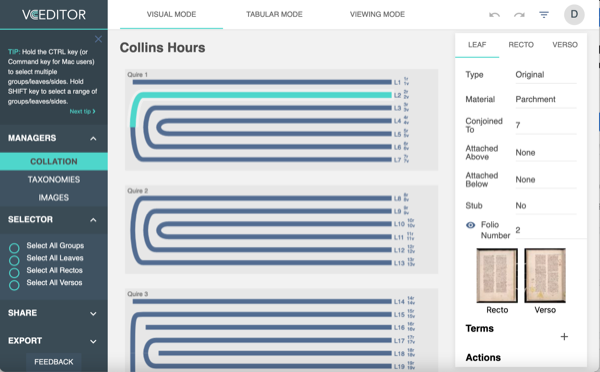
- The interactive visual map.
- An active selected leaf or side of the leaf.
- Editable properties of the selected leaf or side of the leaf.
- Actions applicable to the leaf or side of the leaf (adding groups/leaves next to the leaf, delete the leaf)
This mode allows you to build your collation on an item-by-item basis.
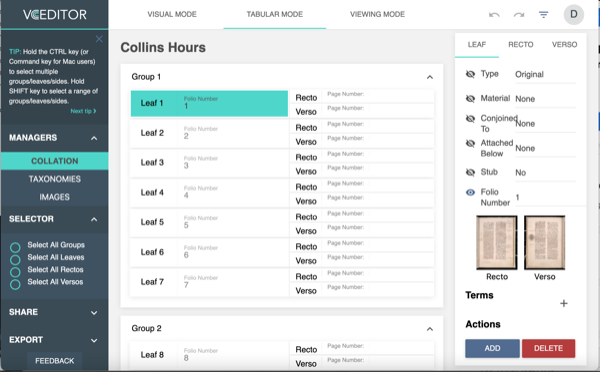
- The interactive visual map.
- An active selected leaf.
- Editable properties of the selected leaf.
- Actions applicable to the leaf (adding groups/leaves next to the leaf, delete the leaf)
This mode is a read-only preview of the resulting collation.
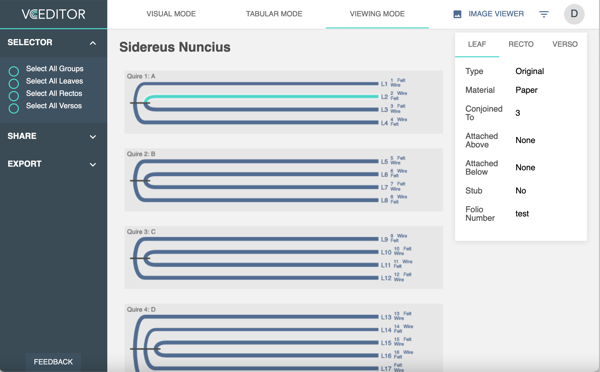
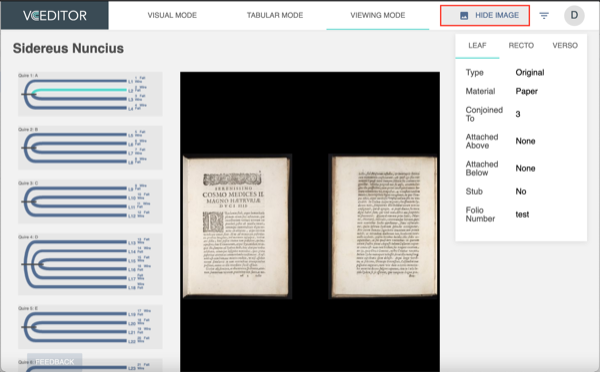
You can toggle the image viewer to view the recto and verso sides of a selected leaf simultaneously.
To select a group or leaf, simply click on it. Clicking again deselects it.
To select multiple groups or leaves (type cannot be mixed), you can do one of the following:
- By holding down Shift while clicking on two groups/leaves that are not consecutive. This will select all groups/leaves in the range, including the ones that are selected.
- By holding down Ctrl while clicking on multiple groups/leaves/sides, which may or may not be consecutive. This will select all the groups/leaves/sides you clicked on.
- By selecting an option under "Selector" in the side menu. This will select all entities in the project specified by the option you chose.
To add a new quire to an empty project, select "Add New Group" in Visual or Tabular Mode.

To add a new quire to an existing project, select a quire and click "Add", then specify whether you would like to add a new quire above or below the selected quire.
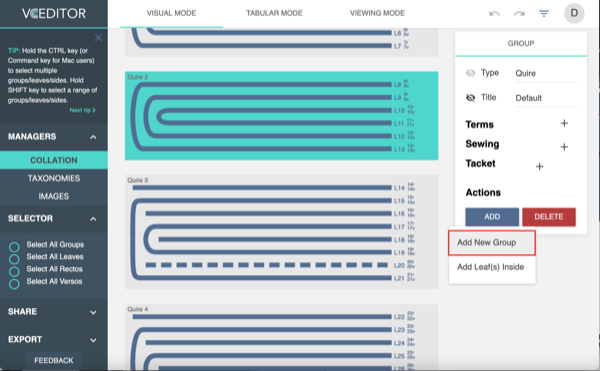
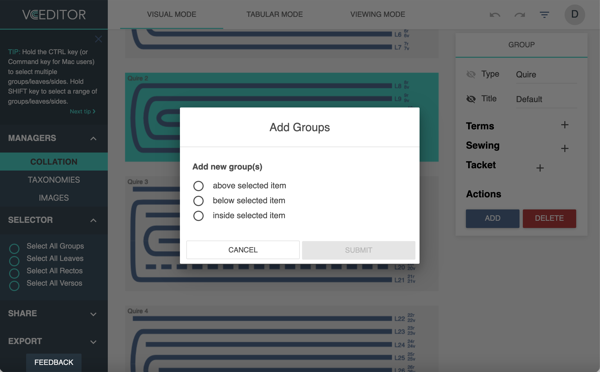
In either case, you can specify how many quires to insert, and optionally how many leaves are in each and whether they are conjoined. Finish by selecting "Submit".
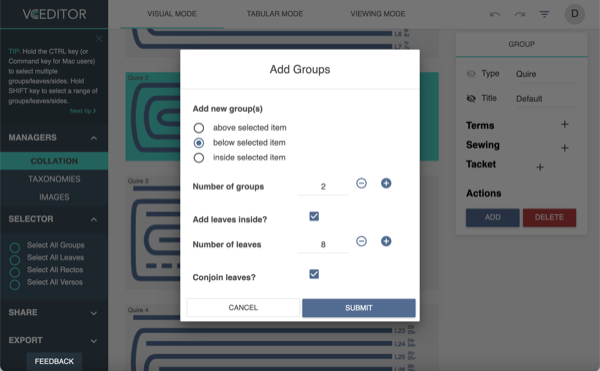
To add a subquire (that is, a quire nested inside another quire), select the parent quire and click "Add", then specify you would like to add a new quire inside the selected quire.
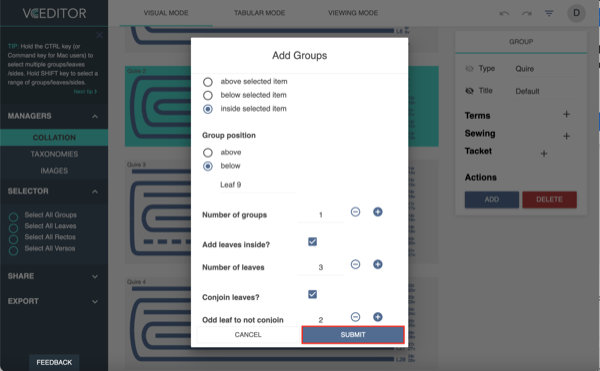
Specify how many leaves are in the quire and whether it is conjoined. Finish by selecting "Submit".
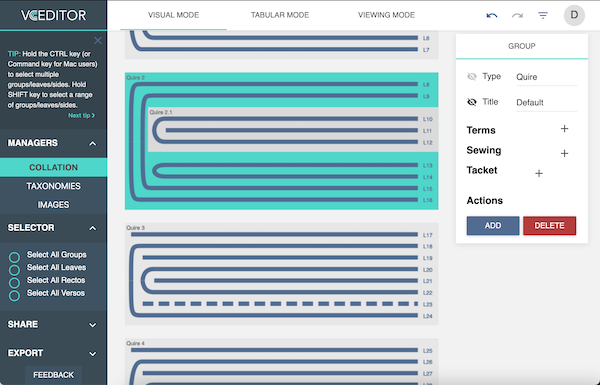
To delete a quire or a subquire, select it and click "Delete".
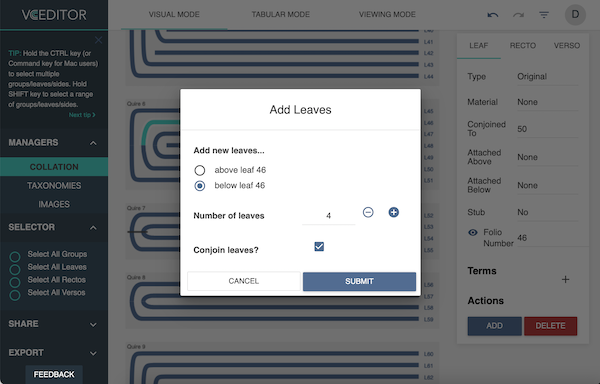
To add leaves inside a quire, select a leaf in Visual or Tabular Mode, then select "Add".
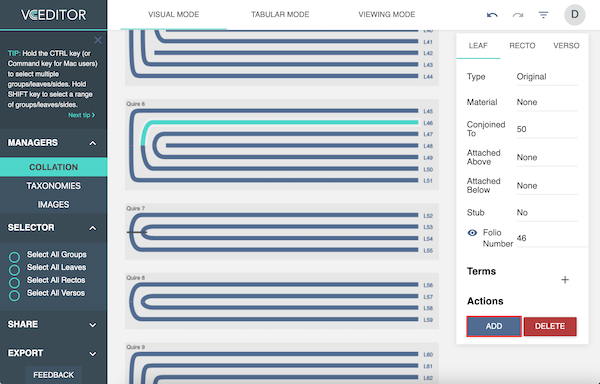
Specify whether to add the new leaves above or below the selected leaf, then indicate the number of leaves to insert and whether they are conjoined, then select "Submit".
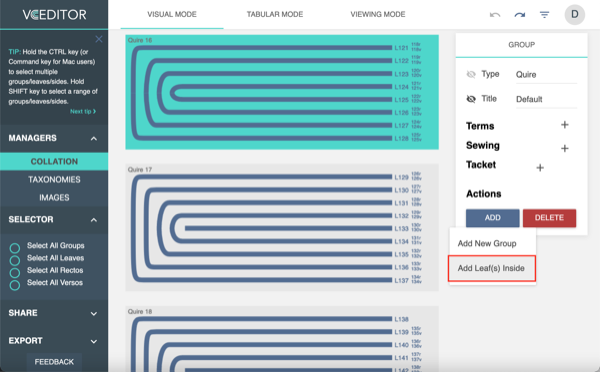
To add new leaves at the front of a quire, select a quire in Visual or Tabular Mode, then select "Add" > "Add Leaf(s) Inside".
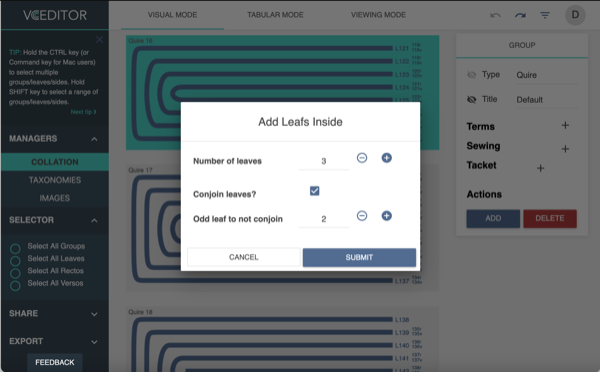
Specify the number of leaves to insert and whether they are conjoined, then select "Submit".
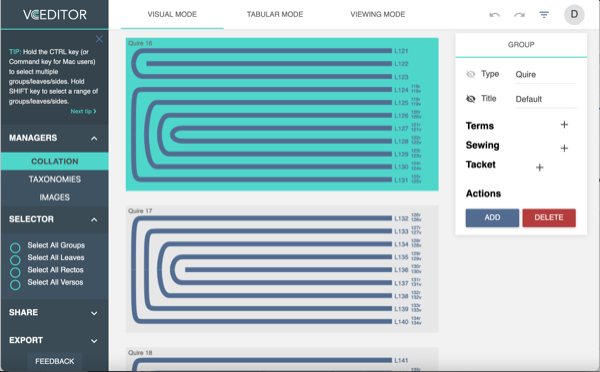
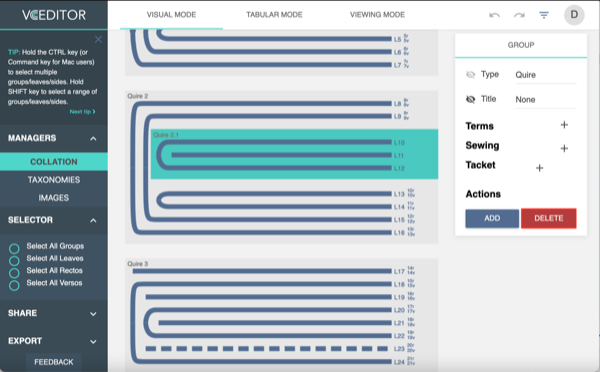
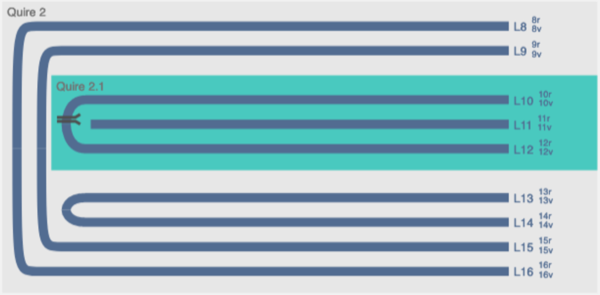
When you use the "Add Leaf(s) Inside" function, leaves are always added at the top of a quire and are part of the main quire. Groups of leaves added inside a quire are also considered to be part of that quire. Subquires are distinct and have their own number (i.e., the first subquire in quire 2 will be numbered 2.1) and can be selected separately from the parent quire.
If you want to add leaves and then incorporate them into the quire, you will have to redo the conjoins (see the next section).
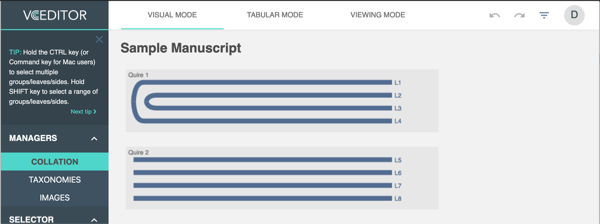
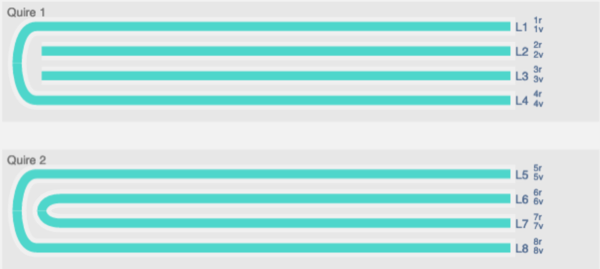
Conjoins describe the contiguous attachment of pages within a quire. By default, conjoined leaves form a series of nested "U" shapes when viewed from the side. In the example below, Quire 1 contains 4 conjoined leaves and Quire 2 contains 4 unconjoined leaves.
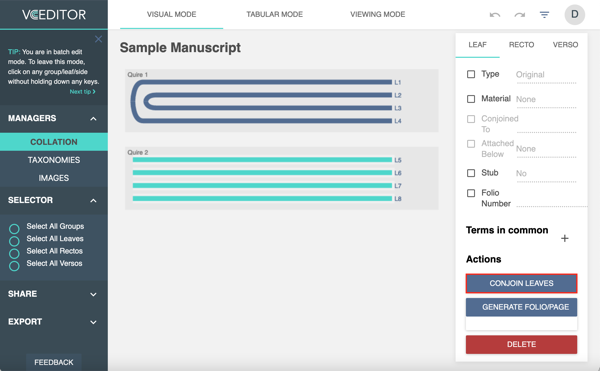
To conjoin a series of unconjoined leaves, select them in Visual or Tabular Mode, then click "Conjoin Selected Leaves". Note that if there is an odd number of selected leaves, the middle leaf will be left unconjoined. You can also recalculate collation in a quire if you have added unconjoined leaves. Select all of the leaves in the quire (not the quire, but the leaves) and then click "Conjoin Leaves." It will recollate the whole quire. If there is an odd leaf it will be placed in the middle of the quire..

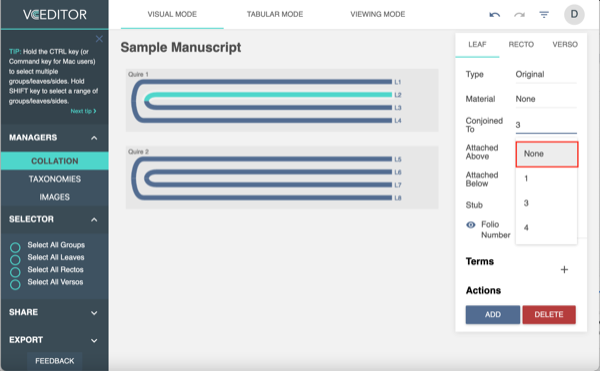
To remove a leaf from a conjoin, select it in Visual or Tabular mode, then set its "Conjoined To" attribute back to None. Note that this will also release the other attached leaf from the conjoin.

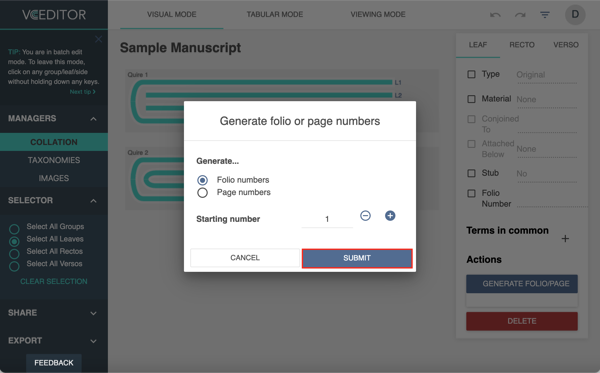
To generate folio or page numbers, select multiple leaves, then select the "Generate Folio/Page Numbers" button.
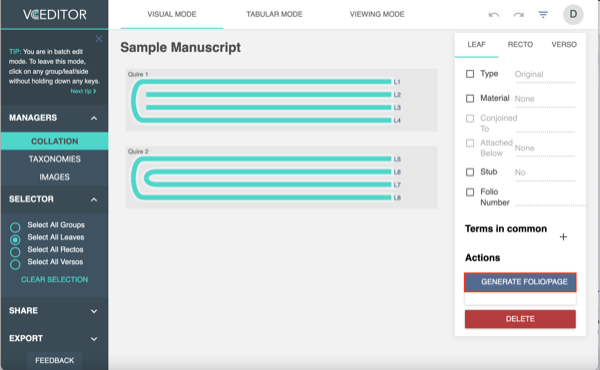
Select "Folio numbers" or "Page numbers", then specify the value that you want to start the folio/page numbers with and then select "Submit".
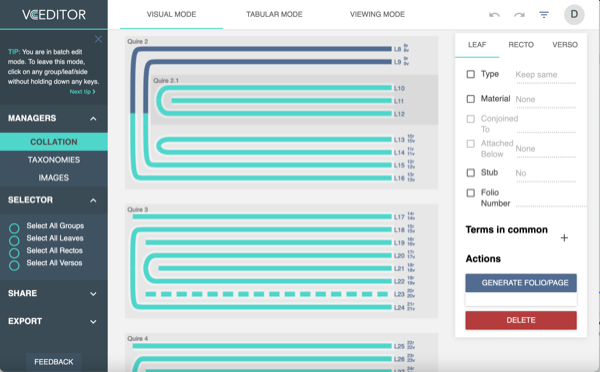
You can also renumber leaves, for example if you have added leaves or subquires. The process is the same: select all the leaves you want to renumber (you can renumber the entire manuscript, or only start with the unnumbered leaves and renumber to the end), then select the "Generate Folio/Page Numbers" button.
Select "Folio numbers" or "Page numbers", then specify the value that you want to start the folio/page numbers with and then select "Submit".
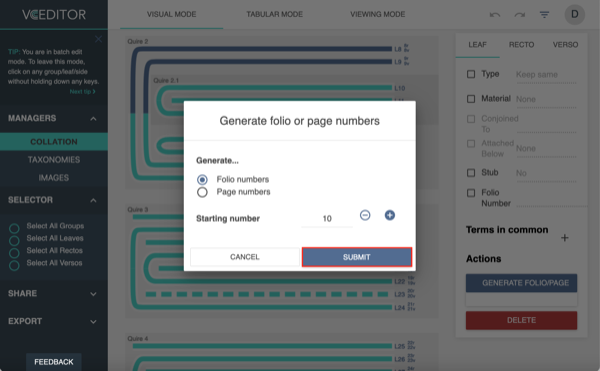
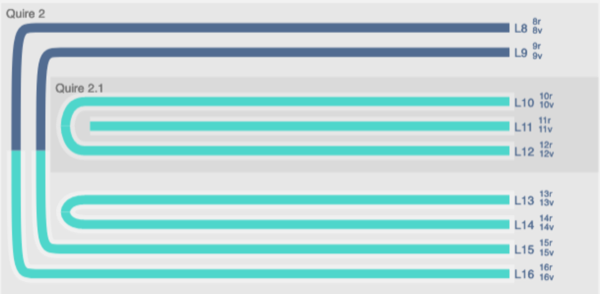
You can also edit individual folio or page numbers as attributes, see the next section.
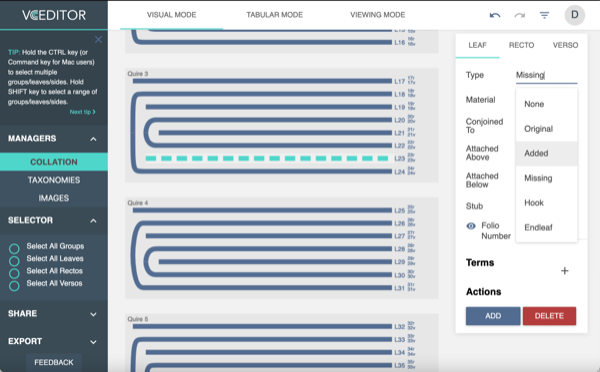
To edit attributes, select a group, leaf or side, then simply select new values for attributes on the attributes you wish to change. Your changes will be saved automatically.
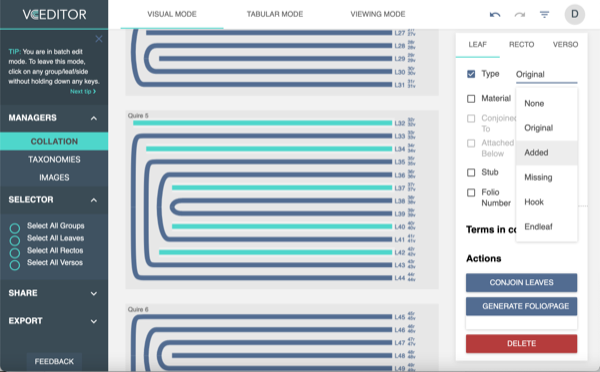
To edit attributes in bulk, select two or more groups, leaves or sides (type cannot be mixed). Tick the checkboxes beside the attribute(s) that you wish to change, then select a new value for each. Click "Submit Changes" to finish.
Sewing and tacketing are special attributes applied to conjoined leaves within a group. You can apply these using Visual Mode or Tabular Mode.
Select a quire or subquire (you have to select the entire quire to do it, not leaves), then click the + button for sewing or tacketing.
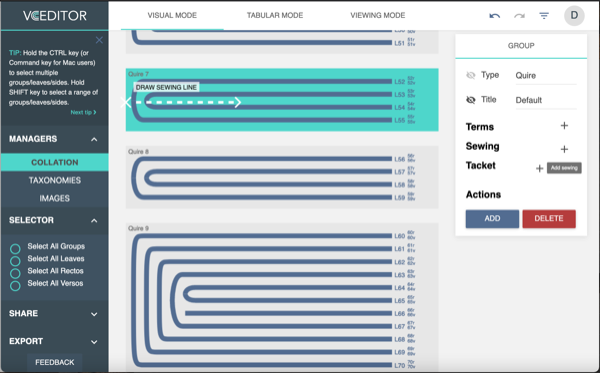
Drag a line across the conjoins to sew or tacket.
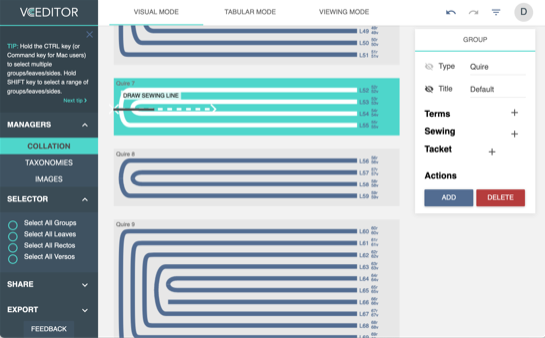
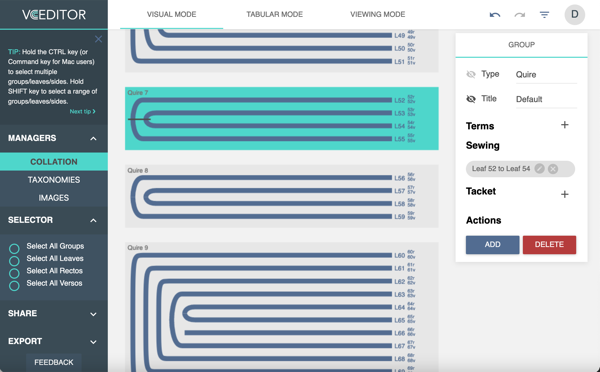
You can draw the sewing line anywhere on a quire, and the line need not pass through all of the bifolia.
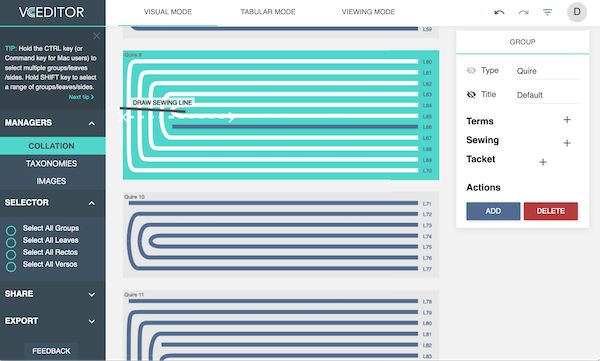
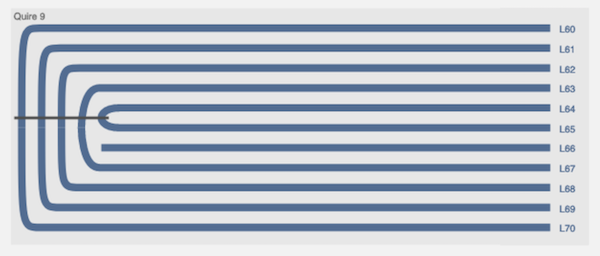
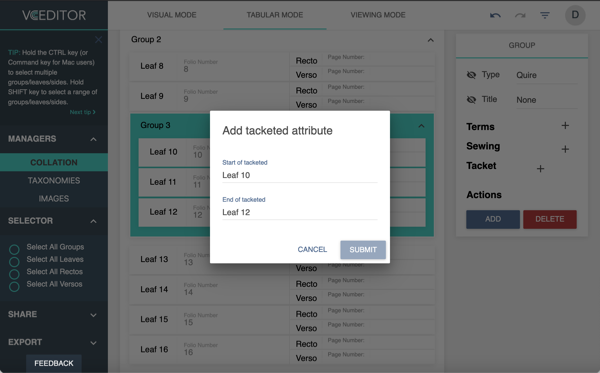
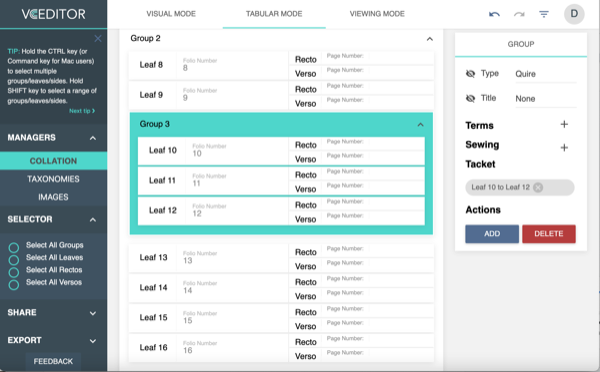
Select a group of conjoined leaves, then click the + button for sewing or tacketing.
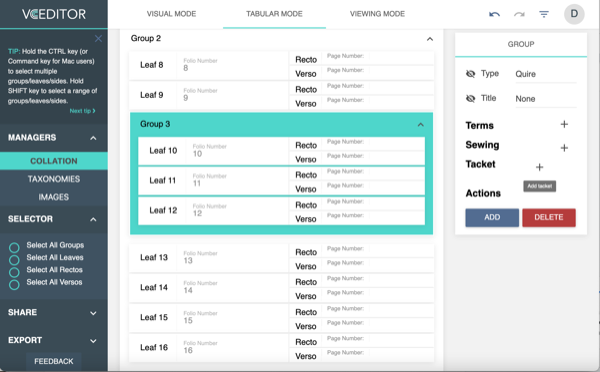
Specify the starting and ending leaves, then click "Submit".
In Tabular Mode, you can view leaf properties in table form. Select any leaf, then click on the eye icon next to an attribute to toggle it. Its value across all leaves will be shown as a column in the table.
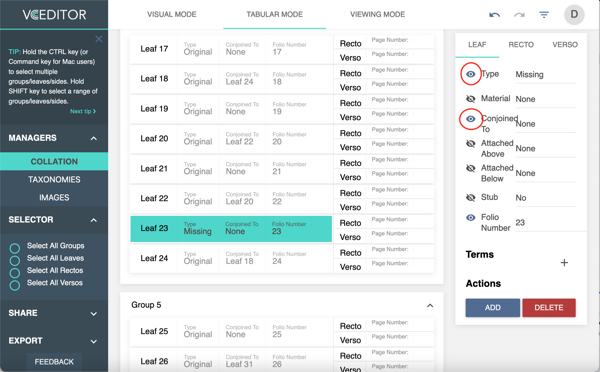
To hide the attribute column again, click on the eye icon again.
Please note that as of November 23, 2021, the Filtering system may not work as expected. Specifically, the Term filtering, once engaged, filters the terms themselves, not the quires, leaves, or sides that the terms are attached to. So a search for Term = illustration and Term = Section Two, rather than filtering in all leaves from Section Two that have illustrations on them, will instead filter nothing. We are aware of this issue and we will be working on it. In the meantime, please be aware of the issue.
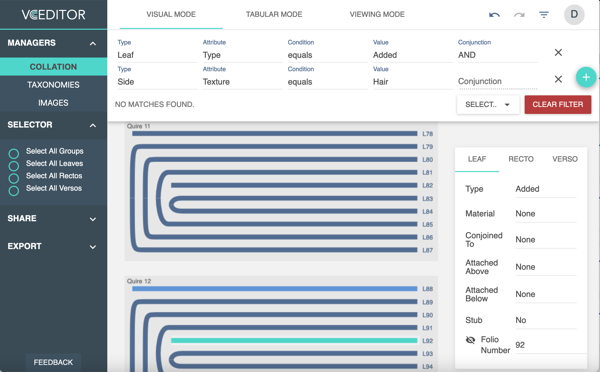
In all three modes, you can use the attribute filter to quickly find highlight and select groups, leaves, sides and/or terms.
To toggle the attribute filter, click on the filter icon on the top bar.
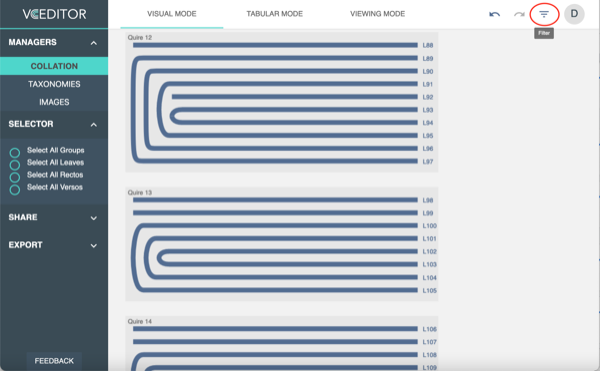
The following search form will appear:

- Type: The type of entity to find. This can be Group, Leaf, Side or Term.
- Attribute: The attribute to filter by.
- Condition: The operator to use to compare with the given value. This can be "equals", "not equals", "contains" or "not contains", depending on the attribute.
- Value: The value to search by.
- Conjunction: If you have multiple filter conditions, you can choose AND to find only entities fitting all the conditions you specified, or OR to find entities that fit any of the conditions.
As soon as you complete your first filtering condition, the view will automatically start highlighting all matches. From there, you can:
- Click + to include additional filtering conditions. You will be required to specify AND or OR to relate the new condition with existing one(s).
- Click the "Select..." dropdown to select or deselect the matched entities. This allows you to edit their attributes or delete them.
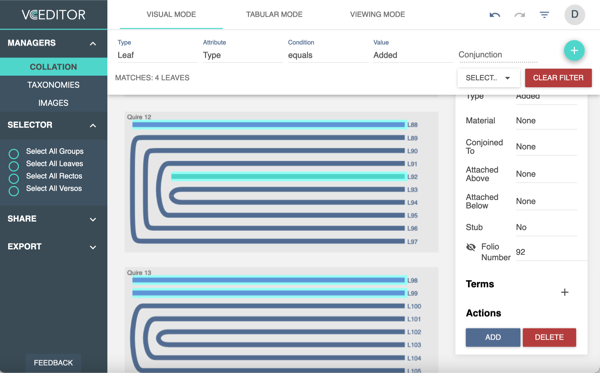
Once you are done with the filter and wish to return to a normal view, click "Clear Filter" to reset the conditions, then click on the filter icon.
